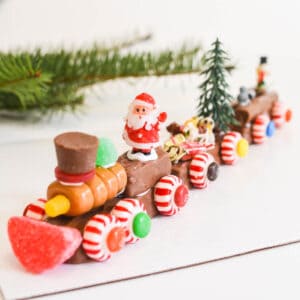
DIY Christmas Candy Train to Make This Holiday
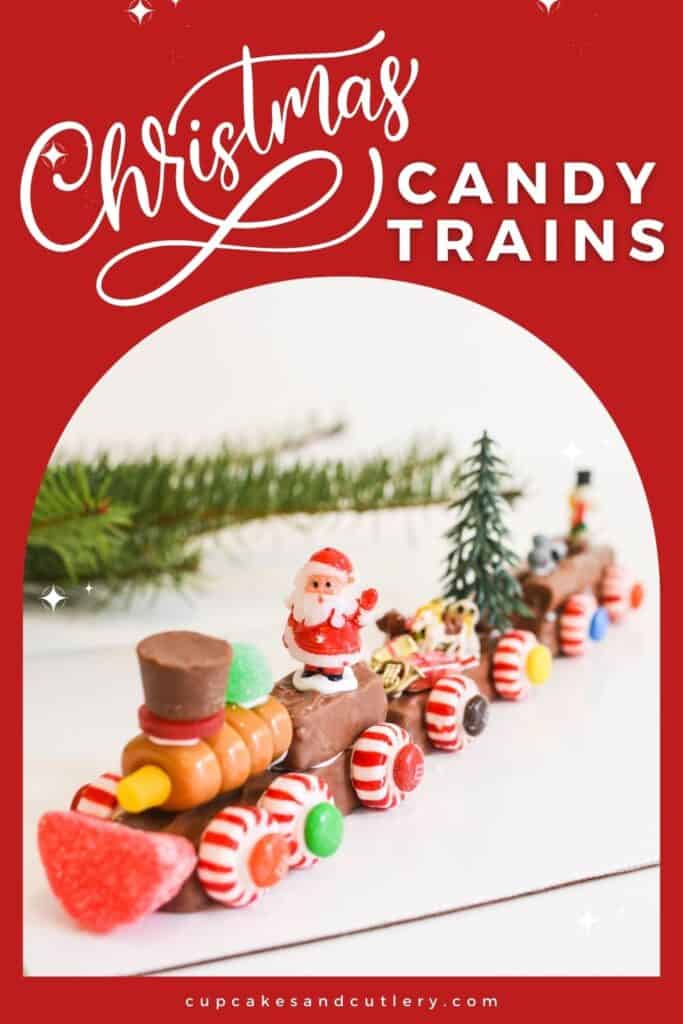
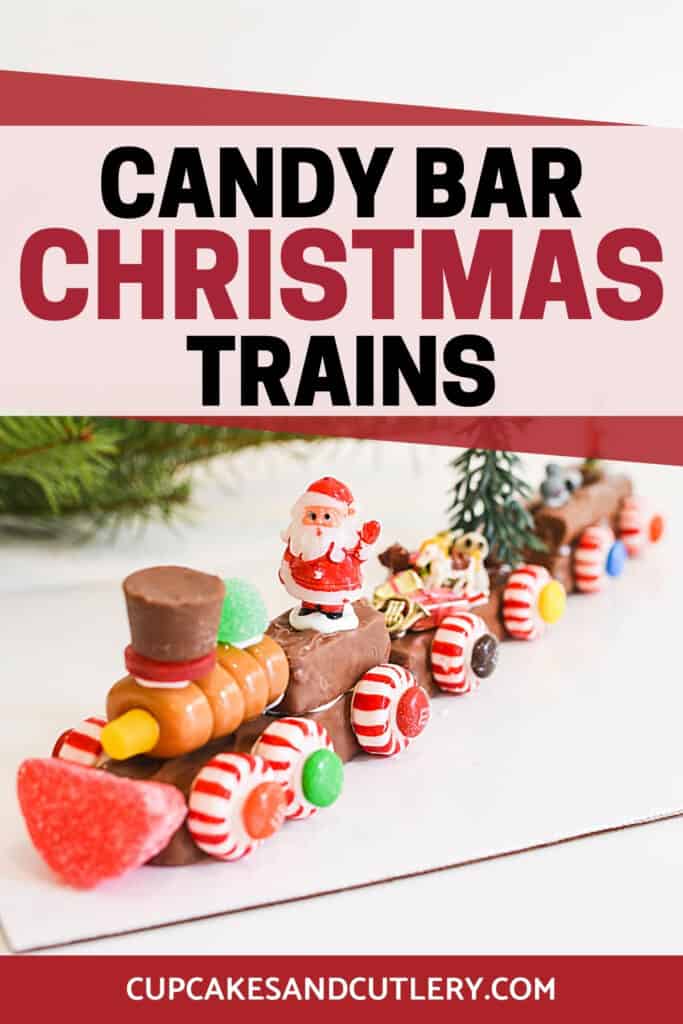
Make a Christmas Candy Train! This fun Christmas craft for kids uses candy bars, Lifesavers and other goodies to make a festive train. The finished project makes a cute holiday decoration to display all season!
These holiday candy trains can be a new tradition for your family to do together. If you’re looking for easy at home diy crafts for Christmas, this idea is totally unique! And it’s totally easier than gingerbread houses.
You’ll love this Christmas craft idea
Growing up, we made a Christmas Candy Train every year. They look super festive and are a great decoration to have at the holidays.
These candy bar trains are a great alternative to making gingerbread houses because they are way easier, especially for little hands.
Candy Bar Christmas Trains are a fun thing to do throughout the holiday season with friends and family and make for a super fun excuse to gather everyone together.
Related: DIY Holiday Photo Banner
Because you use small quantities of a variety of candies, it’s actually not super expensive to make more than one. And they aren’t very stressful. (But you might want to check out my holiday stress-management anyway).
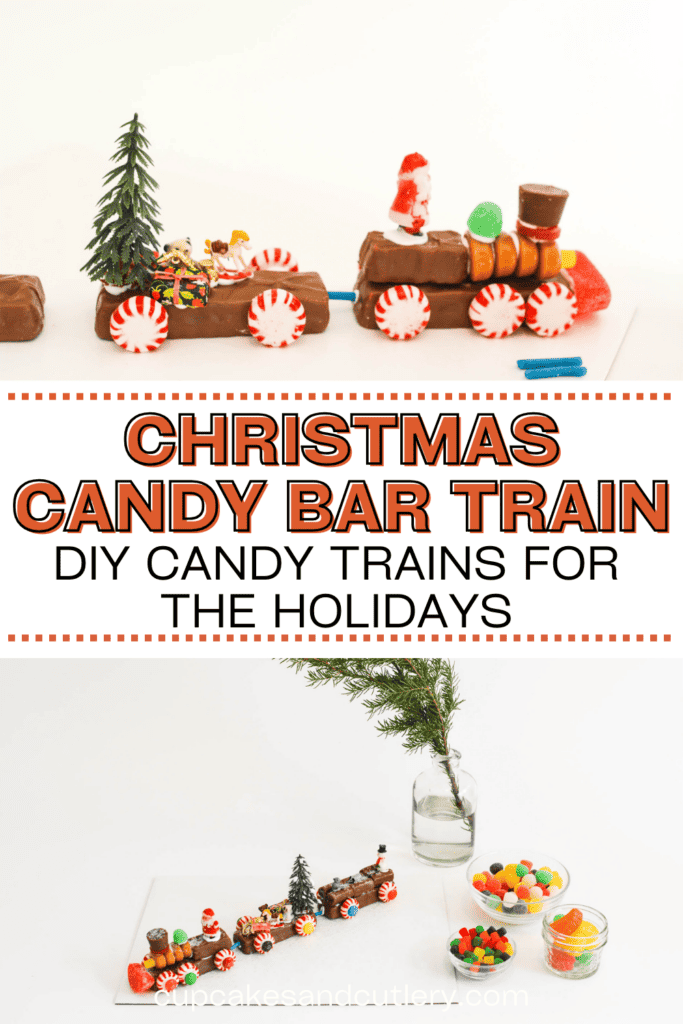
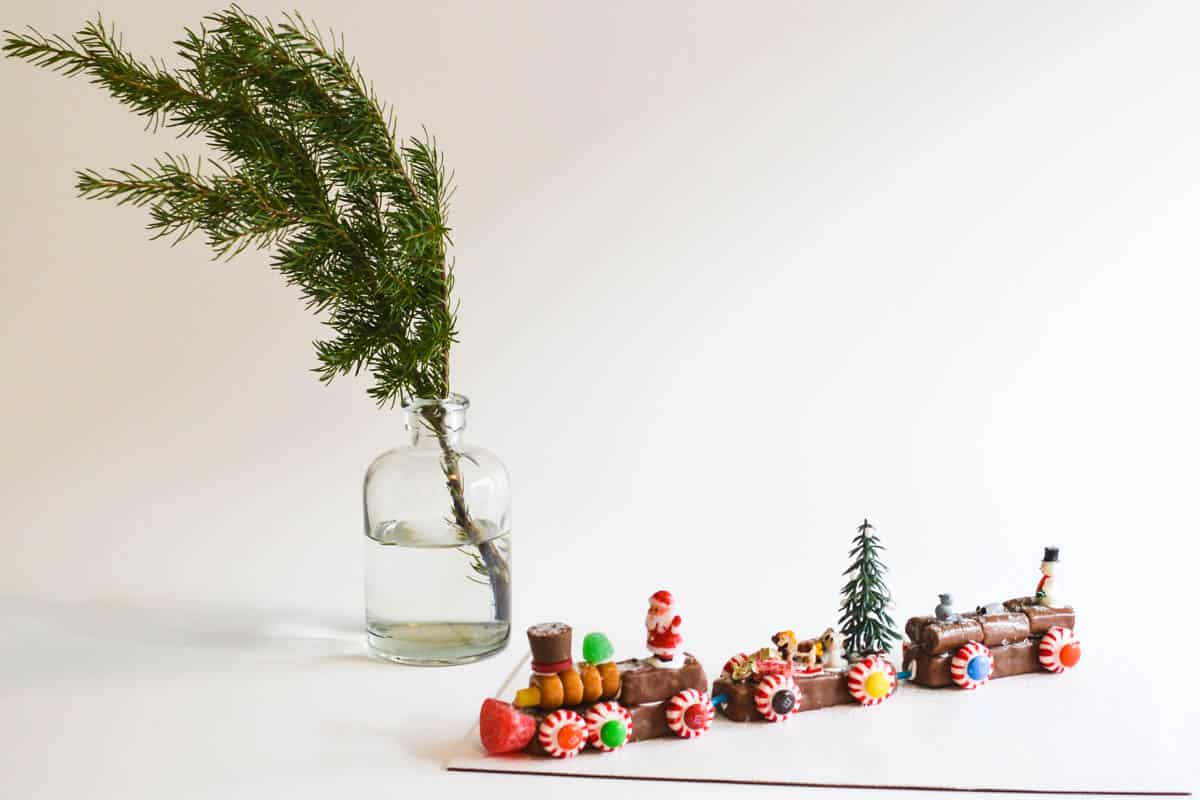
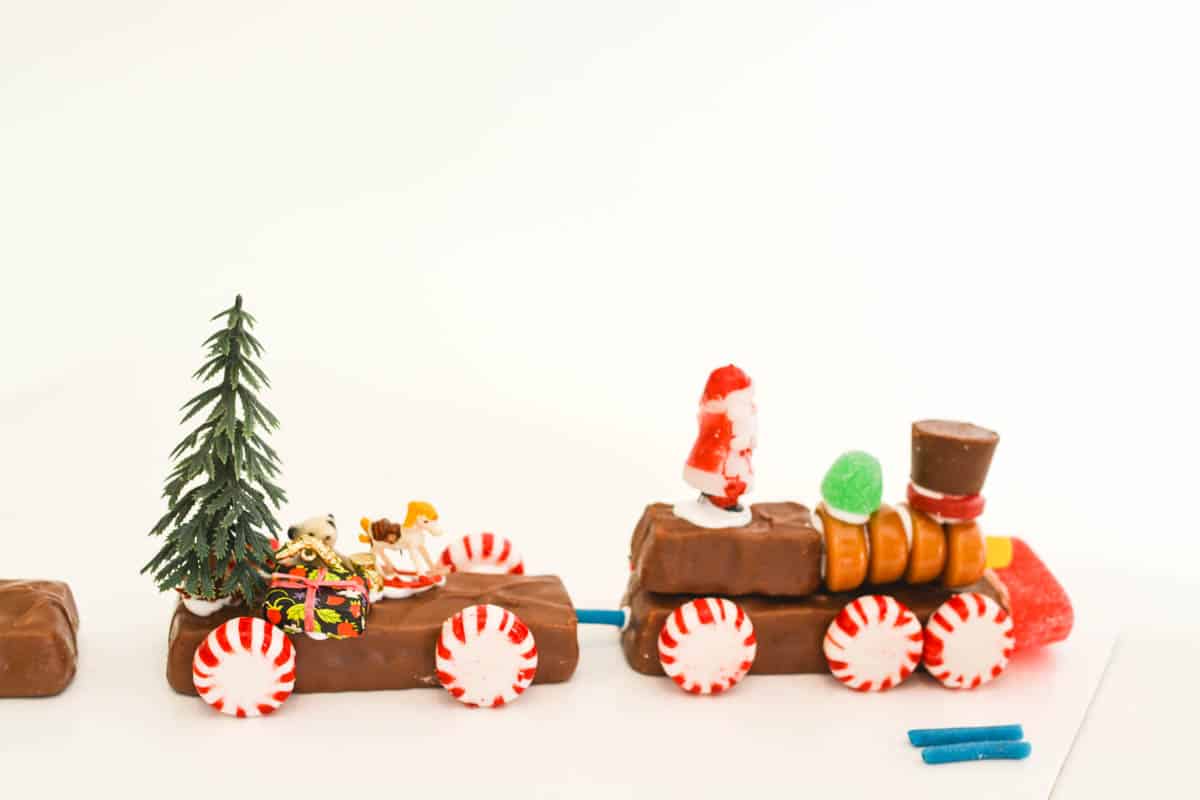
I am sharing a multi-car train but you can easily have each kid just make one car to keep things easy.
While we do a Candy Train craft during the holidays, this fun DIY can really be done any time of year!
Supplies
This list of supplies is what my mom has written in her instructions from when we made these Christmas Candy Bar Trains as kids.
While this is one of my favorite easy Christmas crafts, there are quite a few supplies including candy, cake boards, royal icing and miniatures.
Use this as an idea to get you started and get whatever you prefer or is available.
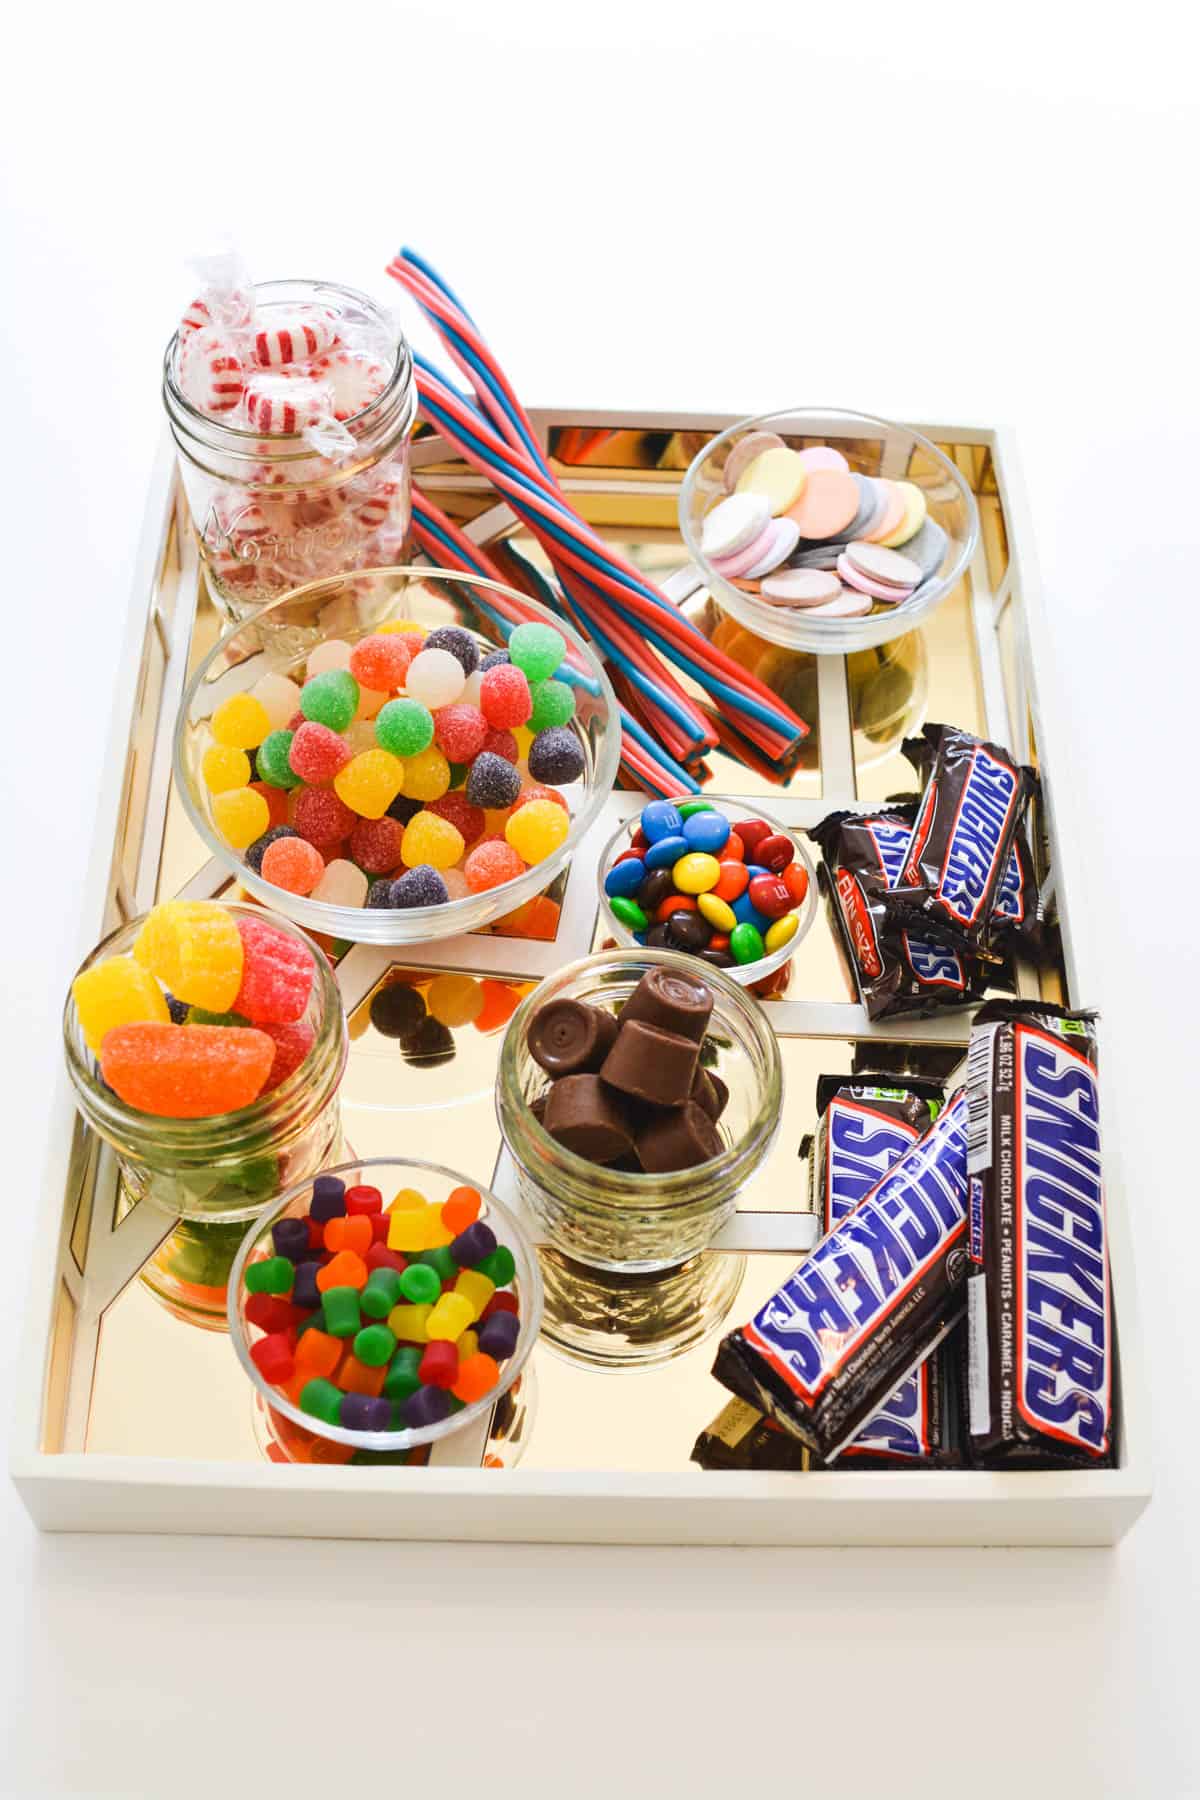
Candy
- Large Snickers bars for the train cars (so 3 full-size Snickers bars for the full train I made)
- Fun Size Snickers bar for the front car
- 14 Peppermint candies for the wheels (note: the first car has 2 extra wheels – and they probably aren’t called wheels are they…)
- 1 gummy fruit slice for the corn catcher at the front of the train
- 4 Werther’s or several Lifesavers for the front of the train car
- 1 JUJU Bee for the light on the very front of the train
- 1 Gum Drop for just behind the smokestack
- 1 Lifesaver and 1 Rolo for the smokestack on the first train car
- 14 M&M’s for decoration on the wheels
- Several Tootsie Rolls for the log car. The full size works best but you can also stack the Midgees if you can’t find the regular ones.
- White edible glitter flakes for snow
You can also use Thin licorice laces to connect the train cars. You’re supposed to use it to make train tracks but I am far too lazy for that! It does look cute though.
You would just lay long pieces just wider apart than the width of the candy train. Then cut licorice to make rungs and space them out about every inch. You can use royal icing to stick them down.
*A note about the candy. I linked to these on Amazon so you could see the exact candies I am talking about. You can find smaller bags of the items at CVS and they often have buy one get one 50% off deals.
Buying on Amazon is great if you are buying enough for a church group or big party, but CVS is great for buying supplies for making a handful of trains!
And some of the specialty items, like the licorice laces and the edible snow are only found on Amazon.
Cake Boards
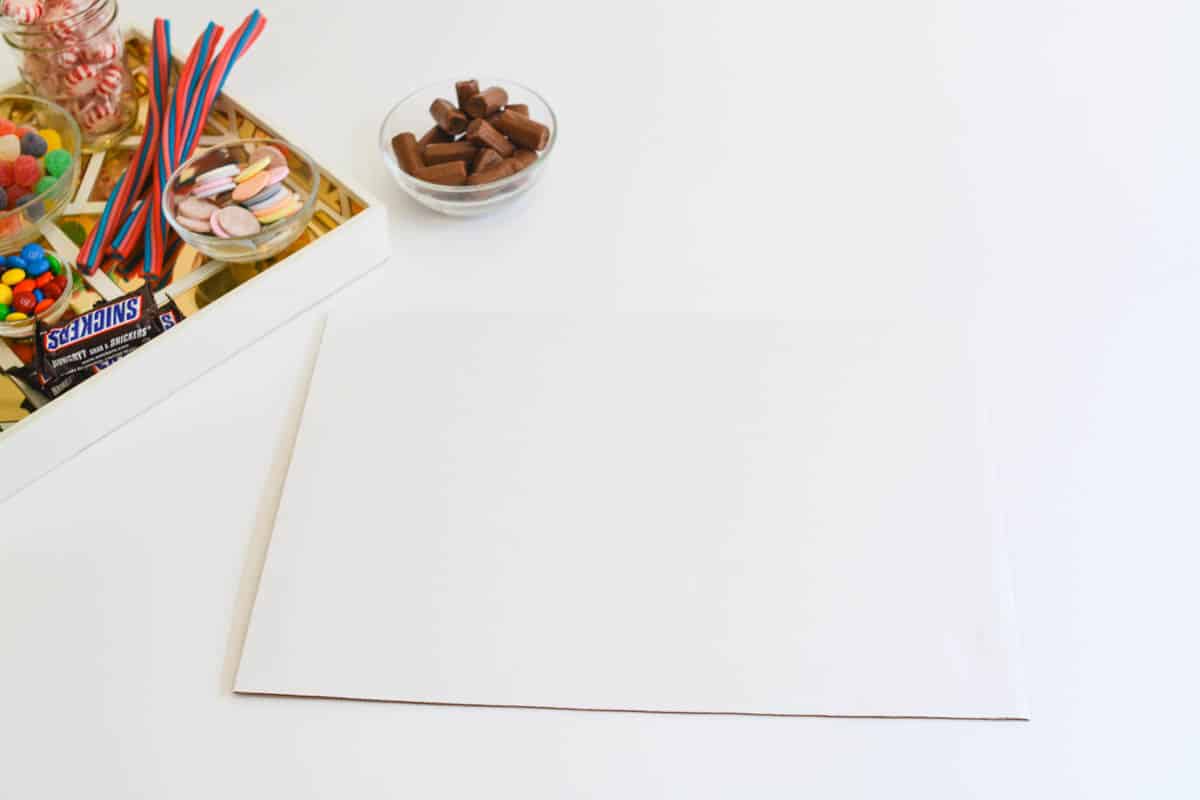
Rectangle cake boards are great because you can build the train or train car right on them. They are sturdy but they are also inexpensive and you can throw them away when done.
Tightly wrap the car and board with plastic wrap and you can send the craft home with whoever made it.
Royal Icing
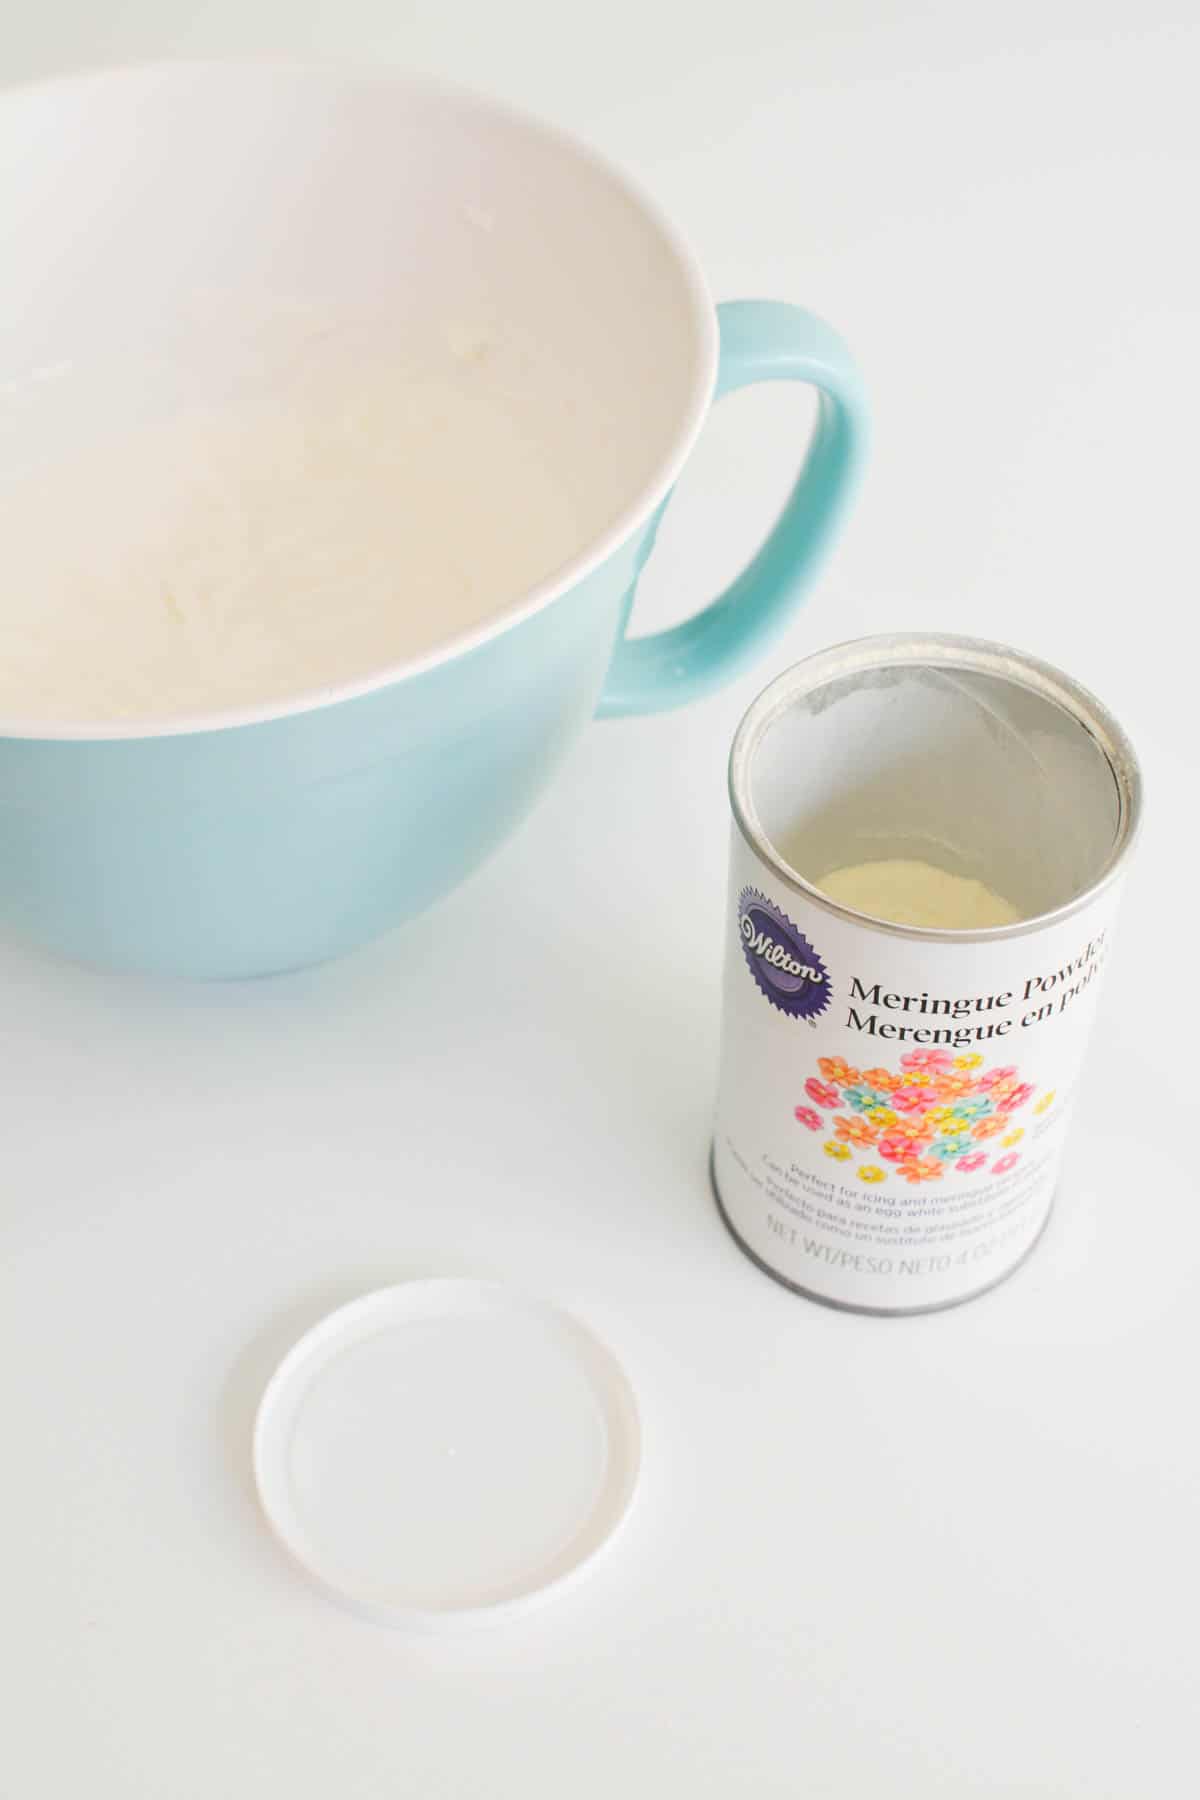
Royal Icing is used as “glue” to stick the candy together for your candy train and for that you will need:
Pastry bag and tips are really helpful for putting the icing exactly where you want it.
NOTE: If a pastry bag is too hard to manage or too overwhelming for you to use (my mom has cake decorating experience, me – not so much), you can also use small paintbrush or put it in a zip bag and cut a corner off.
And dabbing some on white icing on the plastic trees can make it look like snow.
Christmas Miniatures
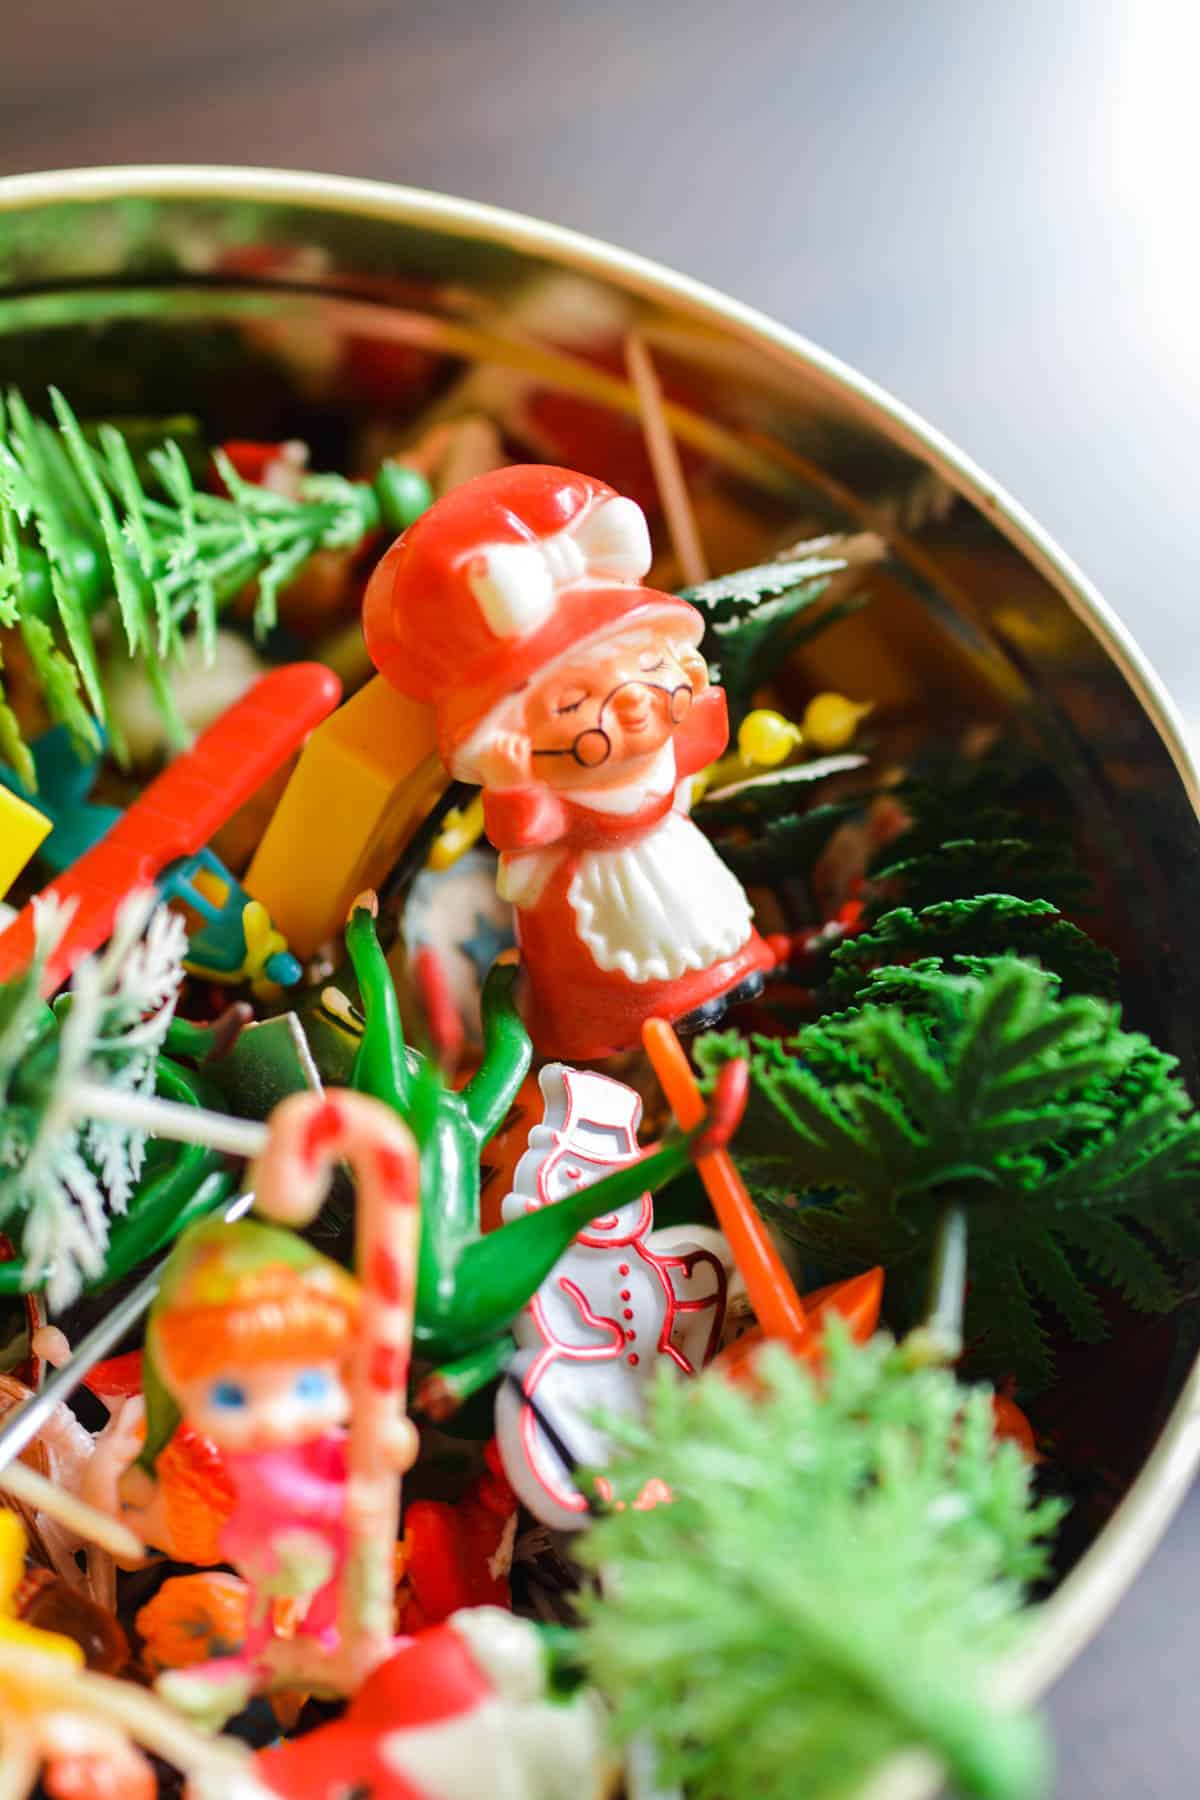
Assorted Christmas-themed plastic miniatures are the perfect way to make a candy train feel ready for Christmas. If you can find vintage ones they are SO much cuter! Check for those on Etsy or Ebay.
I have noticed that craft stores are also starting to have a better selection of miniatures.
To make a candy bar train during another time of the year, use different miniatures or leave them off all together.
How to make a Candy Train
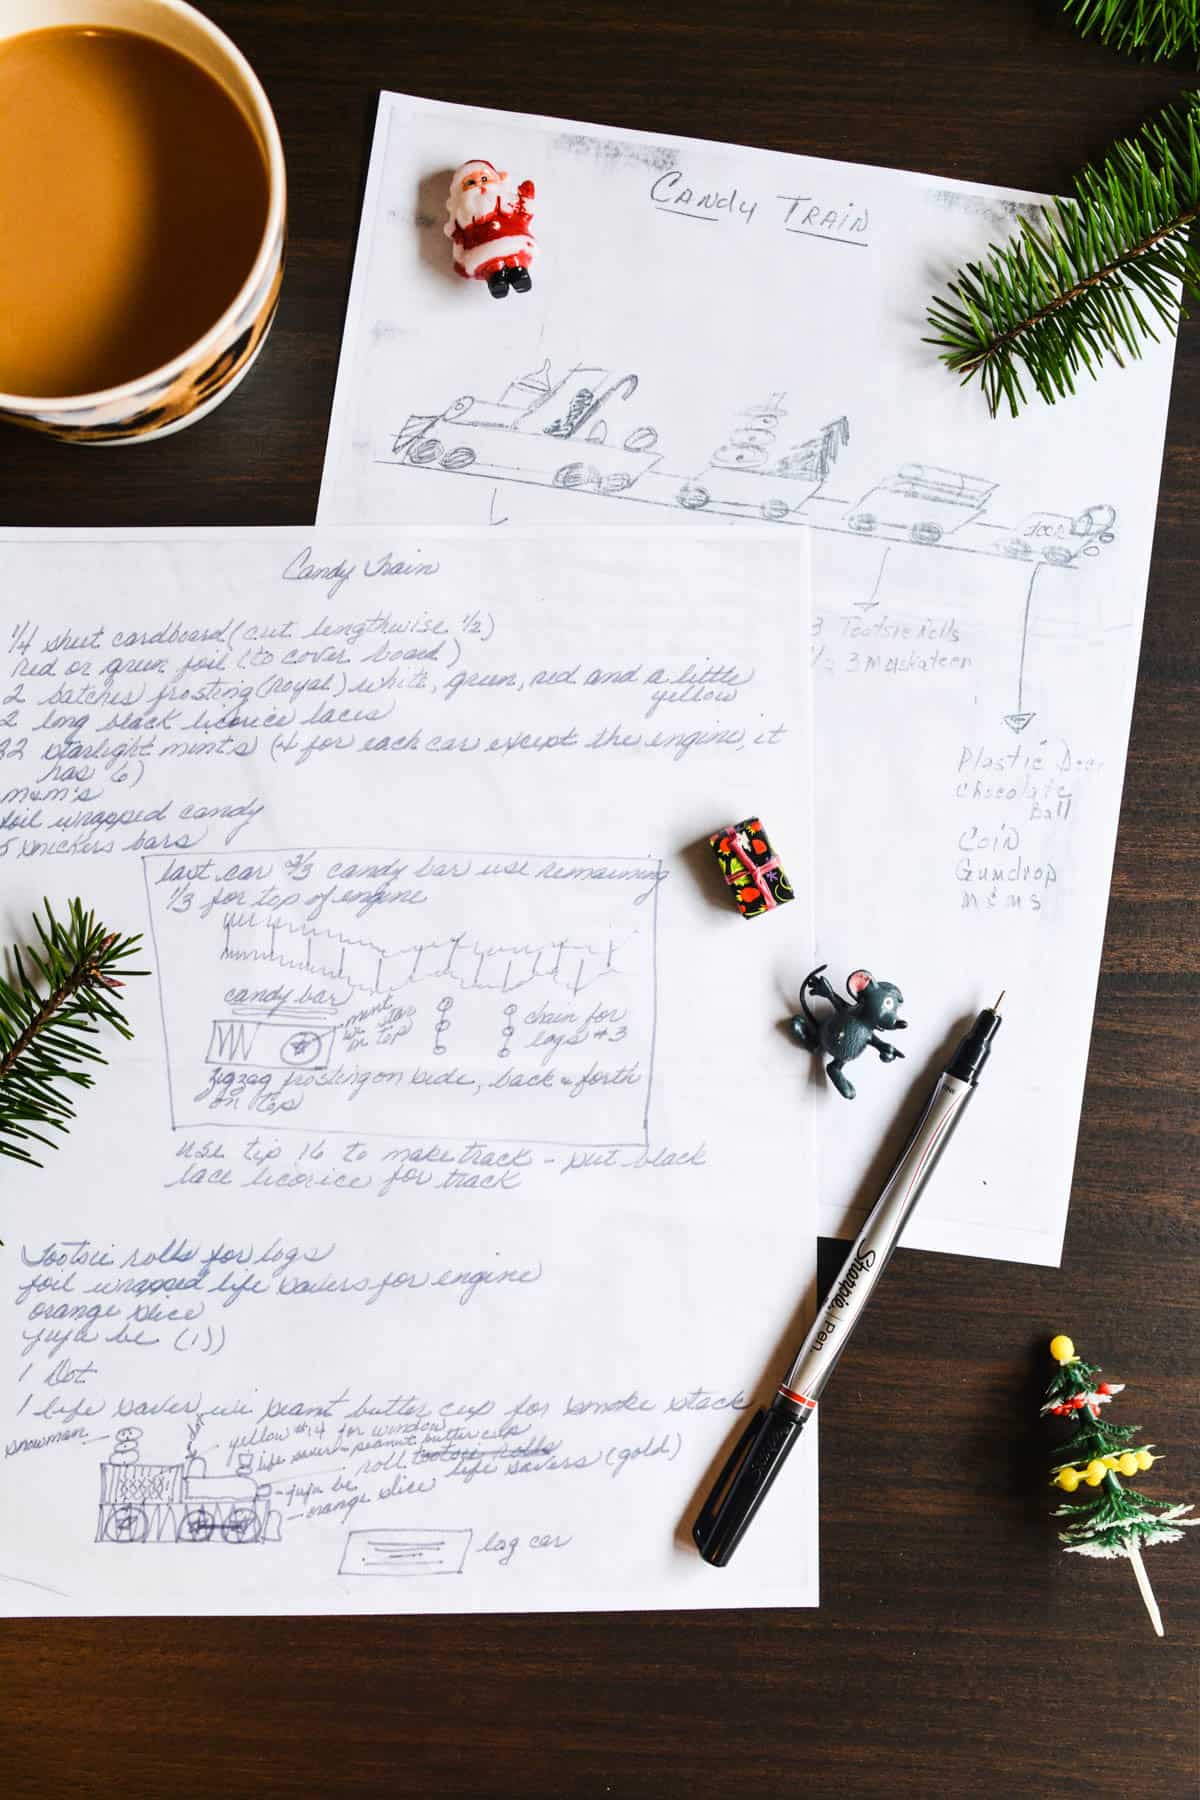
My mom found her hand-written candy train directions from years ago and copied them for me so I’d always have them.
We followed them, step-by-step, but feel free to make this craft your own!
1. Mock it up
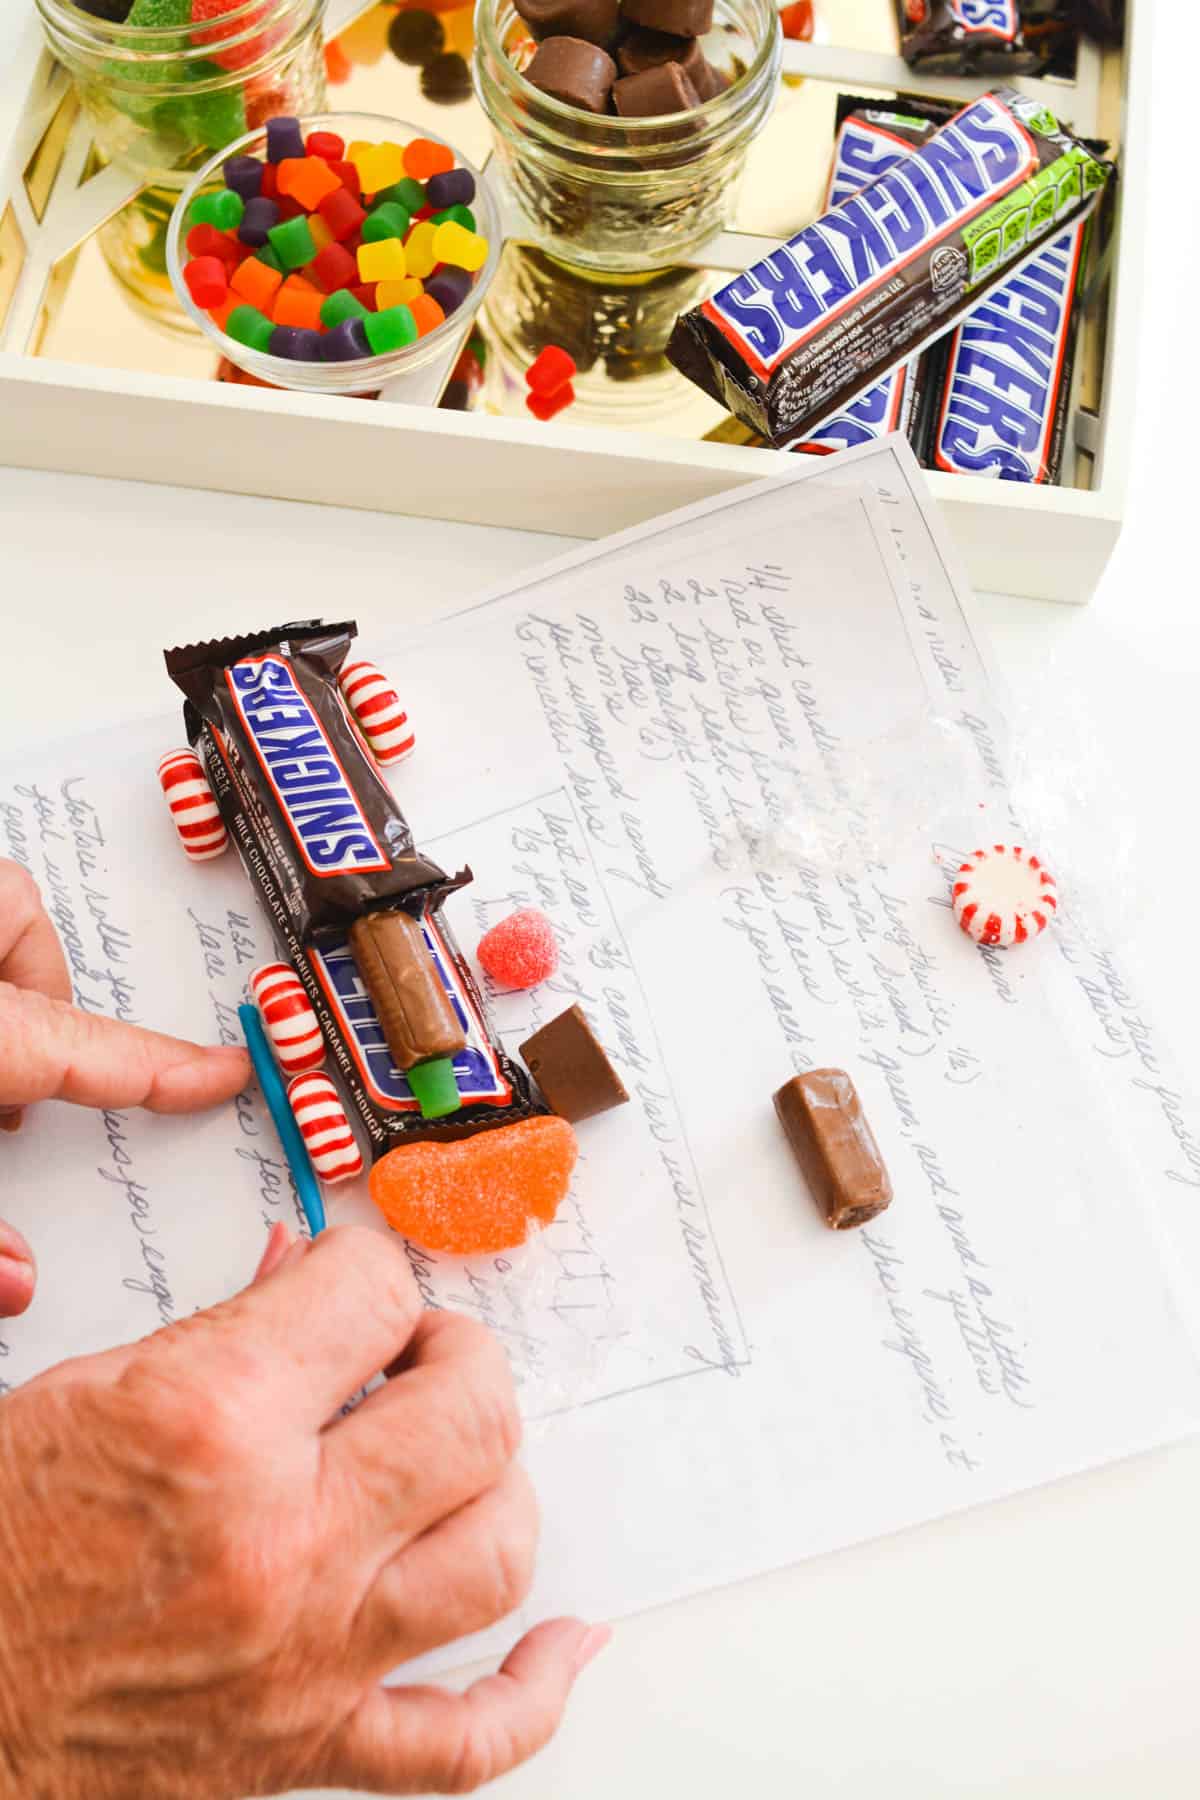
We did a little mock-up before gluing things together with the royal icing. In doing so, we learned that candy has changed a bit since we first made these (which felt like a hundred years ago!).
Use the images in this post as a guide for how a train might look. But of course, do your own thing!
The first candy train car is really the most specific. The rest of the cars are more simple that you can just add candy to.
2. Make the Royal Icing
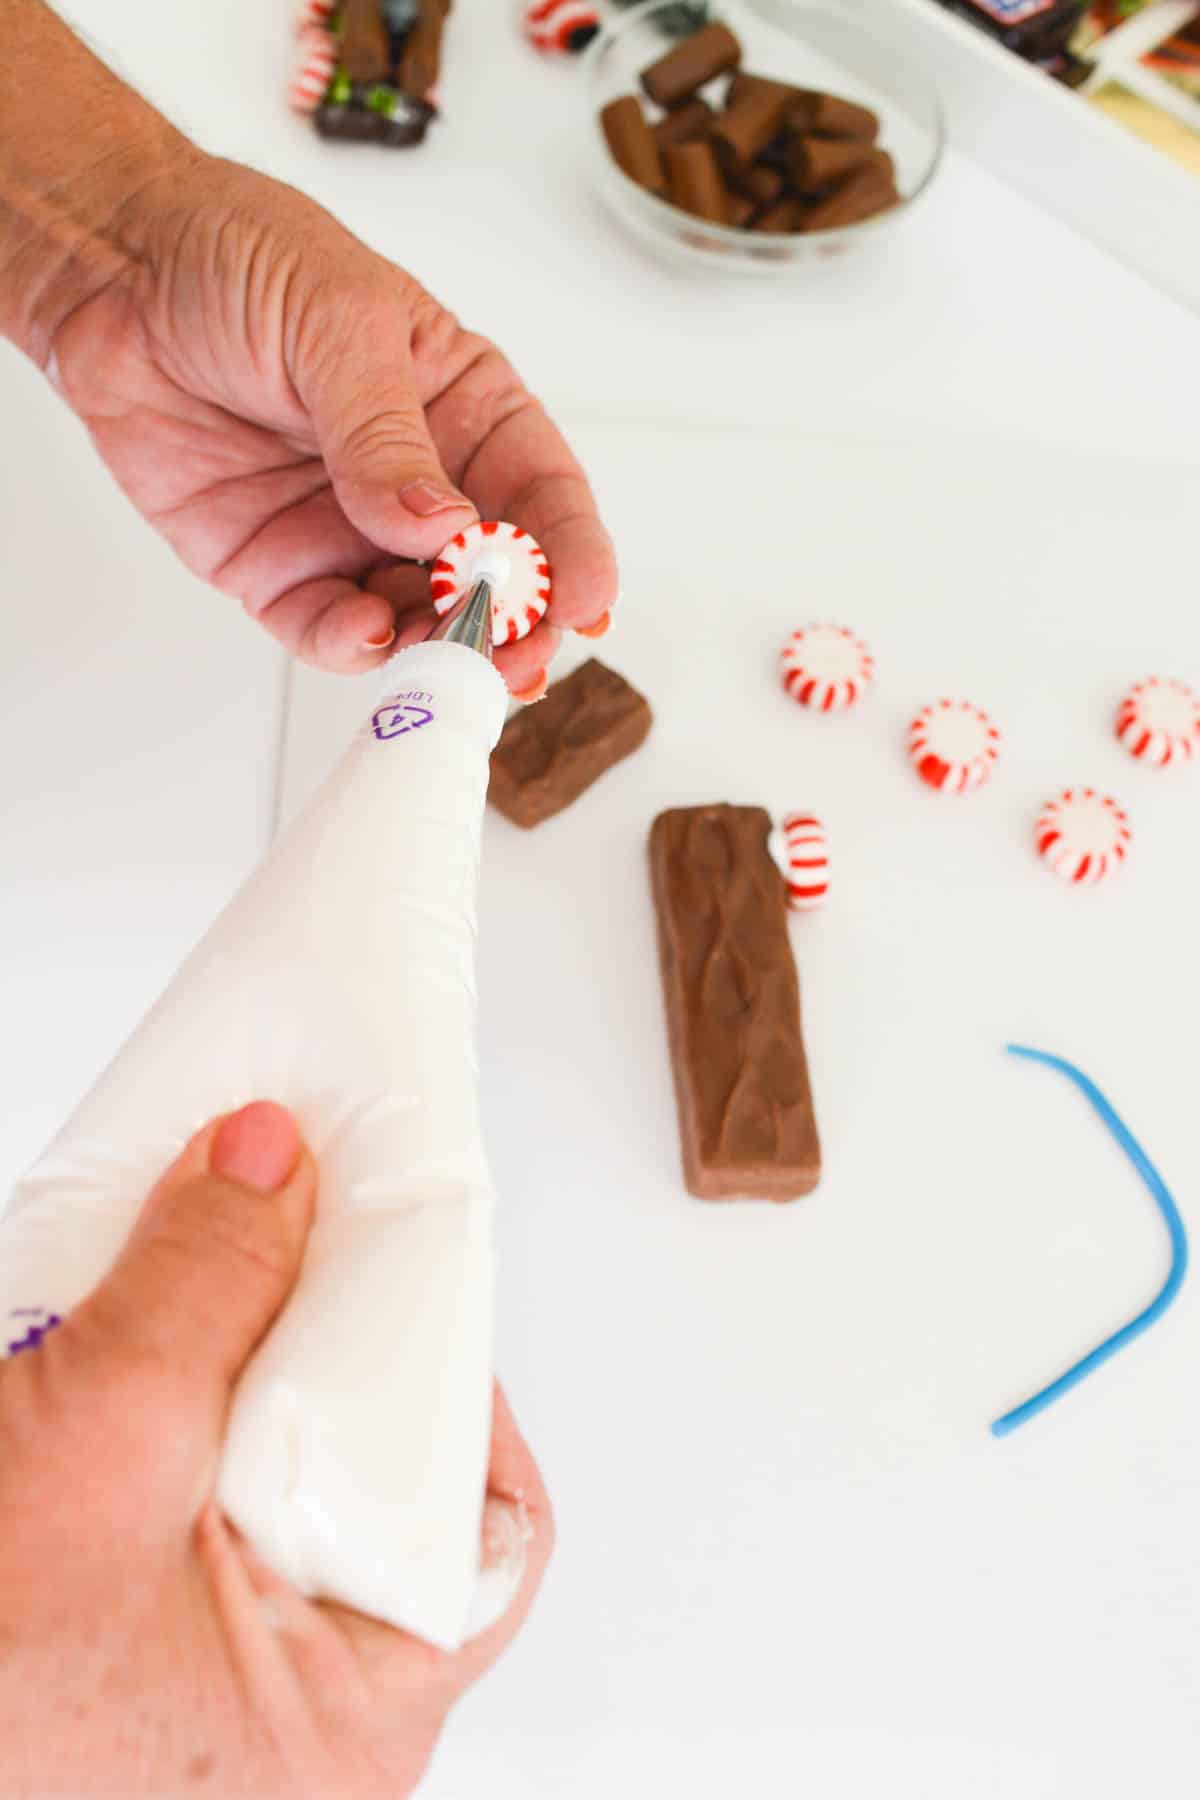
Make a batch of royal icing and put it in a piping bag with a basic tip or use one of the other methods I mentioned above.
Unwrap the candies and place them near your work area which includes a cake board.
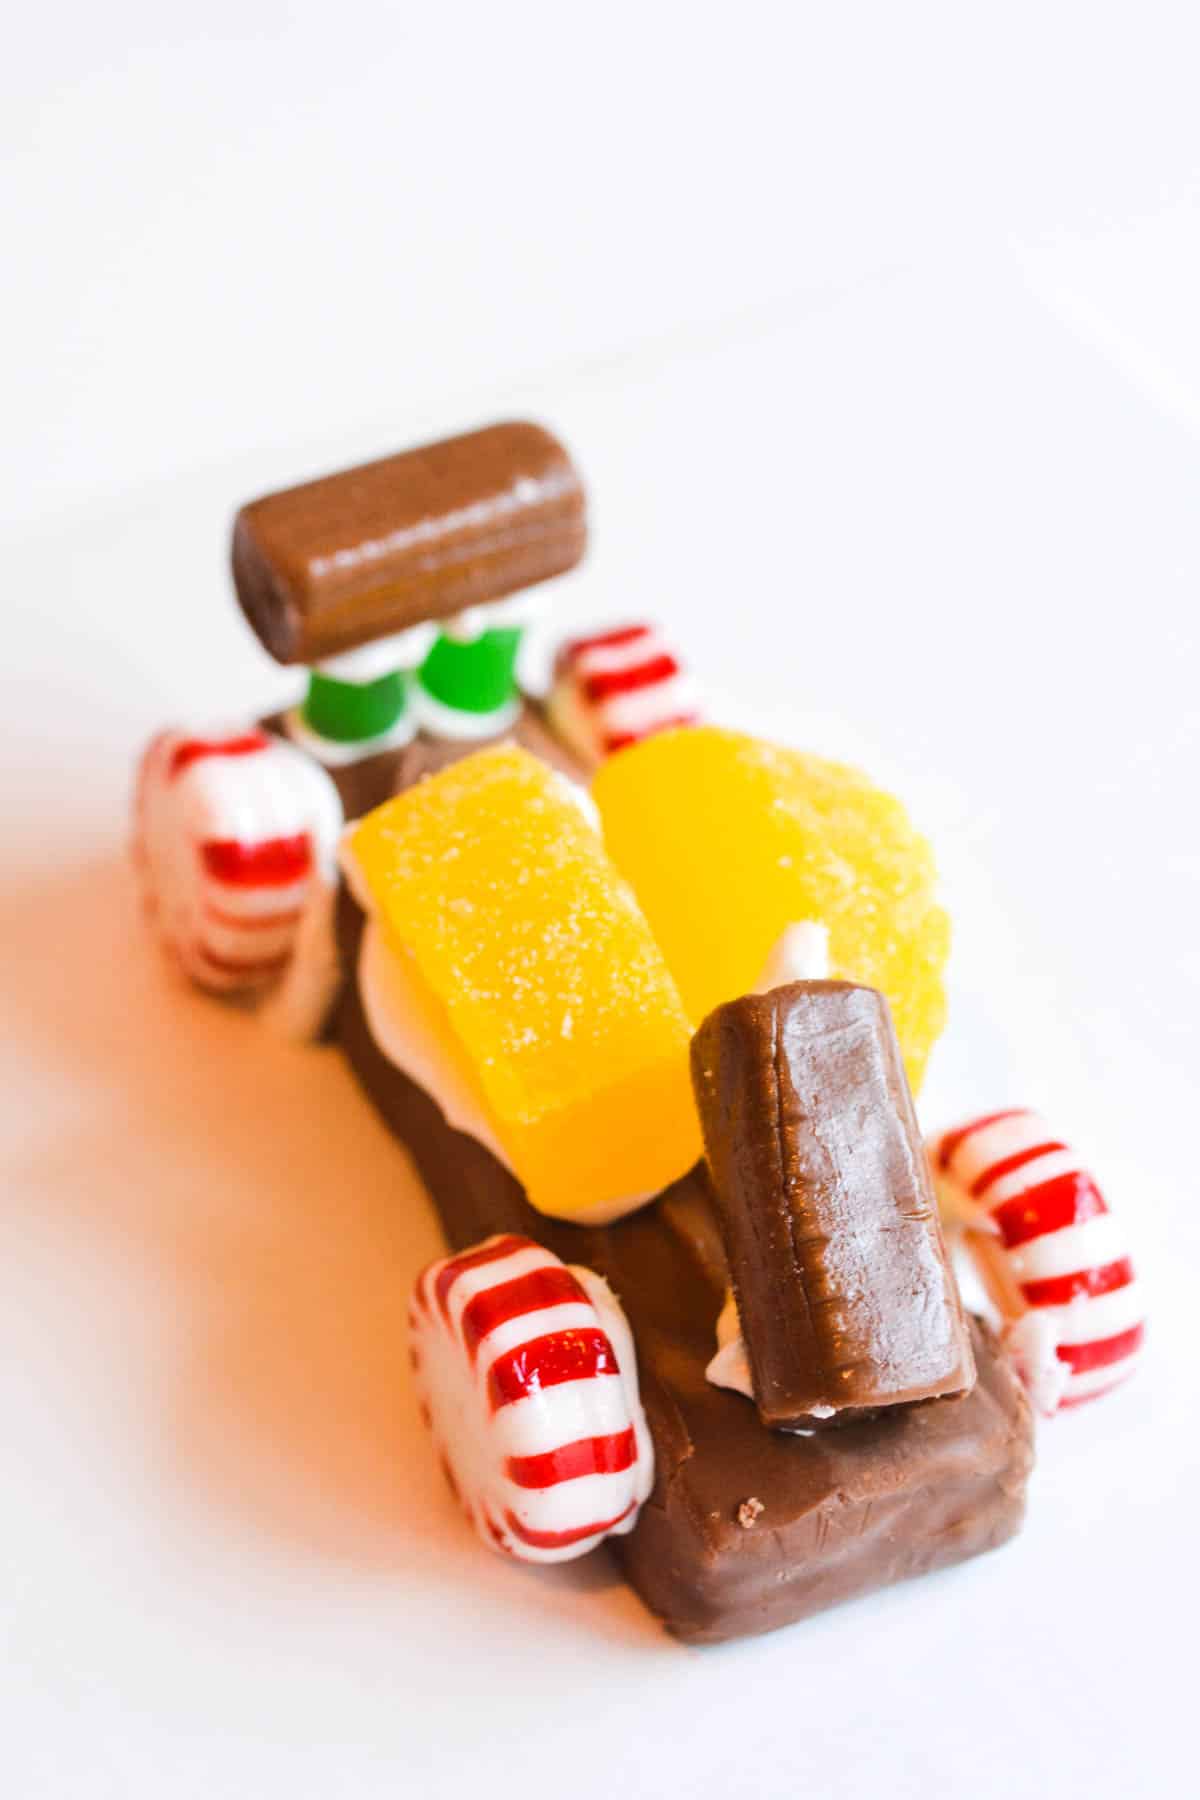
Start with a full-sized candy bar as the base and add peppermint wheels with royal icing.
If you are a visual person, use the picture just below as the guide.
3. Add the Wheels
Choose which side you want to be the front of the car then add 2 peppermint candies on each side in the front of the car and one on each side near the back of the car (and when I say car I mean candy bar).
Just use a small dot of icing as when you press the candies to stick to the candy train, the excess will ooze out the sides.
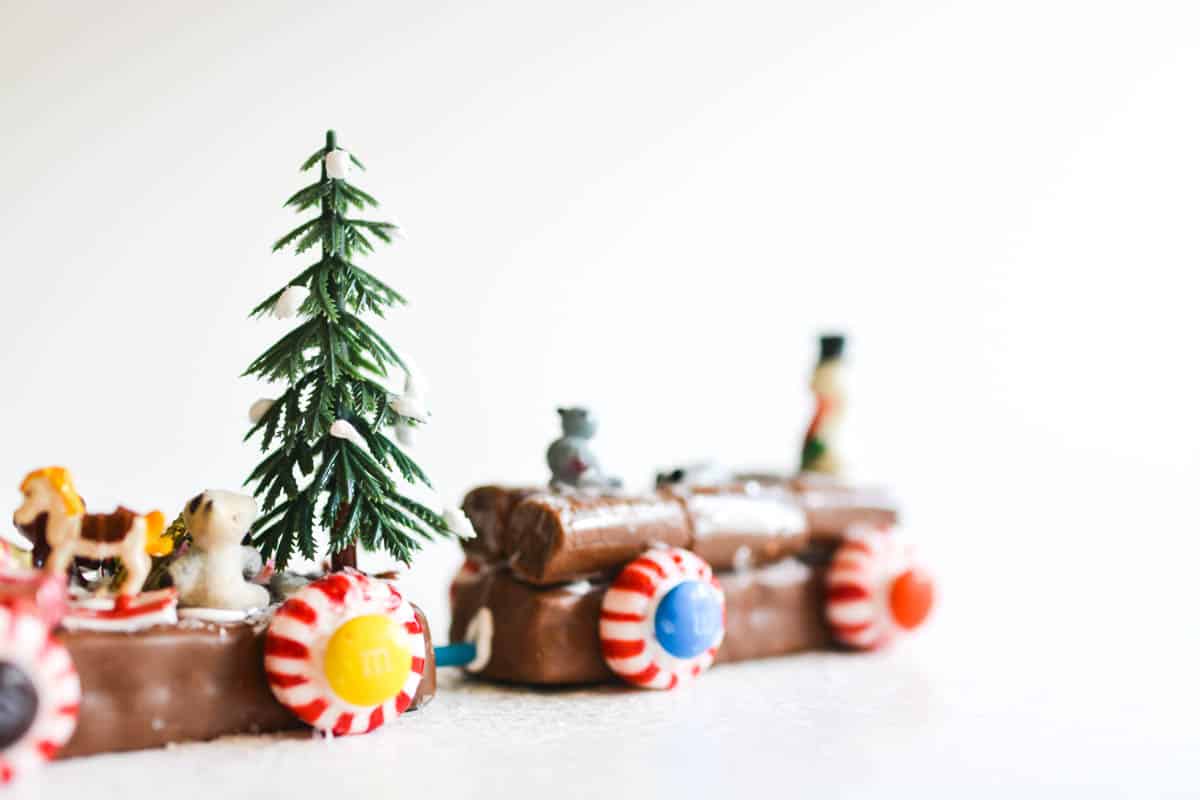
And don’t forget to add an M&M to each wheel! Just add a drop of royal icing and and place one chocolate candy in the center of each mint. (Scroll up or down to see images of the finished train cars to see an example)
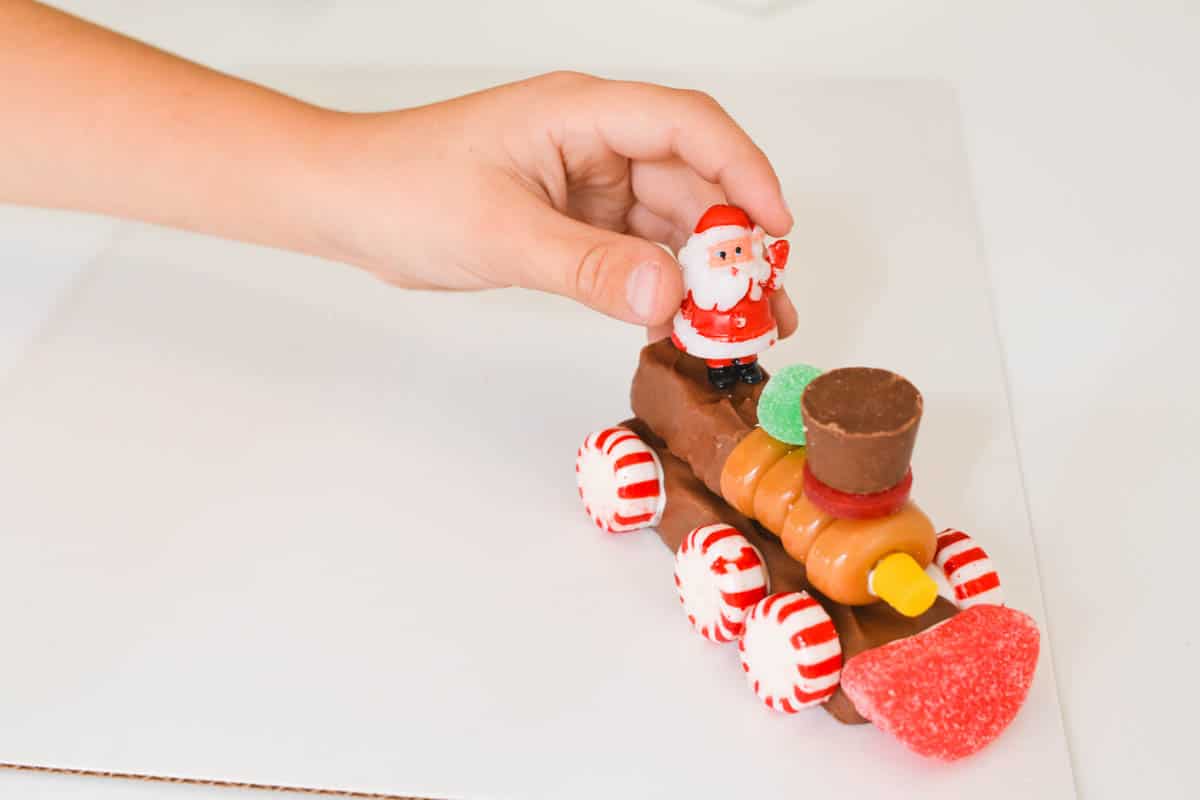
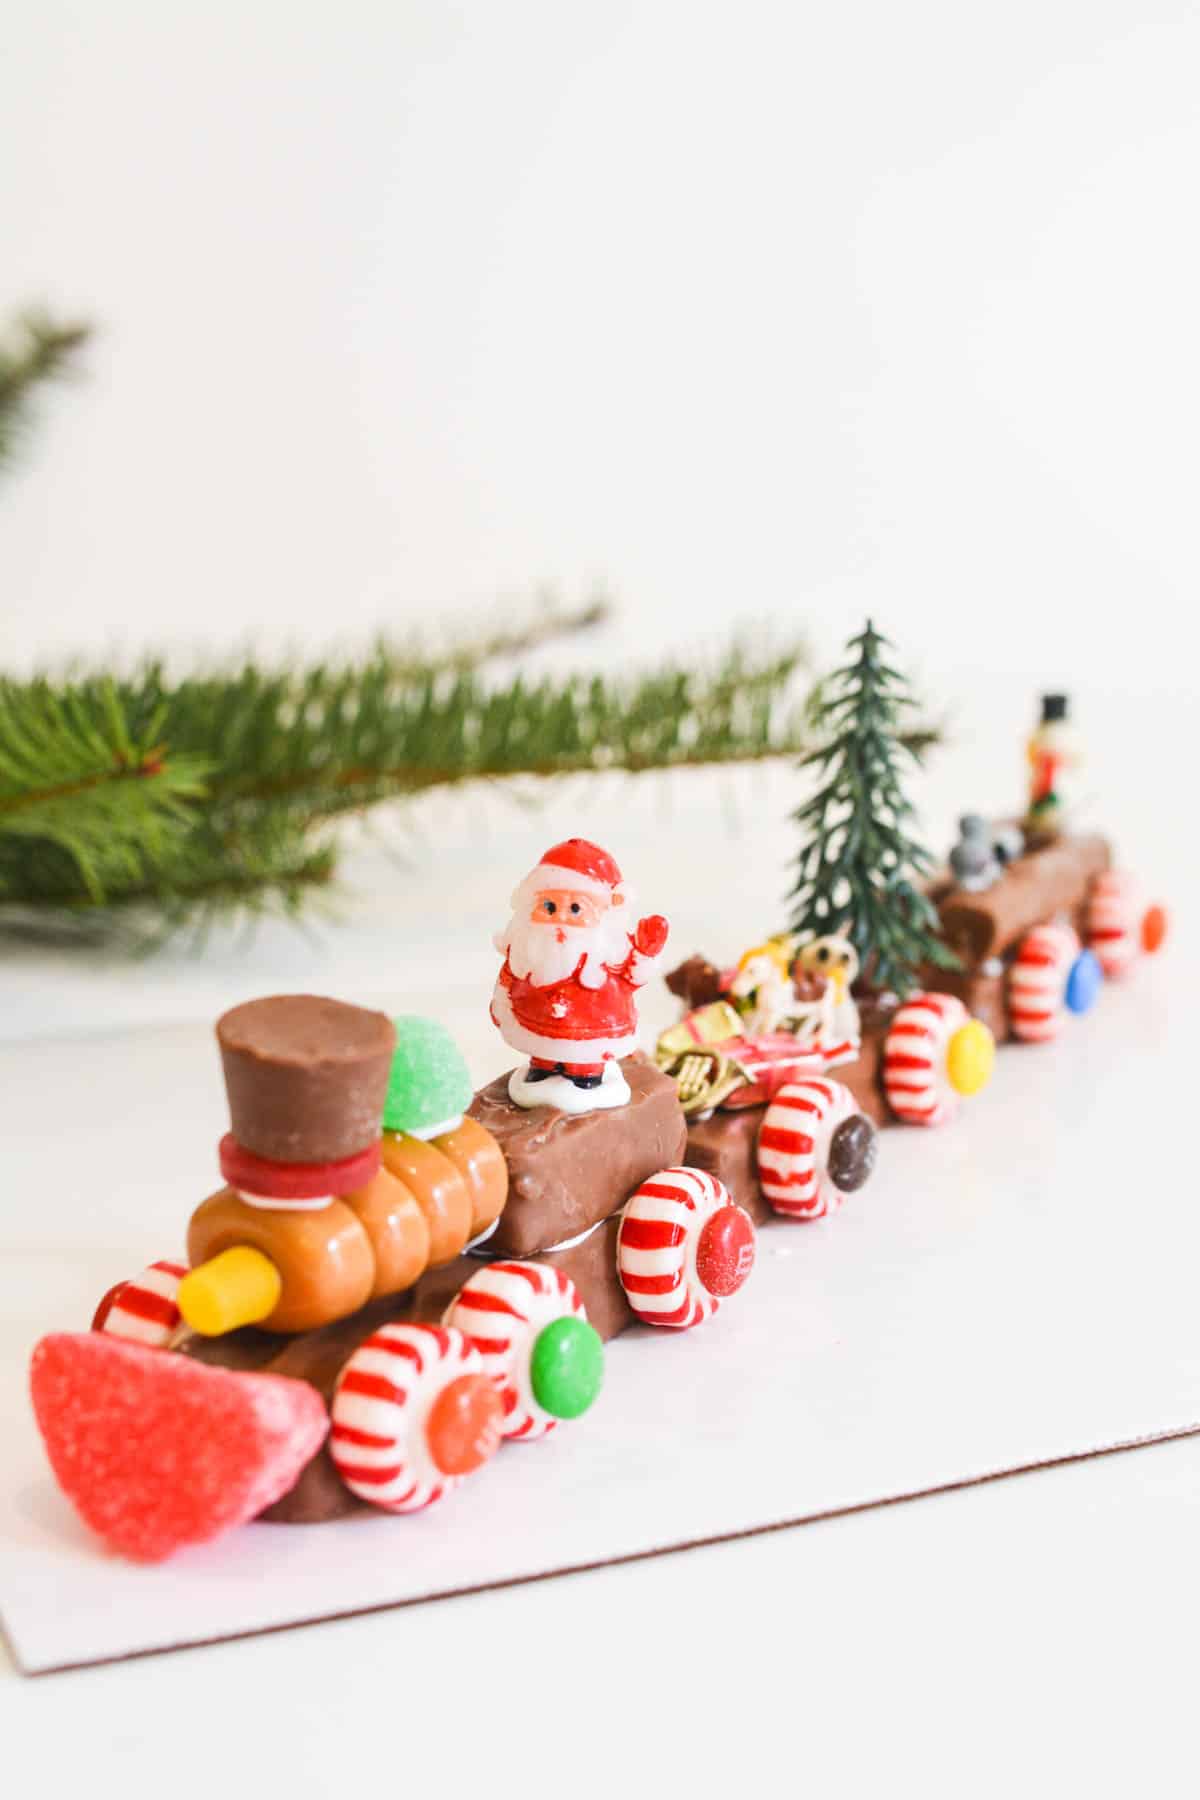
4. Make the Engine Car
Glue a fun-sized candy bar to the top rear of the train.
Add a gummy fruit slice to the very front of the candy bar.
Add 4 Werther’s hard caramels, sideways, and glue them to the front of the fun-sized candy bar. You could use Lifesavers to equal roughly the same size instead. (I just had a hard time finding Lifesavers the day we shot this).
Add a Lifesaver topped with a Rolo to make the smokestack.
A single Juju Bee is the light to lead the way glued to the front of the Werther’s.
And a Gum Drop goes just behind the smokestack.
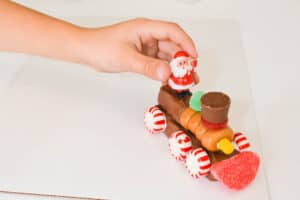
A miniature Santa Claus finishes off the first car perfectly but, of course, is optional.
Miniatures really add such a fun touch to a DIY Christmas candy train. Be sure to see the mini bunnies I used in my panoramic sugar eggs.
5. Create the Other Train Cars
For the second car (and any after), use another full-sized candy bar as the base.
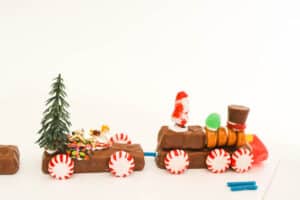
Add the wheels (any car besides the first car just get two wheels on each side) and then get creative! A small plastic tree looks super cute!
6. Attach the Cars Together
Some colorful licorice, cut into small ropes, is the perfect way to link the cars.
You can also use the licorice running from the first wheel to the last wheel of the car to make it look more train-like. I deemed it unnecessary for ours.
7. Decorate the Candy Bar Train
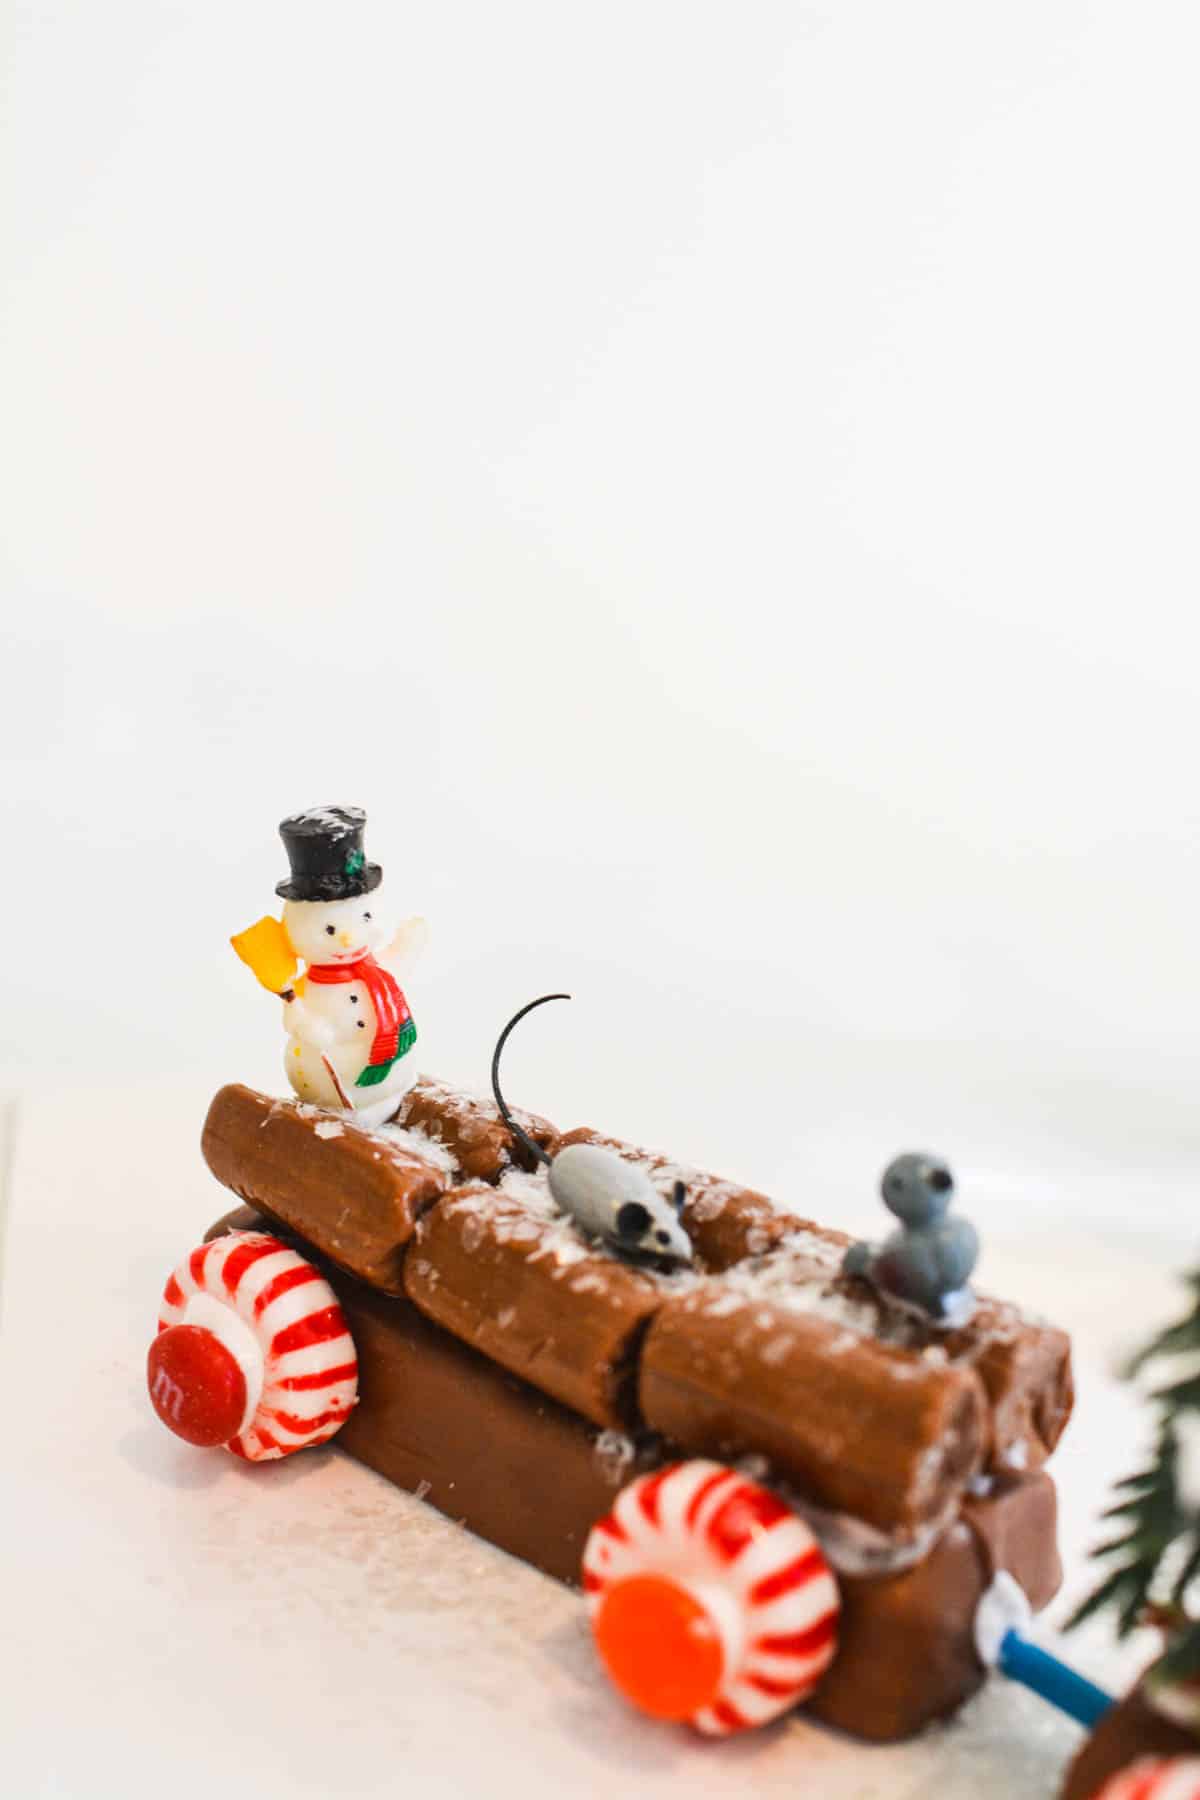
For the final car, my mom always added “logs” (which are miniature Tootsie Rolls). Some edible snow and miniatures give it the perfect finishing touch.
I had only bought 6 of the large candy bars but the candy used to decorate was very plentiful. We could have made a ton of train cars by just picking up a few more full-sized Snickers bars.
Which is why it’s a great activity to do with a crowd. Just put on a Christmas Playlist and go to town!
Can You Eat a Candy Train
Like gingerbread houses, these candy bar trains are edible, but since all of the candy has been manhandled I wouldn’t recommend eating them.
My kids asked so incessantly that I finally said they could eat the candy train cars they made.
Turns out all the different flavors of candy don’t taste that great together. So they stopped eating them instead of picking the candy off individually…dummies.
(Yes I just called my kids dummies. But as a joke. That is kind of ironic. Especially since my 3rd grader had to go ask his teacher how to do one of his homework math problems since I couldn’t figure it out…)
NOTE: Royal icing hardens when dried and might be hard to bite through.
Tips
When having older kids make these without too much help, a paint brush works really well for them to place the royal icing on the mints (wheels) to attach them to the candy bar.
You can do these cars in stages or one at a time. For example, add all the Starlight mint “wheels” to all of your train car candy bar bases at once before moving on to adding another type of candy.
Or make each car fully, before moving on to the next one.
Variations
With a little imagination, your “train” can also be made as a sports car. It becomes a quicker project if your kids are making just one car as opposed to a whole train.
You may have also seen versions made with rolls of Lifesavers. Those are usually just a single car and are an even easier Christmas candy craft for younger kids.
You can also use the same idea as the Lifesaver trains and use a package of Rolo’s instead of an unwrapped candy bar.
Taste of Home has a version where they made actual train cars out of graham crackers to hold the candy. This idea feels way more complicated to me.
I’ve tried to be as detailed as I can be on how to make candy trains with candy bars! If you have any questions, just email or message me!
Looking for more fun holiday traditions? Be sure to check out my Hallmark Holiday Movie Drinking Game.
Growing up, holidays were always pretty low-key but my mom always made sure that Christmas was full of super fun activities and traditions (like serving Panettone).
Related Posts
- Make a Faux Croquembouche Donut Hole Tree for holiday breakfast or dessert!
- A Cinnamon Toast Bar for Brunch is a sweet way to start the day. It’s a great way to keep everyone from getting too hungry as they wait for brunch.
- Homemade Woven Christmas Ornaments are another fun activity but they also can double as gifts for the family!
- Getting ready for New Year’s Eve? Make these Hourly Countdown Bags for the kids to open!
- Knotted Garland from chunky yarn that is perfect for winter decorations.
Christmas Candy Train DIY
Equipment
- Cake board
- Pastry bags and tips or plastic sandwich bag
Ingredients
- 3 Snickers Bars Regular Sized
- 1 Fun-sized Snickers Bar
- 14 Peppermint Candies
- 1 Gummy Fruit Slice
- 4 Werther's Caramels Hard Candies (or Lifesavers)
- 1 JUJU Bee
- 1 Gum Drop
- 1 Rolo
- 14 M&Ms, plain
- 6 Tootsie Rolls or more
- 1 edible gliter flakes
- 2 tablespoons Meringue Powder
- 2 2/3 cup powdered sugar
Instructions
- Follow this recipe to make Royal Icing. You will need meringue powder, powdered sugar and water.
- Put the royal icing in a piping bag with a small basic tip or a plastic sandwich bag and cut a small hole out of one corner.
- Unwrap candies and place the cake board on the table.
Build the first train car
- Place a full-sized Snickers bar down as the base.

- Using small dots of royal icing, add 2 peppermint candies on each side of the car near what you have decided is the front of the car. Add 1 more to each side of the rear of the car.
- Use royal icing to attach a fun-sized Snickers bar to the top of the train near the rear.
- Add a gummy fruit slice to the very front of the candy bar.
- Add 4 Werther's Hard Caramels (or use Lifesavers) and glue the flat side to the front of the fun-sized candy bar.
- Add a Lifesaver to the top of the caramels, near the front of the train then top with a Rolo.
- Add on Juju Bee to the front of the caramels.
- Add a gum drop to just behind the Lifesave/Rolo's smokestack.
- Add any miniatures that you may have.
- Add an M&M to the center of each peppermint "wheel".
For the second car
- Use a full-sized Snicker's bar as the base.
- Add a peppermint to the front of and back of the train car on each side. (note: only the first car has 2 peppermints near the front).
- Add M&Ms to the center of each "wheel".
- Add any miniatures that you have. Consider adding a small plastic Christmas tree to make it look more festive.
For the third car
- Create the base as noted above with a full-sized Snickers bar and peppermint candies as wheels including the M&Ms.

- Lay Tootsie Rolls on the base candy bar to resemble tree logs. Stack them up however you would like them.
- Add any miniatures you may have.

To connect the cars
- Place the cars on the cake board where you want them to sit.
- Use approximately 1" pieces of licorice laces and use Royal icing to link the first car to the second car.
- Do this for as many cars as you have.
Add snow
- Add small drips of Royal Icing to the plastic tree to make it look like fallen snow (optional).
- Sprinkle the whole train with edible glitter flakes.
To make train tracks (optional)
- Use royal icing and black licorice laces to create a track on the cake board.
- Place two long pieces, parallel to each other, as wide as the candy train cars. Cut smaller pieces and run them horizontally between the two long pieces to make the tracks.
- Place train on top of the tracks.
Originally posted December 9, 2014. I’ve updated the post to include more detailed instructions to make following this tutorial easier.
This brings back THE BEST memories! We need to build one of these TODAY– a ray of light during lockdown. Thank you for posting :)
I just updated this post and was fondly remembering Kingsley eating all the candy! :)
I love these. My kids are teens and they would STILL get a kick out of making them!
These are absolutely adorable! Pinned. I’ve just found your site, and I’m excited to explore!
Thank you Heidi!! They were SO much fun to make! My sister in law and I are already on the hunt for miniatures for next year. :)
Ahhh these are so darling! And I love that your mom still had her instructions! These are my favorite kinds of holiday traditions. :-)
It was so fun to do the post with her!!