How to Put a Picture on a Balloon for Mother’s Day
Need a cute and easy DIY decoration for Mother’s Day? Here’s how to put a picture on a balloon. It’s a fun way to customize your celebration with a personalized craft that can be done in just a few minutes!
This tutorial for how to put pictures on balloons was sponsored by Balloon Time Helium Tanks. They let me share my love of balloons with you and come up with easy-to-recreate ideas and party DIYs that you can make at home!
Balloons with Pictures are so Cute
Balloons are a fun way to decorate for any type of party or celebration. They are colorful, they are inexpensive and there are tons of different DIYs that can be done to make them personalized and perfect for any event or holiday theme.
While I made these in honor of Mother’s Day, they are also a really fun idea for baby showers and milestone birthdays.
They take a few minutes to make but don’t require any special skills and are free-standing so you don’t need to worry about attaching anything to your walls.
Related: Party Signs Made with Balloons
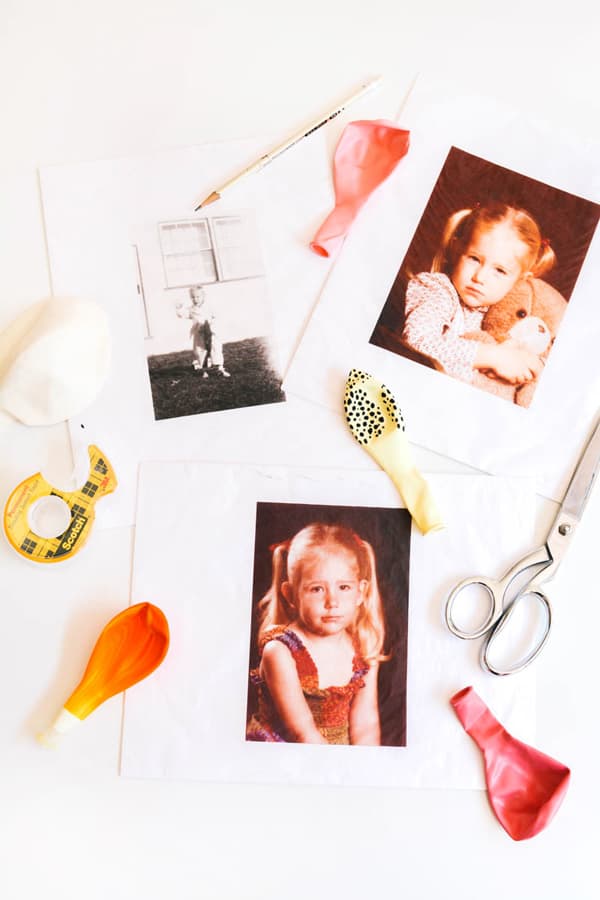
My kids love seeing pictures of me and my husband when we were kids so I thought it would be really fun to come up with an idea to incorporate baby photos into some simple Mother’s Day decor.
They are a great way to customize your space, quickly or can even be given as a small gift. And who wouldn’t love to see their face on a balloon?!
Supplies
To make this photo balloon DIY you will need to print photos onto tissue paper. This will work on most printers. Tissue paper is light and won’t weigh the balloons down.
- Baby photos
- tissue paper
- card stock
- pencil
- double-sided tape
- scissors
- balloons
- Balloon Time Helium Tank
- spray adhesive
- string or ribbon
How to Make Photo Balloons
Gather all your supplies so everything is close at hand.
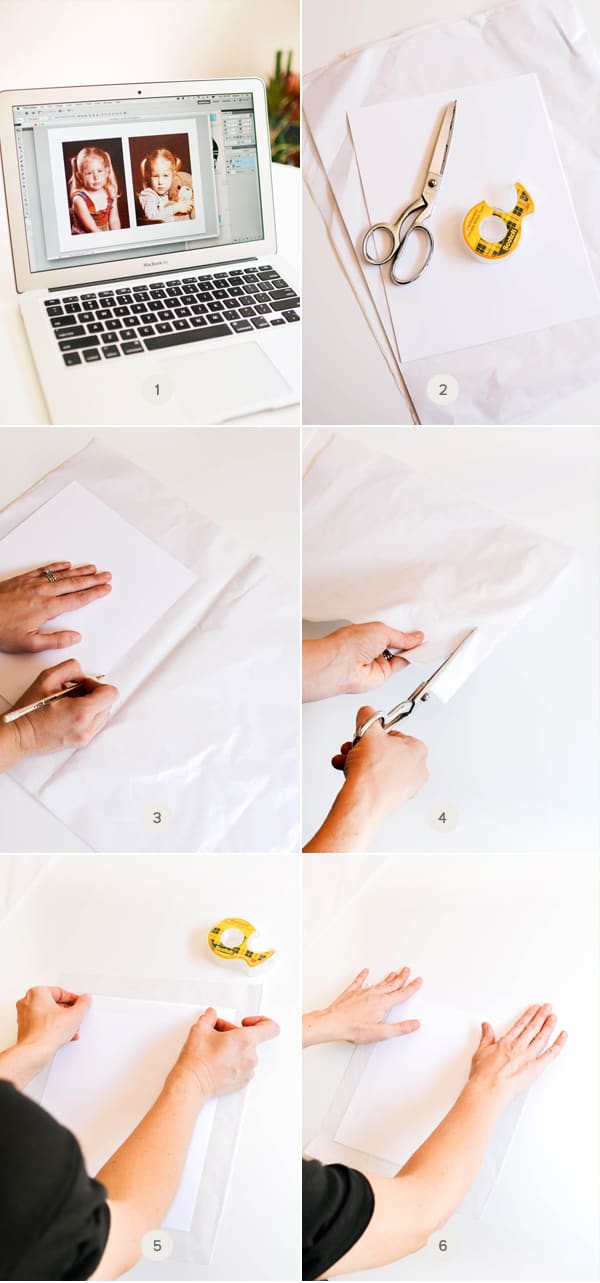
Step 1: Prepare the Baby Pictures
Scan the photos and make them into a digital file.
To make this craft efficient, try to put more than one image on an 8.5 x 11 page. I was able to do that using Photoshop but Microsoft Word or Canva would work too.
NOTE: Smaller photos will work better and go on smoother.
Step 2: Prepare the Tissue Paper
Stack sheets of tissue paper together (for however many photos you plan to print). Place a piece of card stock on top of the stack and trace roughly around the paper.
Leave about an inch margin all the way around your pencil line and cut out the tissue paper.
Move the rest of the tissue paper aside and work on them one at a time.
Place the tissue paper, shiny side up on the table. Center one piece of card stock on top of the tissue paper.
Using double-stick tape, tape around all the edges of the card stock.
Fold over the excess tissue paper and stick it to the tape. Do this around all the edges.
Step 3: Print the Photos
I placed the paper, tissue paper side down, in the paper tray of my printer (yours might be different – you may want to do a test print first!).
I placed each piece of tissue paper wrapped card stock through one at a time, for each photo page that I printed.

Step 4
Blow up all the balloons you will be using to have them ready to go.
NOTE: I would suggest doing this right before your Mother’s Day celebration starts because it seems like whenever you put anything on a helium balloon, they start to sink faster than without.
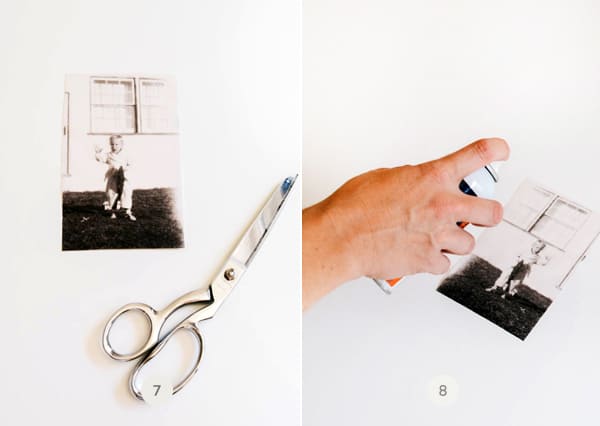
Step 5
Cut out the photos from the tissue paper. Discard the excess tissue paper and the card stock.
Step 6
In a well-ventilated area (I sprayed them outside), spray the back of the tissue paper photo lightly with the spray adhesive by holding the can back a foot or two.
Try not to get the tissue paper too wet.
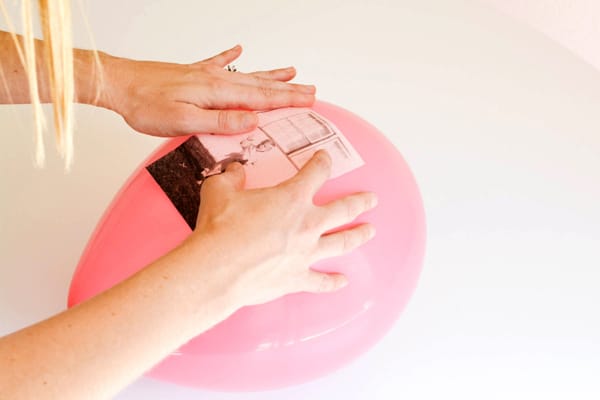
Step 7
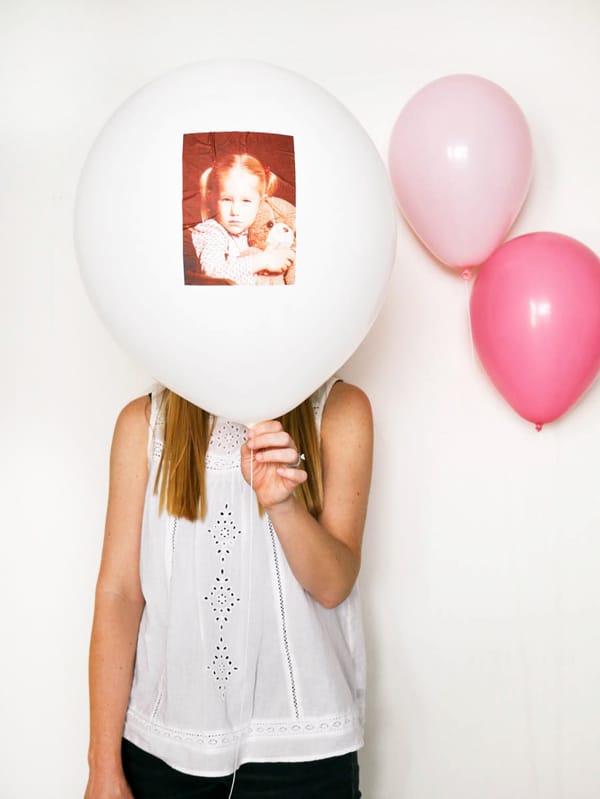
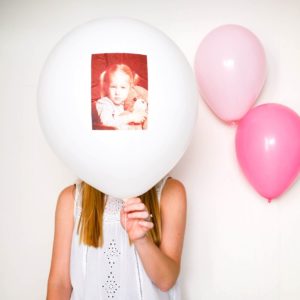
Carefully smooth the photo onto the balloon.
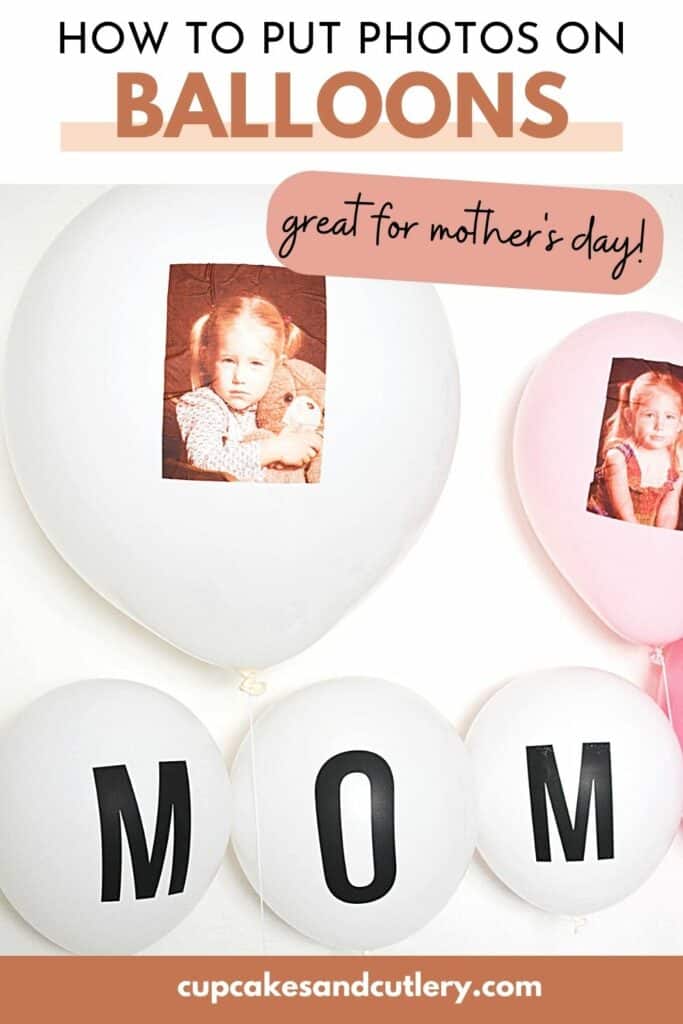
NOTE: Since the balloon is round and the images are rectangular, they do not lay perfectly on the balloon and do have some wrinkles.
One way around this would be to use smaller images. I don’t think the wrinkles looked bad but it might bother some people. Adjust this craft according to your OCD preferences. :)
Step 8
You can attach the balloons to balloon weights with string or just tie them to the table you want to add pizzaz too.
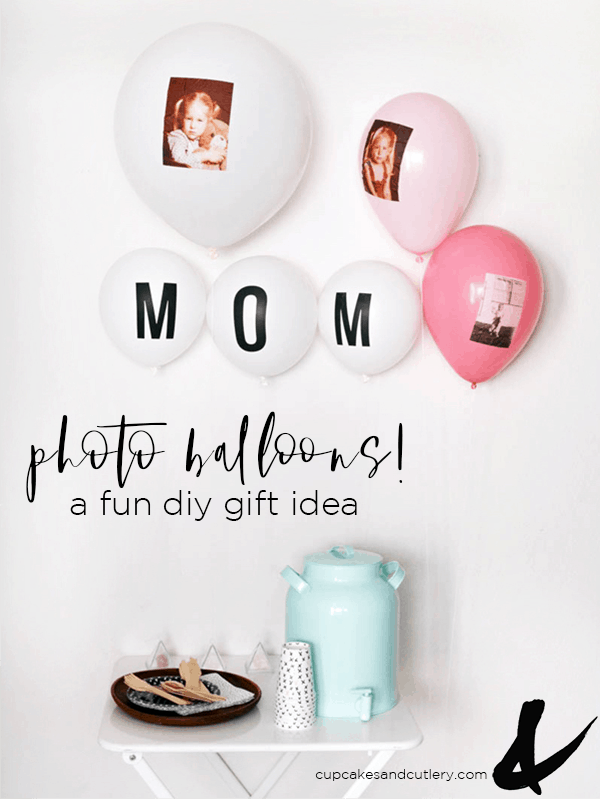
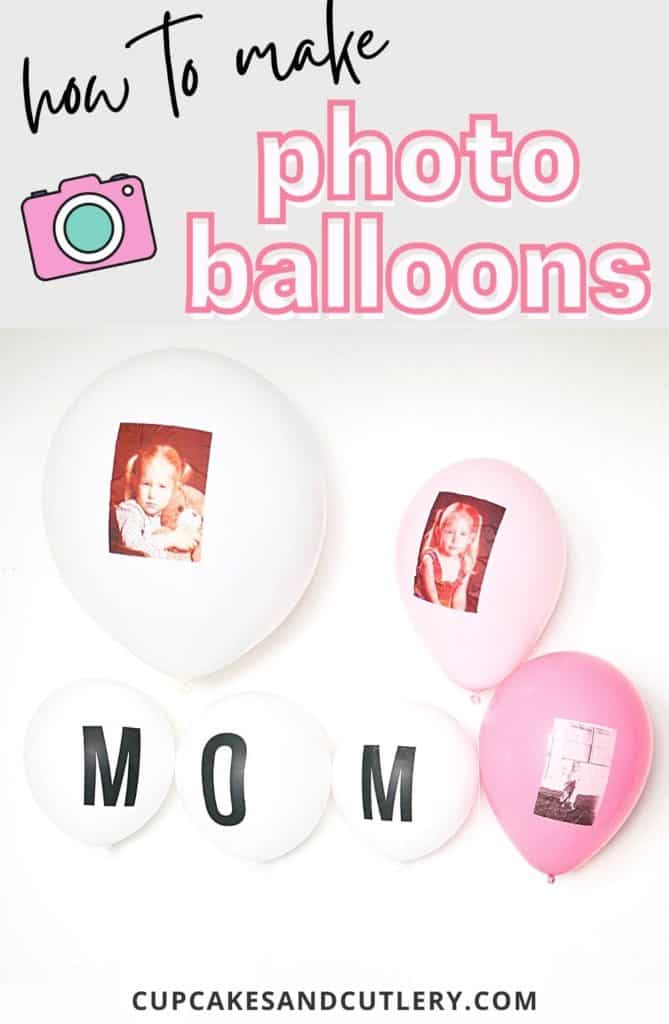
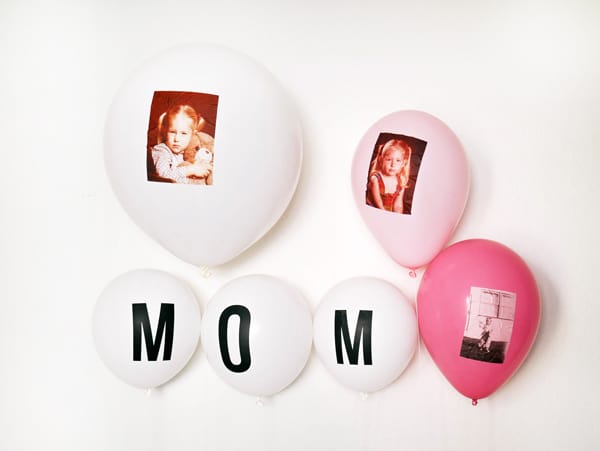
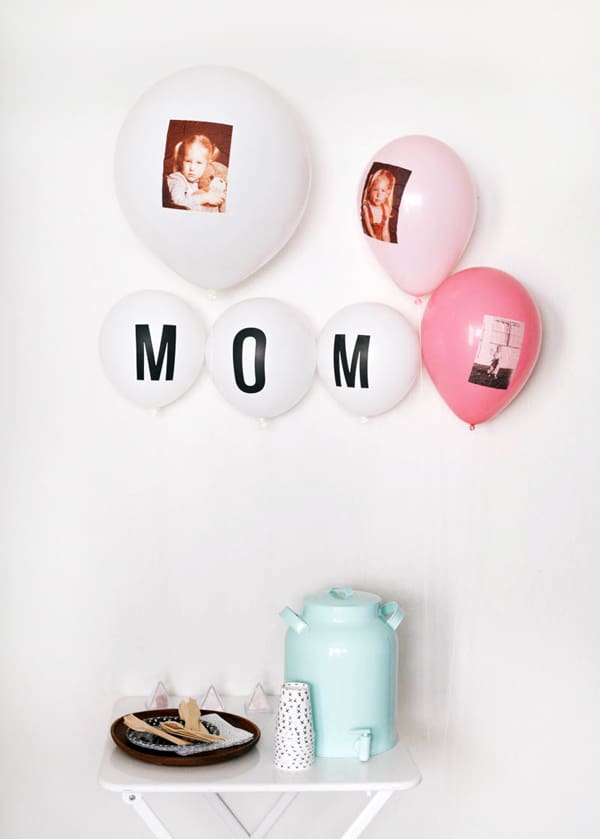
I used two of my own baby pictures and one of my mom as a kid. My boys LOVED seeing these balloons! They were super simple to make and looked adorable.
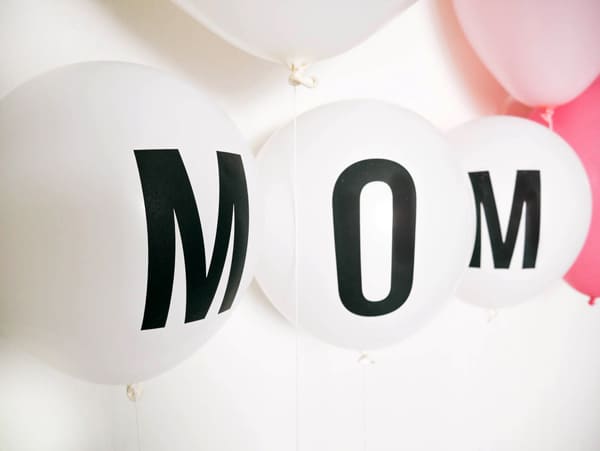
And how cute are these letter balloons! They were from Hip Hip Party Goods which doesn’t appear to be in business any longer. You could use black mylar letter balloons instead.
Now that I know how easy it is to print on tissue paper, I kind of feel like I need to do it for all kinds of things!
This photo balloon DIY is perfect for Mother’s Day but would also be awesome for birthdays and graduation parties! And of course bridal and baby showers.
Along with this easy decoration you can serve up some Mimosas for Mother’s Day or set up a non-alcoholic mimosa bar!
Thank you for supporting brands like, Balloon Time, that allow me to create fun content to make your life easier and full of special moments!
More easy balloon decoration ideas
- Make easy rainbow Balloon Columns for St. Patrick’s Day or any party!
- Check out this Toast and Jams brunch idea with recipe balloons.
- How to create a balloon chandelier.
- DIY Party Signs with Balloons are a fun way to show everyone where the bar is.
- Big Balloons are awesome and are great for party decorations.
- Create balloon bouquets with lavender sachets for a gorgeous and scented decoration or gift.
How to Put Photos on Balloons
Equipment
- 1 Printer
- Pencil
Ingredients
- 1 Baby Photo to Scan
- 1 Tissue Paper
- 1 heavy card stock
- 1 balloon
- spray adhesive
- string
- double stick tape
Instructions
- Prepare the baby pictures. Scan them and make them in to a digital file. To make this craft efficient, try to put more than one image on a page. I was able to do that using Photoshop but Microsoft Word would work too. Smaller photos will work better and go on smoother.
- Stack sheets of tissue paper together (for however many photos you plan to print). Place a piece of card stock on top of the stack and trace roughly around the paper. Leave about an inch margin all the way around your pencil line and cut out from the full sheet of tissue paper.
- Move the rest of the tissue paper aside and work on them one at a time. Place the tissue paper, shiny side up on the table. Center one piece of card stock on top of the tissue paper. Using double-stick tape, tape around all the edges of the card stock.Fold over the excess tissue paper and stick it to the tape. Do this around all the edges.
- I placed the paper, tissue paper side down, in the paper tray of my printer (yours might be different – you may want to do a test print first!). I placed each piece of tissue paper wrapped card stock through one at a time, for each photo I printed.
- Next, cut out the photo from the tissue paper. Discard the excess tissue paper and the card stock. In a well-ventilated area (I sprayed them outside), spray the back of the tissue paper photo.
- Blow up the balloons that you'll use. The number you blow up will depend on how many photo balloons you want to make.
- Carefully smooth the photo onto the balloon. Since the balloon is round and the images are rectangular, they do not lay perfectly on the balloon and do have some wrinkles.
- Attach a string and then secure them with balloon weights or tie them to the table or another party area.
I love this idea Sharon! This would be such a thoughtful touch. Totally doing this.