DIY Balloon Sign for a Party (Easy Balloon Decoration)
This quick and easy DIY Balloon Sign Decoration is a perfect homemade craft to use at all your parties. With some decorative paper or fabric plus a few balloons, you can create homemade decorations for your celebration! Scroll down for a step-by-step tutorial.
This DIY balloon decor post is sponsored by Balloon Time Helium Tanks. I was an ambassador for Balloon Time for a few years and created many balloon projects.
Make easy signs and decorations with balloons
If you’re throwing a party at home and want to add a more festive touch, make this Balloon Decoration DIY!
This simple balloon decor is an inexpensive craft project that really creates a big impact when the guests walk in. You can customize the colors to fit your theme and it helps to fill out a space that might feel empty.
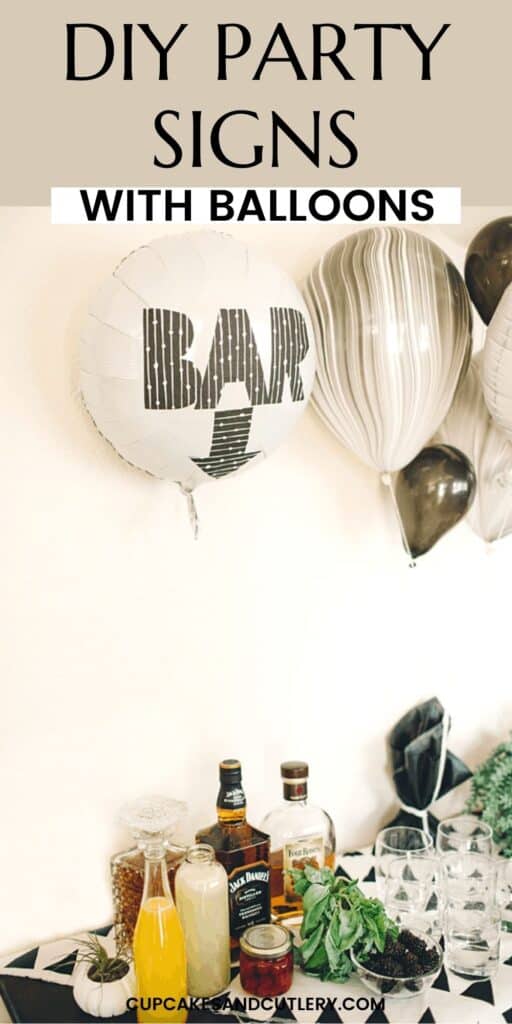
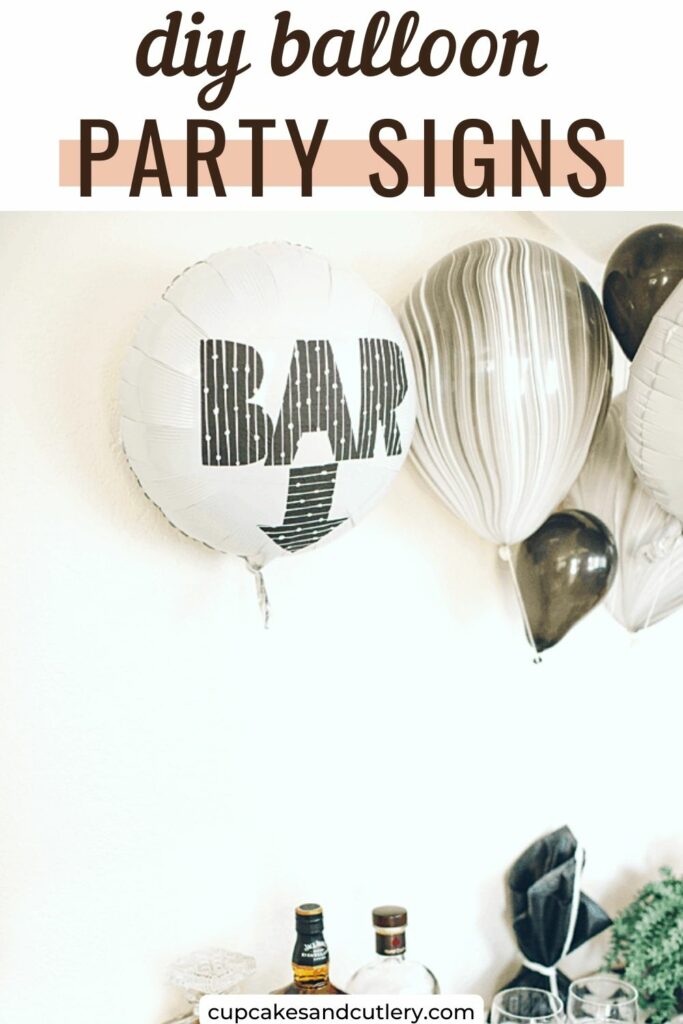
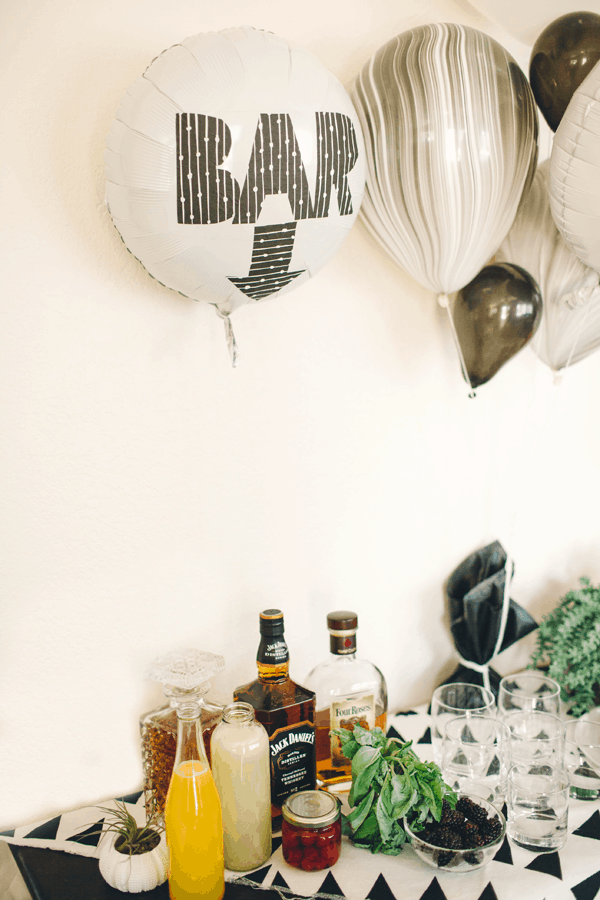
DIY balloon signs can help direct guests where to go for the bar, and food as well as wish the guest of honor well.
Related: Papel Picado Style Balloon Sign Decoration
I LOVE using balloons in my party decor. I love how a kid’s face lights up when they arrive somewhere where big balloons are floating in the air. And I’m sure you’ve seen an adult’s face light up too.
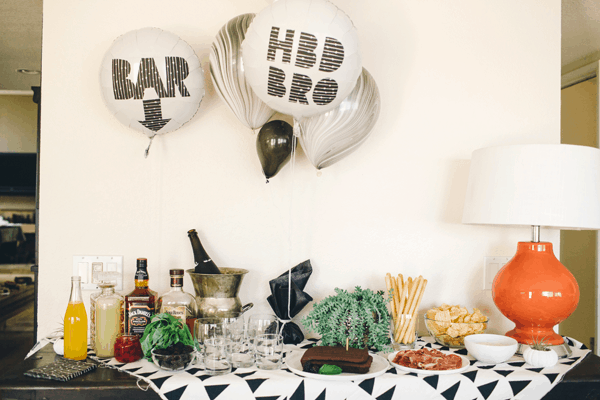
For this styled party, I wanted to keep it masculine. With simple, modern patterns and a whiskey sour bar, these ideas are easy to recreate for all kinds of things and with low effort.
Supply Notes
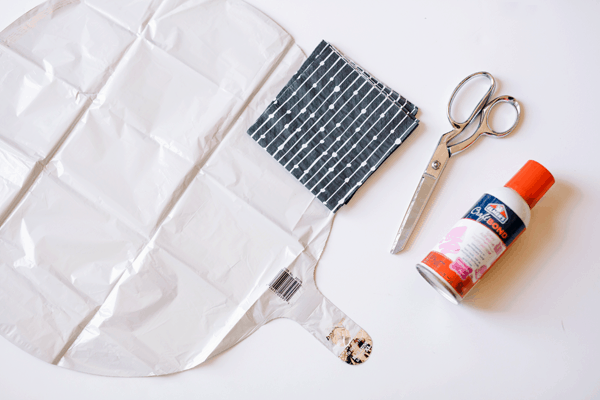
To make your message stand out, you will want to get a plain-colored mylar balloon. I used circle-shaped balloons but they come in a lot of different size options. Use what you like, just make sure you have a nice flat, open space for your message to adhere to.
Choose a color that coordinates with your theme. White is always perfect for making DIY Balloon Signs.
I used patterned napkins for a few reasons. They are really easy to find, they can be very inexpensive, it’s the perfect way to have it coordinate with the rest of your party decor and they are very lightweight.
When working with helium and creating a balloon decoration DIY, you want to keep your materials as light as possible. Anything heavy will work against the helium and your balloons might lose their float before your party is over.
You can also use tissue paper, but I think it can be harder to find printed sheets and it tears a little bit easier. You also might see the spray adhesive through it.
Scissors and spray adhesive will help you create the letters for your simple balloon sign and help them to stick on the balloon. I find the spray adhesive the easiest to use because it is strong, light and super sticky. It also doesn’t really require any drying time.
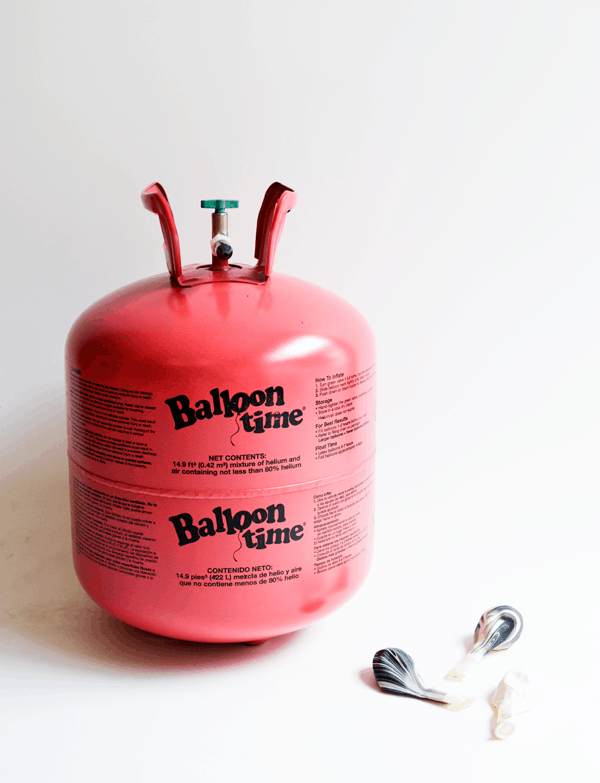
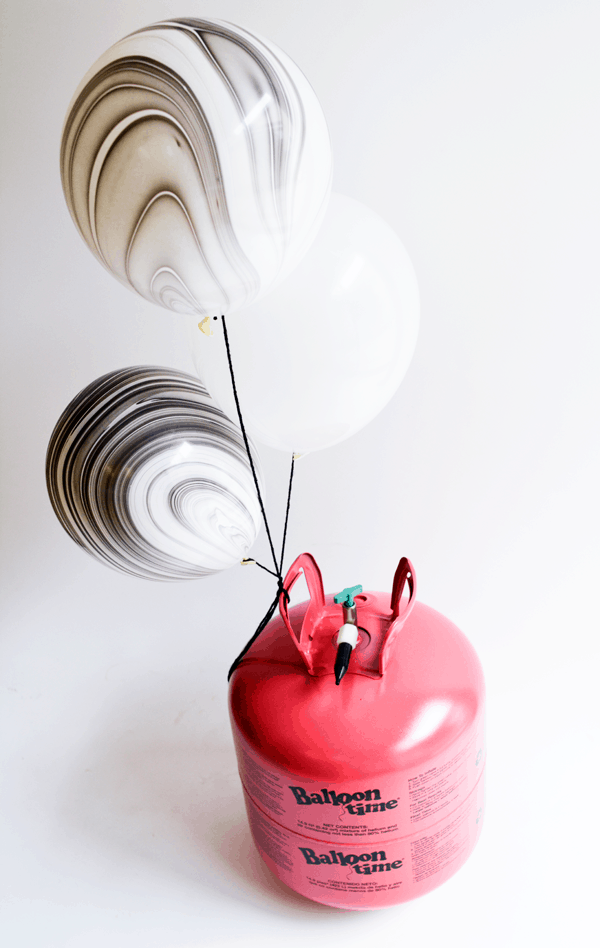
I LOVE my Balloon Time helium tank. I keep it in the garage and use it all the time. It ensures that you can create tons of easy balloons decorations, like photo balloons and balloon bouquets, when you need them.
Of course, they work amazing for creating your party decor with balloons, but they are also great for taking a single balloon to school for a teacher’s birthday or if a kid comes over who turns cranky…balloons for the win!
A string or paper ribbon is needed to secure the balloons and hold the sign where you want it. Again, you want this to be light. I’ve tried yarn and other decorative things but it can be too heavy.
Having plain balloons, in coordinating colors, is a great way to fill in space or make more of a balloon bouquet look.
How to Make Balloon Signs for a Party
Step 1
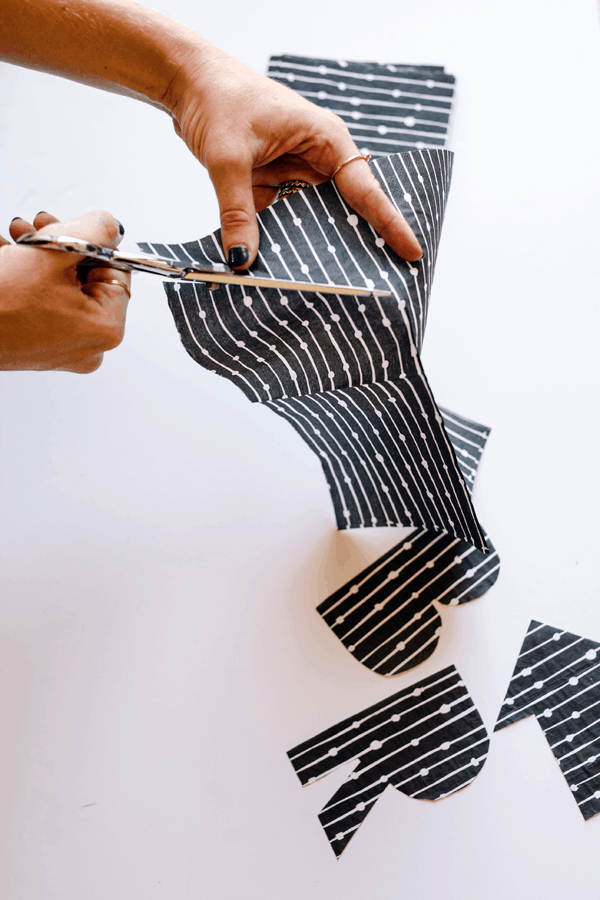
Cut out the letters.
You can free-hand the letters or you can create a stencil by printing out your phrase, in your desired font, on card stock.
Step 2
Blow up the balloons.
The tanks are really easy to use (Hint, push the nozzle down after you’ve slipped on the balloon…I wasted lots of helium figuring that one out. Duh).
Find the opening of the mylar balloon and slide it onto the nozzle. Press down and the balloon should start to fill. Once it is full, (try not to overfill, you want it to be taught and smooth) slide it off the nozzle and pinch the tab together.
Although some mylar balloons are self-sealing (ish), I like to tie the string around the tab, right away, to ensure a good seal. Or use a balloon clamp.
If you are blowing up a regular balloon, simply tie it off with a knot. This balloon tie tool makes it so easy and fast!
Step 3
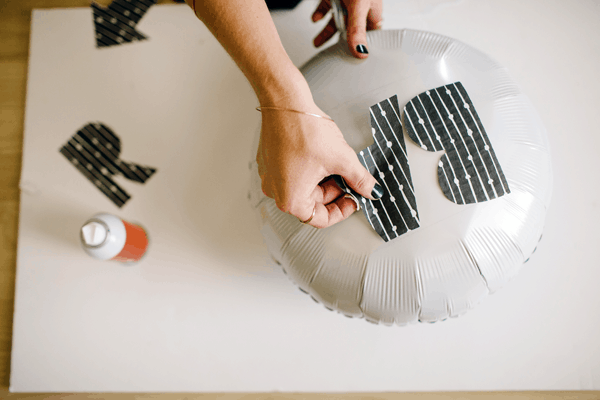
Next spray the backside of your napkin letters and stick them on the inflated mylar balloon. So easy. And so cute!
Keep in mind that spray adhesive is REALLY sticky. You need to do this part outside, it helps if you wear rubber gloves and be careful as you get to the later letters.
Your gloves or fingers will be sticky and you can potentially rip the napkin letter if you aren’t careful.
Also, be sure to start with the letter that is in the middle of the word to help with spacing.
Display around the party
As you can see, these balloon signs work best for words with just a few letters. You can also make them smaller to fit more but that can get pretty tedious.
You can use the message balloons in all kinds of ways throughout the party. As a welcome sign, or to direct people to the bar, this DIY balloon decoration is useful and adds a touch of whimsy.
Tips and Tricks
- Make these balloon signs the day of the party for best results. Sometimes, a balloon with a decoration added to it doesn’t float as long as a regular mylar balloon.
- You can make this balloon decoration without helium by using one of these balloon sticks.
- If you need to blow up a lot of regular balloons to create more decorations with, this balloon pump is the fastest way to do it. And it’s so cute!
Frequently Asked Questions
Yes! Because the circle balloons are fairly flat, you may be able to use painter’s tape to attach them to a wall.
No! You can blow up any mylar balloon by inserting a straw and blowing air into the hole. You can then add them to a balloon stick or hang them from something.
Where to Find a Helium Tank
You can find Balloon Time helium tanks at tons of stores. I picked this Jumbo Helium Tank at Party City but their site can help you find them at a store near you.
The Balloon Time site has all the information you need for using the tanks to create awesome balloon DIYS, party decor or even just making your kids smile.
They have info on everything from where to buy, how to use and how to recycle the tanks. PLUS they are a great resource for unique party ideas using helium-filled balloons!
The tanks are more expensive to buy on Amazon than in-store so pick one up on your next trip to Party City, Target or Walmart.
If you’ve ever wanted to incorporate your own personal touch into the parties you throw, this Balloon Decoration DIY is perfect for you. You can create homemade signs and decor with balloons in just minutes!
Birthday balloons are always a highlight at parties, especially when they are personalised. Sweet Balloons provides designs that make celebrations feel more unique.
The kids’ birthday balloon setup London by Sweet Balloons was colourful, fun, and perfectly themed.
very awesome you can enjoy your birthday with amazing wooden watches Canada