How to Make a Homemade Reed Diffuser for Essential Oils [DIY Reed DIffuser]
With this homemade DIY reed diffuser and your favorite essential oils, it’s easy to make the house smell amazing, naturally! It’s a simple DIY project to help you infuse your home with non-toxic aromatherapy.
This DIY Diffuser is so easy
You’ll be able to make a homemade Reed Diffuser with the step-by-step instructions below.
It makes me so happy when my friends come into the house and immediately remark that my house smells like a spa.
I use a scent diffuser just about every day. I like to roast veggies and ever since one of my son’s friends came over and said my house smelled like farts, I was like, OK, I gotta make sure my house smells better than that. I’m better than farts!
I love this simple DIY shower diffuser I made with lava stone or this battery-operated shower diffuser daily. And right now I have this DIY oil diffuser on my desk since I’ve maxed out my plugs with my computer and lamps.
This homemade reed diffuser is another great diffuser idea for my desk and beyond. With no electricity needed and some water and vodka, you can make your own quickly.
Making your own reed diffuser is an easy and inexpensive way to enjoy aromatherapy.
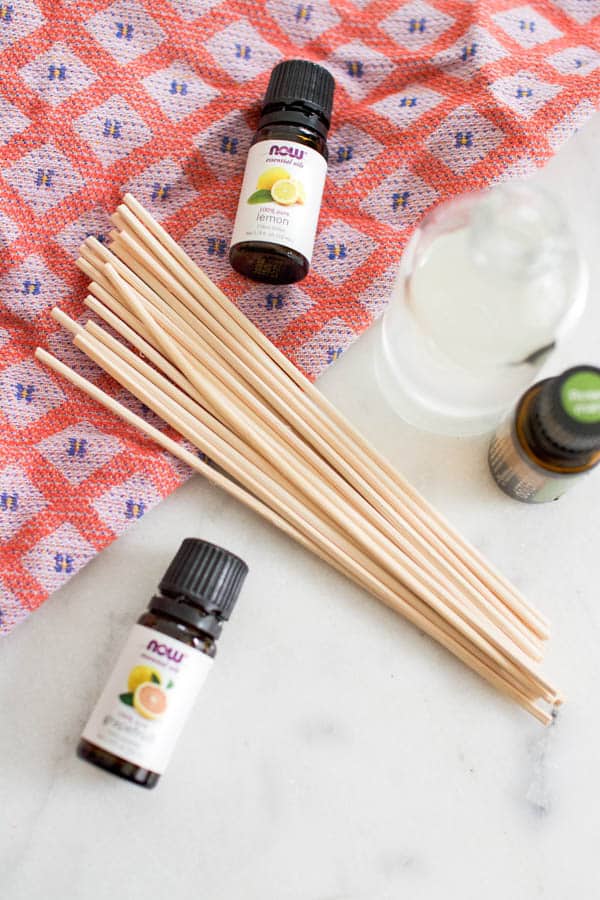
Supply Notes
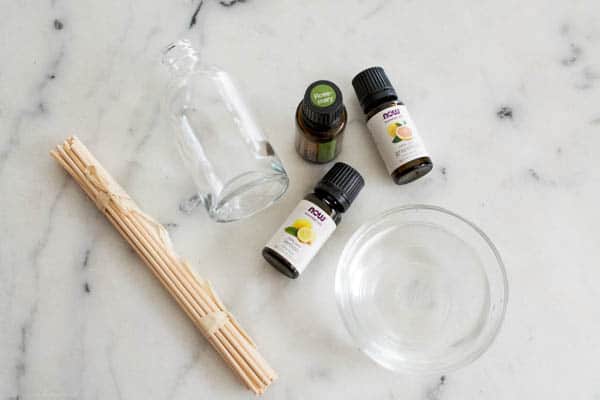
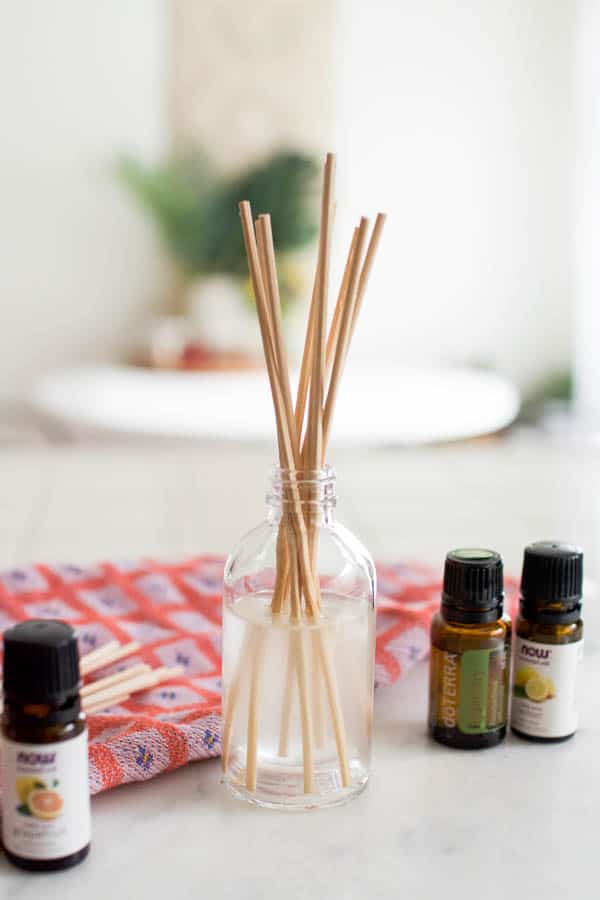
Wooden reeds are a necessity for this diffuser. They are readily available on Amazon and are made to let the oils and water creep up and out of the bottle spreading the yummy scents into the air.
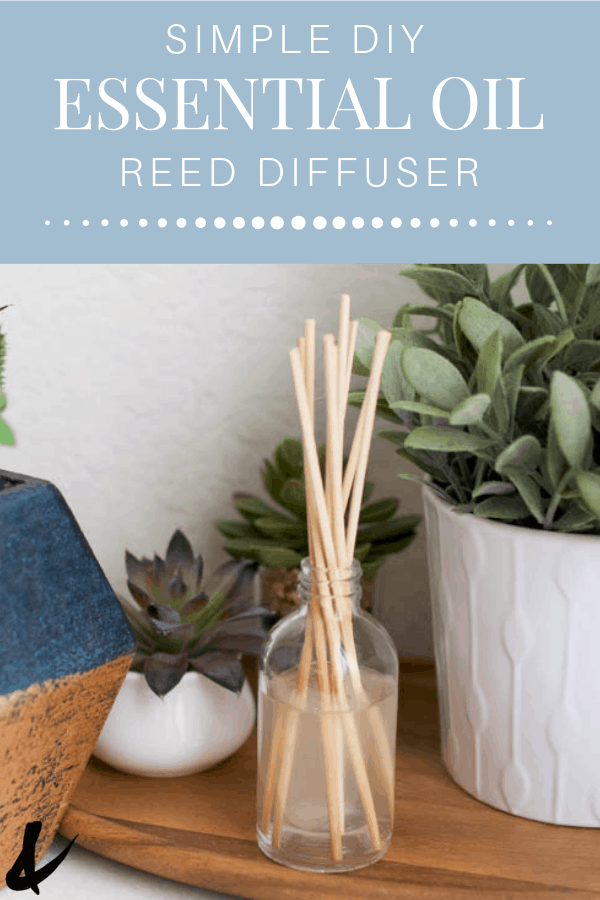
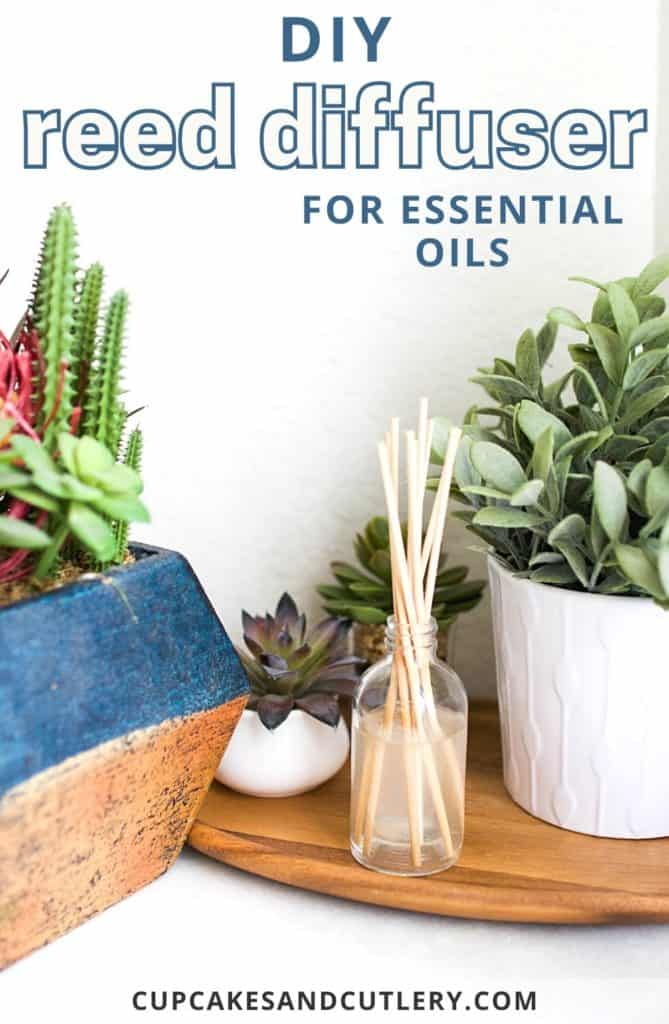
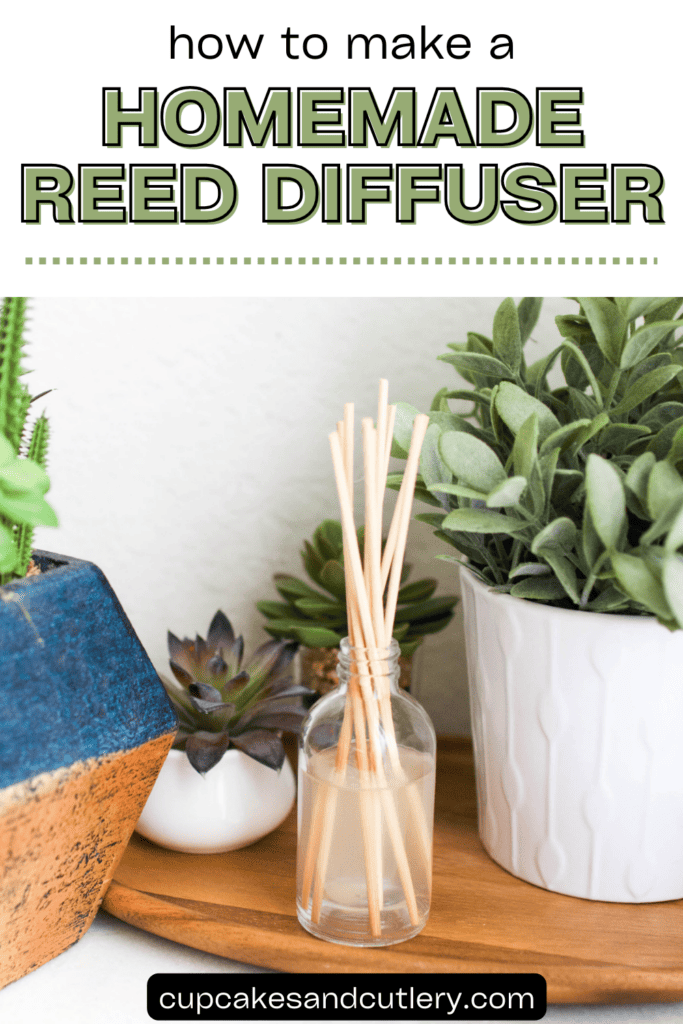
You can use any glass bottle you have at home or one you buy. The reeds should stick out the top but you can use a variety of shapes.
20-30 drops of Essential Oils, in any combination, will make your room smell amazing!
A small metal funnel makes it easy to add the water and oils to the bottle before you add the reeds. But you can also just use whatever you have on hand.
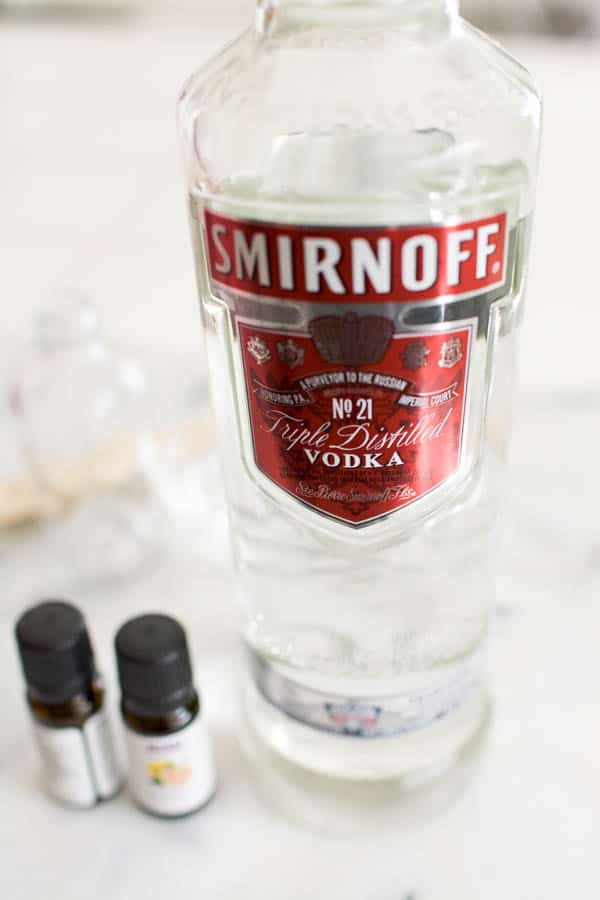
I used 1 TBSP vodka (since you aren’t drinking this you can use something super cheap).
You can also use witch hazel but vodka works just as great and you probably have some hanging out in your kitchen. (If you’re like me, you love easy vodka recipes).
Vodka is used to help the essential oils disperse better in the water. Oil and water don’t mix as you learned in science class. I like using vodka since it has less of an odor than witch hazel.
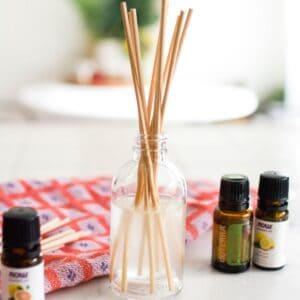
How to Make a DIY Reed Diffuser
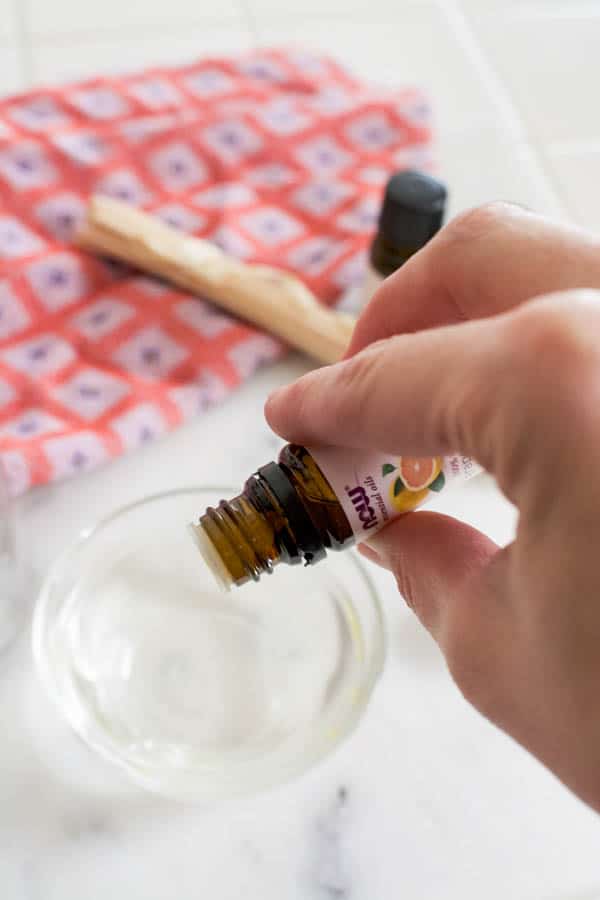
Add the vodka and essential oils to the glass bottle. Yeah, I know that this photo shows the water in a bowl.
But I had forgotten it works better to have it in a bottle so you can shake it up really well. Use your thumb or a few layers of paper towels to cover the hole and give it a really good shake.
I added about 20 drops of the essential oils. This easy DIY reed diffuser is a great way to freshen up a space but just know, it does not last as long as a plug-in diffuser (this diffuser is my favorite!).
You can use the same essential oil recipe I use in my favorite room spray if you’re not sure what to use. Or if it’s near Christmas you can use my holiday room spray blend.
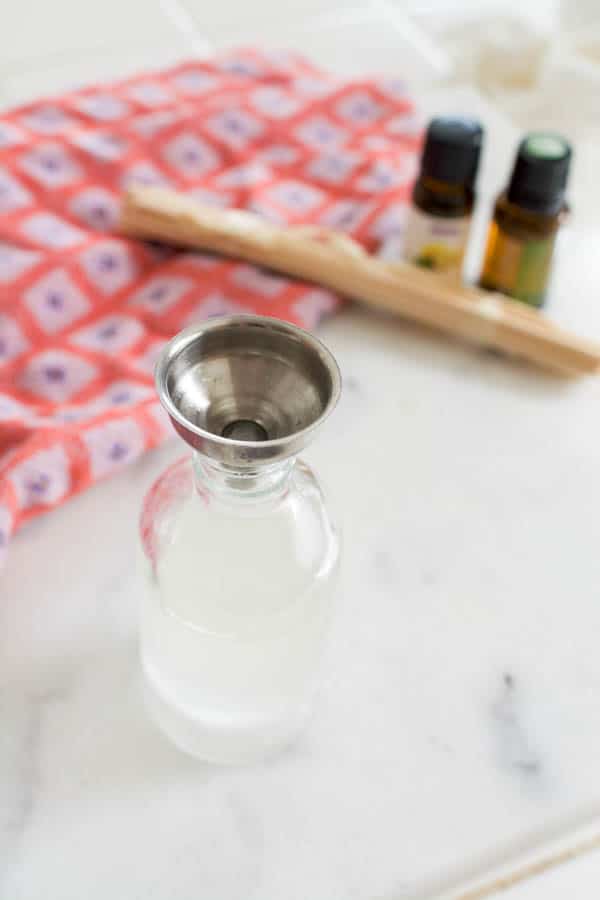
Use the funnel to easily add water to the bottle. And shake it all up really good again.
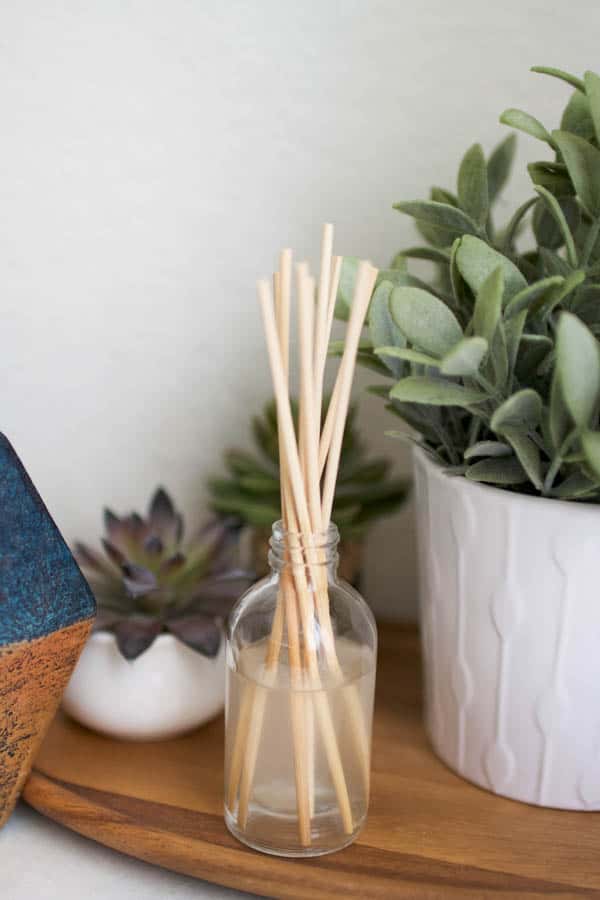
Once you have the oil blend ready, you can add the reeds to the glass bottle.
How to Use Your Reed Diffuser
Soak one end of the reeds, in the oil mixture, for about 5 minutes.
Then turn them over and put them back in the bottle. Your DIY diffuser with reeds is good to go!

For this essential oil blend, I wanted something that was refreshing and full of yummy and bright citrus flavor. I added a touch of rosemary to amp up the freshness.
Tips and Tricks
- You can buy ready-made reed diffusers, but I like this DIY version since it’s non-toxic and doesn’t have any other additives.
- You can embellish the bottle if this is a little too plain for you.
- Head over to my Essential Oils Pinterest Board to find inspiration and recipes for oil blends.
- Some tutorials call for a carrier oil instead of water and vodka. You can use whatever you have and prefer.
- Your nose will probably get used to the scent before any guests.
- It will take a few hours for the scent to really climb the reeds and make your room smell great.
- The stronger the oil, the stronger the smell! Use really bold scents if you want this to smell intense.
Frequently Asked Questions
The reeds should be changed weekly (or as needed) to keep the scent as strong as possible while you should replace the essential oil blend monthly.
Turning the reeds over, to allow the side that has been soaking in the oil-infused water will always help to refresh the scent.
The water and vodka with the oils will evaporate over about a week. To keep your scent fresh, simply follow the direction above and remake as often as needed.
As mentioned above, you can use strong-smelling oils in your blend. You can also add more reeds that will help disperse the scent into the room.
This simple essential oil reed diffuser is also a cute DIY gift idea for friends and neighbors.
I love how simple this DIY reed diffuser looks. It blends into all types of home decor and works in any room. It gives off a subtle scent and is a great way to add aromatherapy around your home without having to use an electric diffuser.
This DIY Reed Diffuser is my favorite!
Related Posts
If you love to use aromatherapy in your home and are looking for more easy ways to diffuse your favorite oils, I have more posts for you to check out.
- Throw a Wine and Oils Party – Host a fun Wine and Essential Oils party for your oil-loving friends! A little wine tasting and some custom oil blending, this is a fun party idea for any time of year.
- DIY Keychain for Oils – Take your aromatherapy oils with you by making a simple DIY Essential Oil Keychain. Just put a few drops on the leather tassel and enjoy the scent as you drive or run errands!
- Essential Oil Good Vibes Spray – Don’t want to make a diffuser, try your hand at creating an essential oil blend to spray throughout your home. Using a similar technique to the DIY reed diffuser above, you’ll love this Essential Oil Room Spray.
DIY Reed Diffuser
Equipment
- Glass Bottle
- Bundle of Reeds
- Mini Funnel
Ingredients
- 1 small glass jar
- 1 bundle wooden reeds
- essential oils (20-30 drops of your favorite blend)
- 1 small metal funnel
- 1 TBSP vodka (or Witch Hazel)
- 1/4 cup water
Instructions
- Add the vodka and essential oils to the glass bottle.
- Use your thumb or folded paper towels to cover the opening and shake really well.
- Use the small metal funnel to add the 1/4 cup of water to the bottle, then shake again.
- Add as many wooden reeds as will fit into the opening of the glass bottle and let them soak for 5 minutes.
- Turn the wooden reeds over in the glass bottle and place where you want to enjoy your DIY Reed Diffuser.
Notes
- You can buy ready-made reed diffusers, but I like this DIY version since it’s non-toxic and doesn’t have any other additives.
- You can embellish the bottle if this is a little too plain for you.
- Head over to my Essential Oils Pinterest Board to find inspiration and recipes for oil blends.
- Some tutorials call for a carrier oil instead of water and vodka. You can use whatever you have and prefer.
- Your nose will probably get used to the scent before any guests.
- It will take a few hours for the scent to really climb the reeds and make your room smell great.
- The stronger the oil, the stronger the smell! Use really bold scents if you want this to smell intense.
- To keep your room smelling fresh, change the reeds once a week and the oils, water and vodka at least monthly.
Originally posted February 13, 2019. This post has been updated with better instructions and more information to help you make your own diffuser!
Can you use plastic bottles & funnel to mix this?
I didn’t think a diy reed diffuser would be so easy to make! I really need to give this a try too, since my apartment is in an older building. Thanks for sharing!
We love to use diffusers in our house. I can’t wait to try this diy diffuser!
This diy reed diffuser is such a great ideas! Thank you for this easy and affordable idea.
I have a particular (expensive) reed diffuser that I love and am out of, and cannot afford to replace. I never in a million years would have thought to make a diy reed diffuser!!! This is brilliant!
It’s so easy to make this diy reed diffuser! With a home full of boys and dogs, I need all of the help I can get! This is such an easy way to add freshness to every room without the chemicals or breaking the bank with store-bought fresheners.