How to Make a Pinata Cake Filled with Candy
Topped with a hard, white chocolate dome, this Pinata Cake Filled with Candy is a show-stopping dessert that is easier than it looks! Because who doesn’t love a surprise? Especially when it’s candy!
A candy surprise cake is awesome
There is a little bit of an issue with what to call this cake. Pinata cake makes sense since you crack it open to find candy.
Smash cake also makes sense. But those sometimes mean the cakes they make for 1 years olds to make a mess with on their first birthdays.
A Surprise Cake sounds good because from the outside you can’t tell that the center is full of candy.
And a Chocolate Dome Cake works because it’s covered by a hard shell that looks like a dome.
Related: Pinata Cupcakes – Cupcakes with a sprinkles surprise inside!
Whatever you want to call it, it’s AMAZING!
It’s such a fun cake idea for kid’s parties and it’s not all that hard to make! And trust me, I do not have any baking or decorating skills!
I first saw this cake idea in a Donna Hay magazine. The hard chocolate shell looked so smooth and meant I wouldn’t have to worry too much about what my cake decorating looked like.
But when I turned the page and realized that the dome was actually hiding a frosted cake full of candy, I instantly needed to try it for my son’s Lego Dance Party birthday party.
I reached out to my friend Kristin, who owned Meringue Bake Shop. And she made one for me.
It was a total hit. I mean, what kid wouldn’t want to whack a hard chocolate shell to get to that candy surprise inside? So I knew I needed to share a tutorial.

How to Make a Cake With Candy Inside
There are two parts to making this cake. And yes, it will take a while. There is a lot of waiting and chilling time involved so plan ahead!
Ingredients
For the cake
- Boxed Cake Mix (plus any ingredients called for on the box)
- Canned Frosting
- Candy
For the chocolate shell
- Wilton Candy Melts (in 2 colors if doing a heart design: light pink and dark pink)
If doing chocolate instead of white chocolate you still need to use the melts. Do not use chocolate chips.
Tools
How to Make a Hard Chocolate Dome
Start out by making the chocolate shell that will cover the frosted cake and hide the candy surprise.
If you are doing a heart design, you’ll need two colors. You’ll only need a small portion of the melts for the hearts. This does add on time and is a little more difficult. Skip it if it feels overwhelming.
Put your bowl in the freezer for a few minutes before you get started. Leave it there until you’re ready to add the chocolate.
Use a little bit of oil to grease the bowl. Any kind will work. Add a small amount (like 1/2 tsp or less) to the bowl. Then use a paper towel to wipe the entire inside of the bowl, up to the edge. Make sure to soak up any leftover oil that pools.
Use a whole bag of the colored melts to make the chocolate dome.
Follow the directions on the bag of the candy melts for melting.
If doing the heart design, paint them on first. Kristin used the end of a cake pop stick and dabbed 3 dots to make a simple heart shape. Put the bowl in the fridge for about 10 minutes to let the hearts to set up.
Next, take the bowl out of the fridge and pour the second color melted candy melts into the bowl.
Tilt and swirl the bowl until the inside is covered completely. It will set quickly. Try and make the edges of the bowl opening a little thicker so it is a little bit more sturdy and will be able to stand up on the cake.
If it’s not swirling well, you can use a spatula to “paint” the chocolate on the bowl. Your goal is to create a thin enough chocolate layer so it doesn’t fall back down into the bowl, but thick enough that it won’t be too fragile and crack easily.
It might be best to do an initial layer and put the bowl in the freezer for about 10 minutes. And then do a second layer. You may need to re-melt the chocolate. Use small increments so you don’t overcook it.
Let it sit in the freezer for a few minutes to harden up a second layer. Then set out on the counter for about 5 minutes.
To unmold, you will carefully tip the bowl on the side and use your other hand to try to guide the chocolate shell out of the bowl.
Watch this video on Youtube that shows making a thin chocolate shell. She’s using a silicone mold so it’s slightly different but you can see her technique for spreading out the chocolate.
Make A Candy Filled Cake
You can bake a cake from scratch, but I think it is just as easy to use a boxed cake mix. There are tons of flavors to choose from and it keeps things quick and easy.
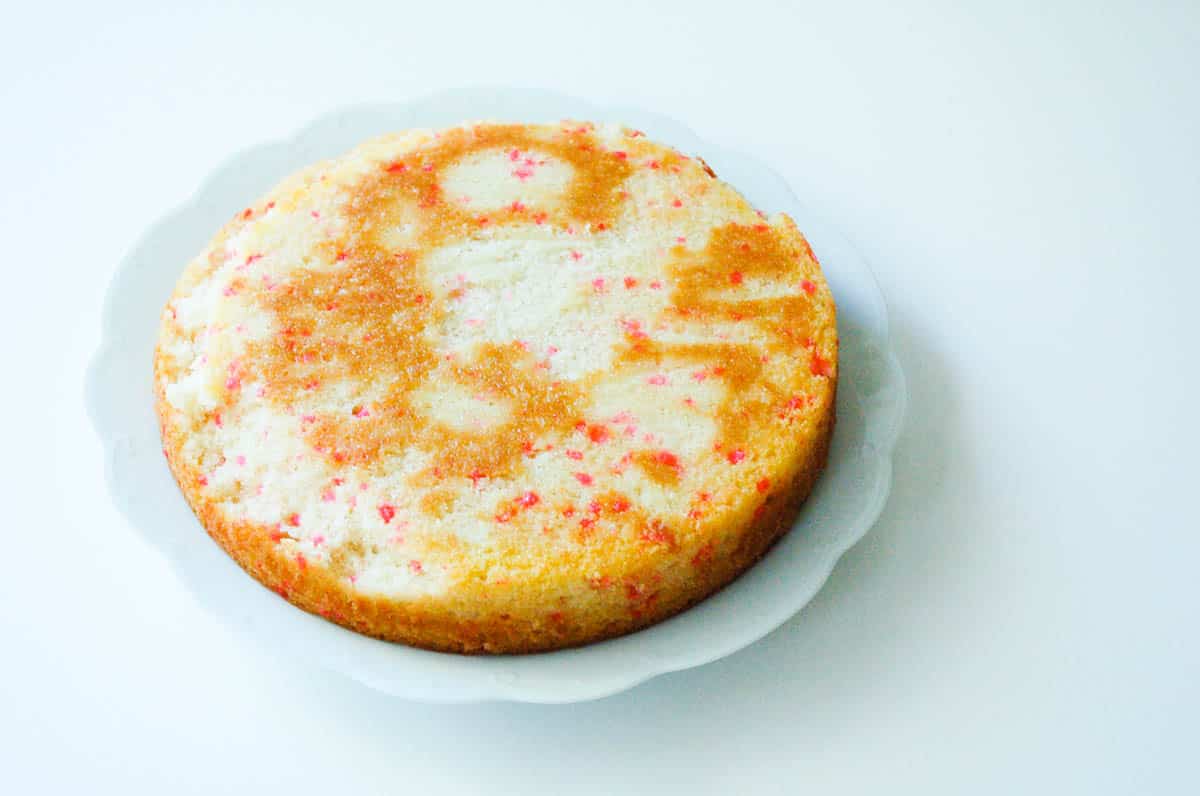
Follow the directions on the back of the box to make and bake the cake.
Let the cake cool completely.
Because it’s going to be totally covered, it doesn’t really matter if it’s level or if some stuck to the pan. Hallelujah.
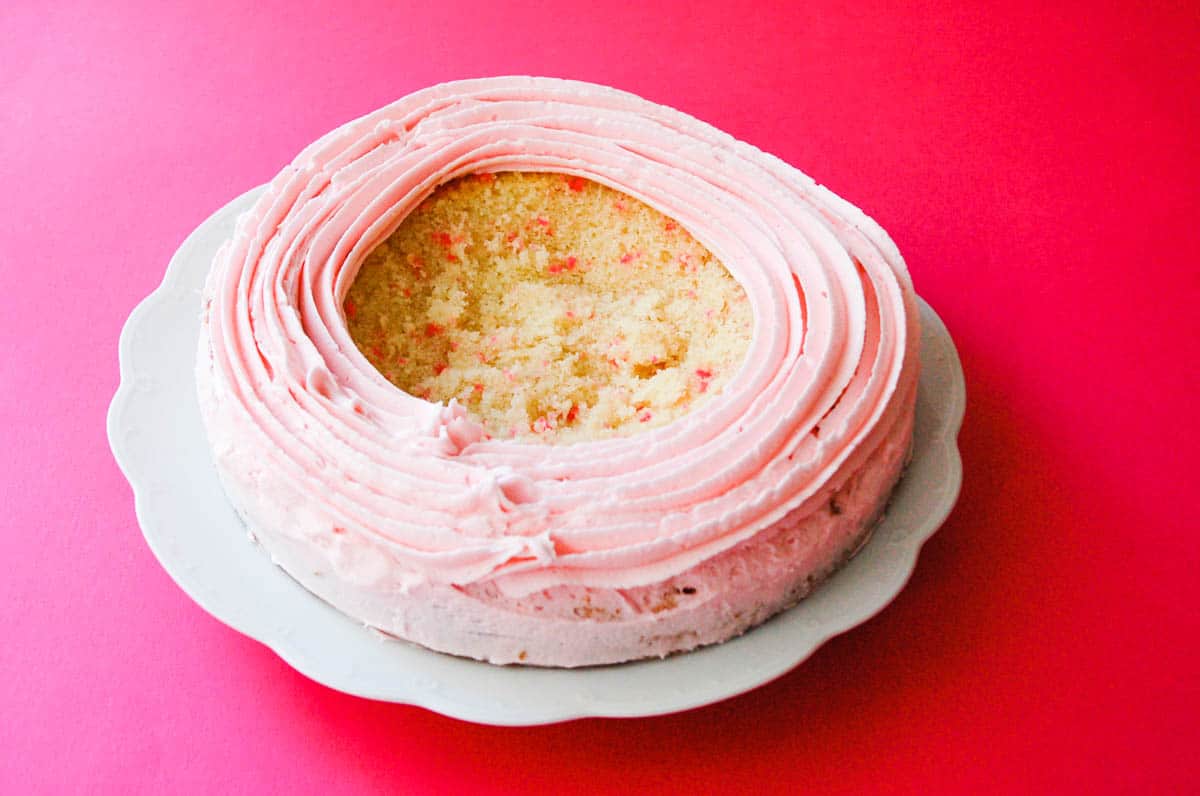
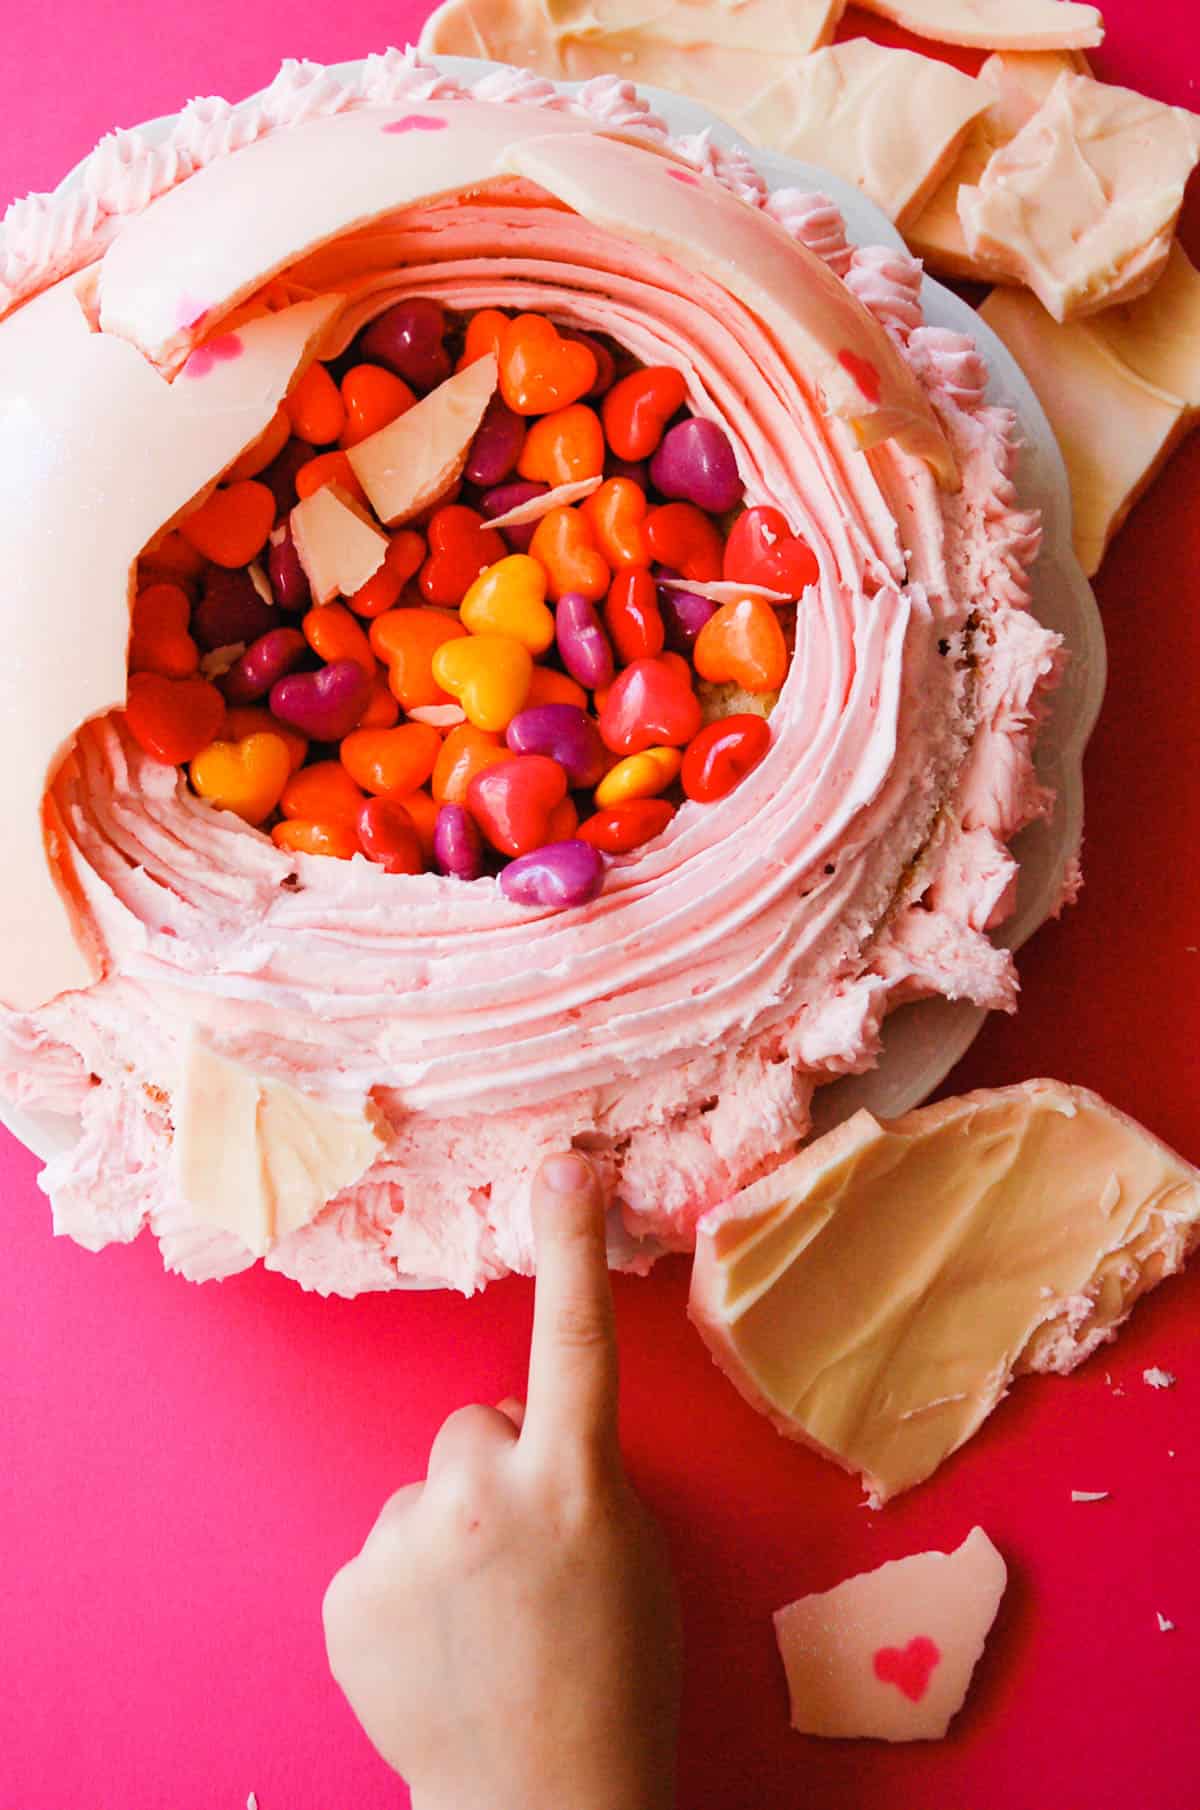
To create more space for the candy, you can carefully make a well in the cooled cake by scooping out the center. (Be sure to cram those leftover cake pieces into your mouth at this point. We don’t want anything to go to waste!)
Frost the sides of the cake. Again, no need to look nice, it’s mostly just for flavor. You can use a vanilla buttercream, but store-bought keeps things easy.
With a large piping tip, frost around the top edges of the cake. This will help keep the candy in the center and also add a little bit of height so you can fit more in.
Again, if you are also going to eat the cake, you want frosting! Frosting makes everything better!
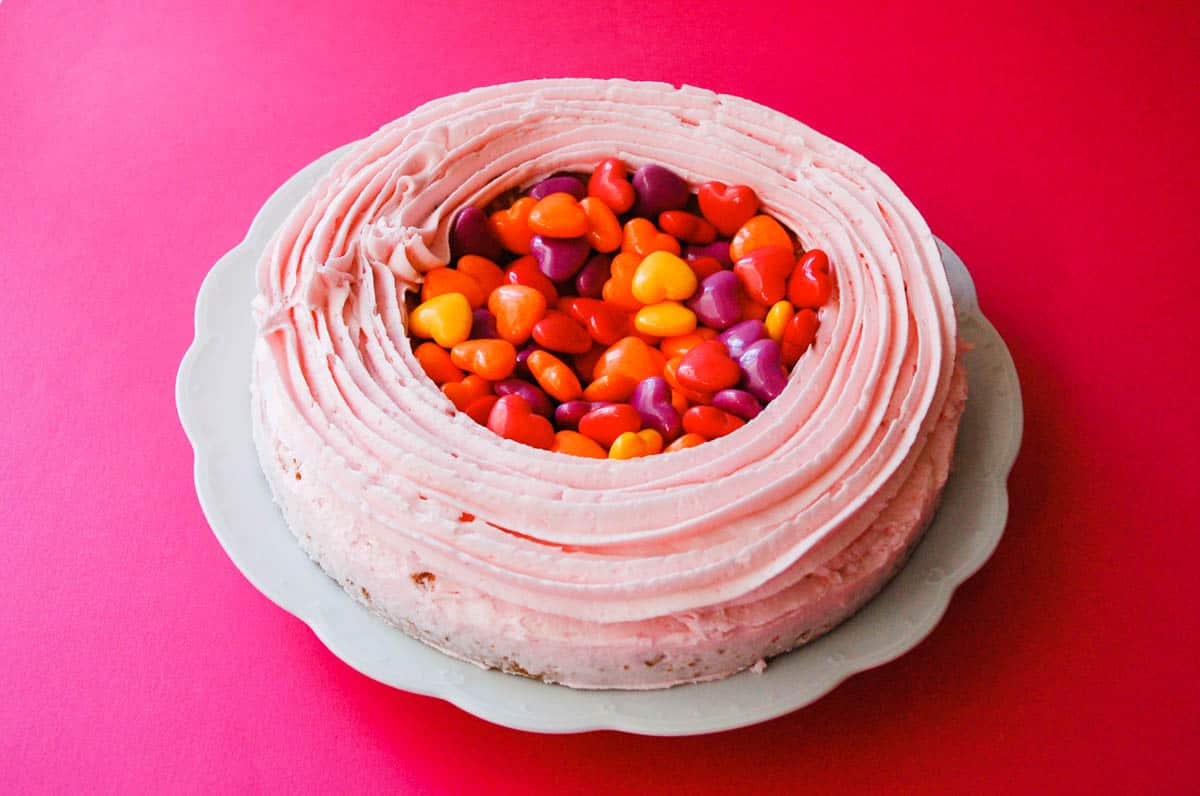
Add the candy to the center. I used my absolute favorite heart-shaped candy that is only out at Valentine’s Day. But they are not chewable.
Best Candy for a Pinata Cake
The best candy for a pinata cake would be something easy to eat, like M&Ms, Skittles, gummy candies, or even SweeTarts. Conversation Hearts would be darling for this Valentine’s Day version too.
Carefully place the dome over the cake. Use frosting to pipe around the edges to hide the seam between the chocolate shell and the cake below.
Again, you don’t have to be a great decorator. As long as you have the decorative tip, you literally are just making dots. it does all the decorative work for you.
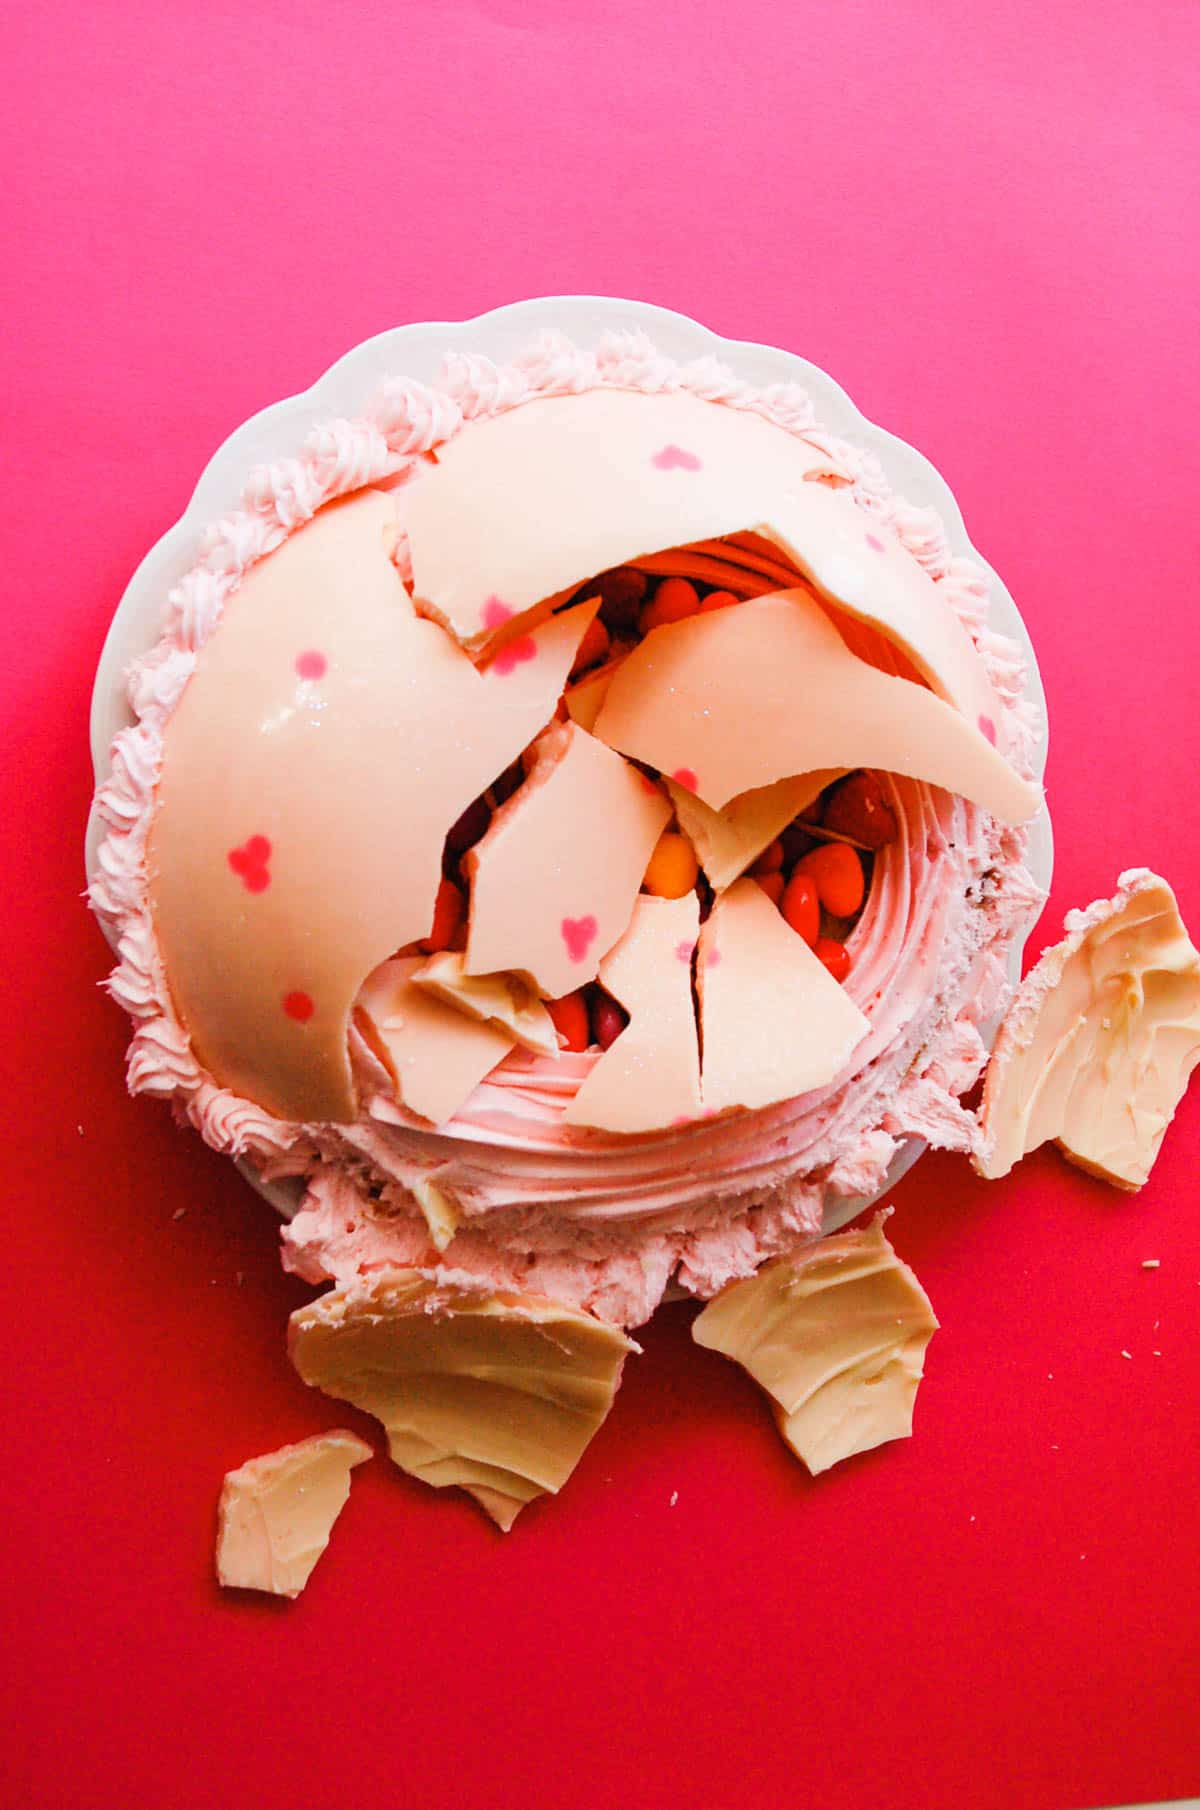
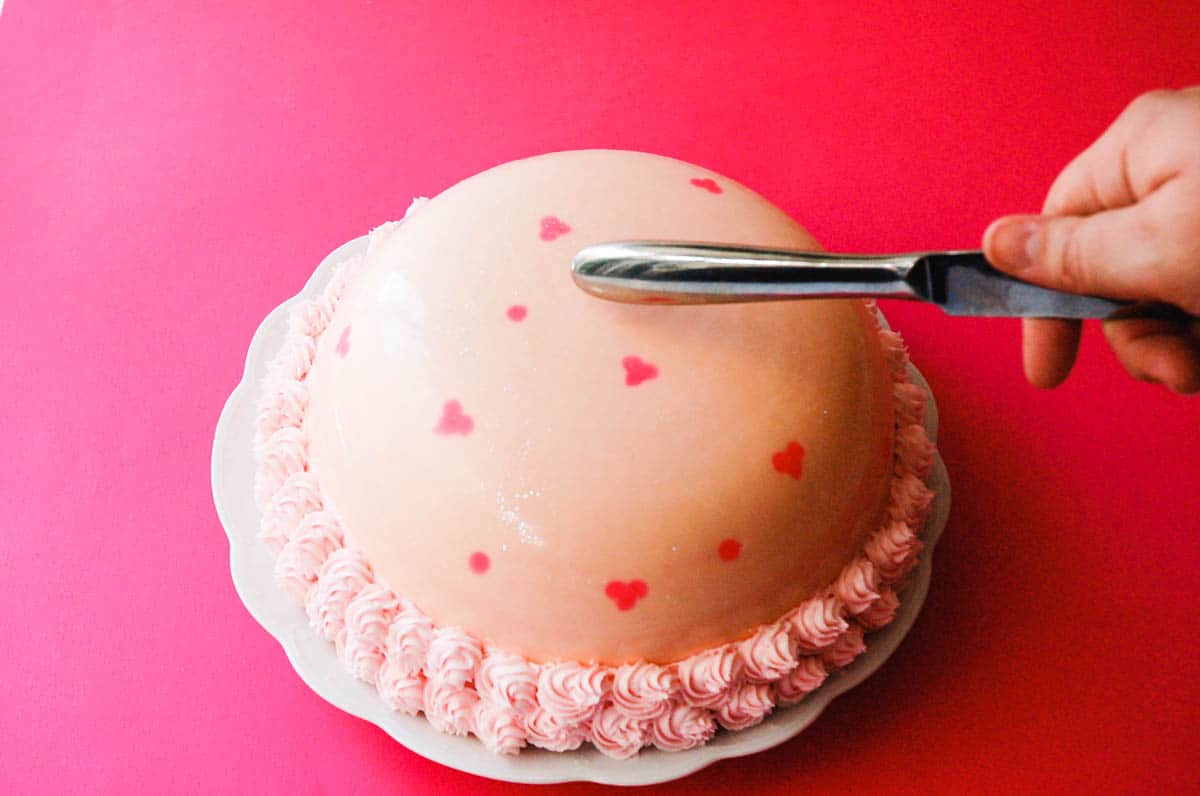
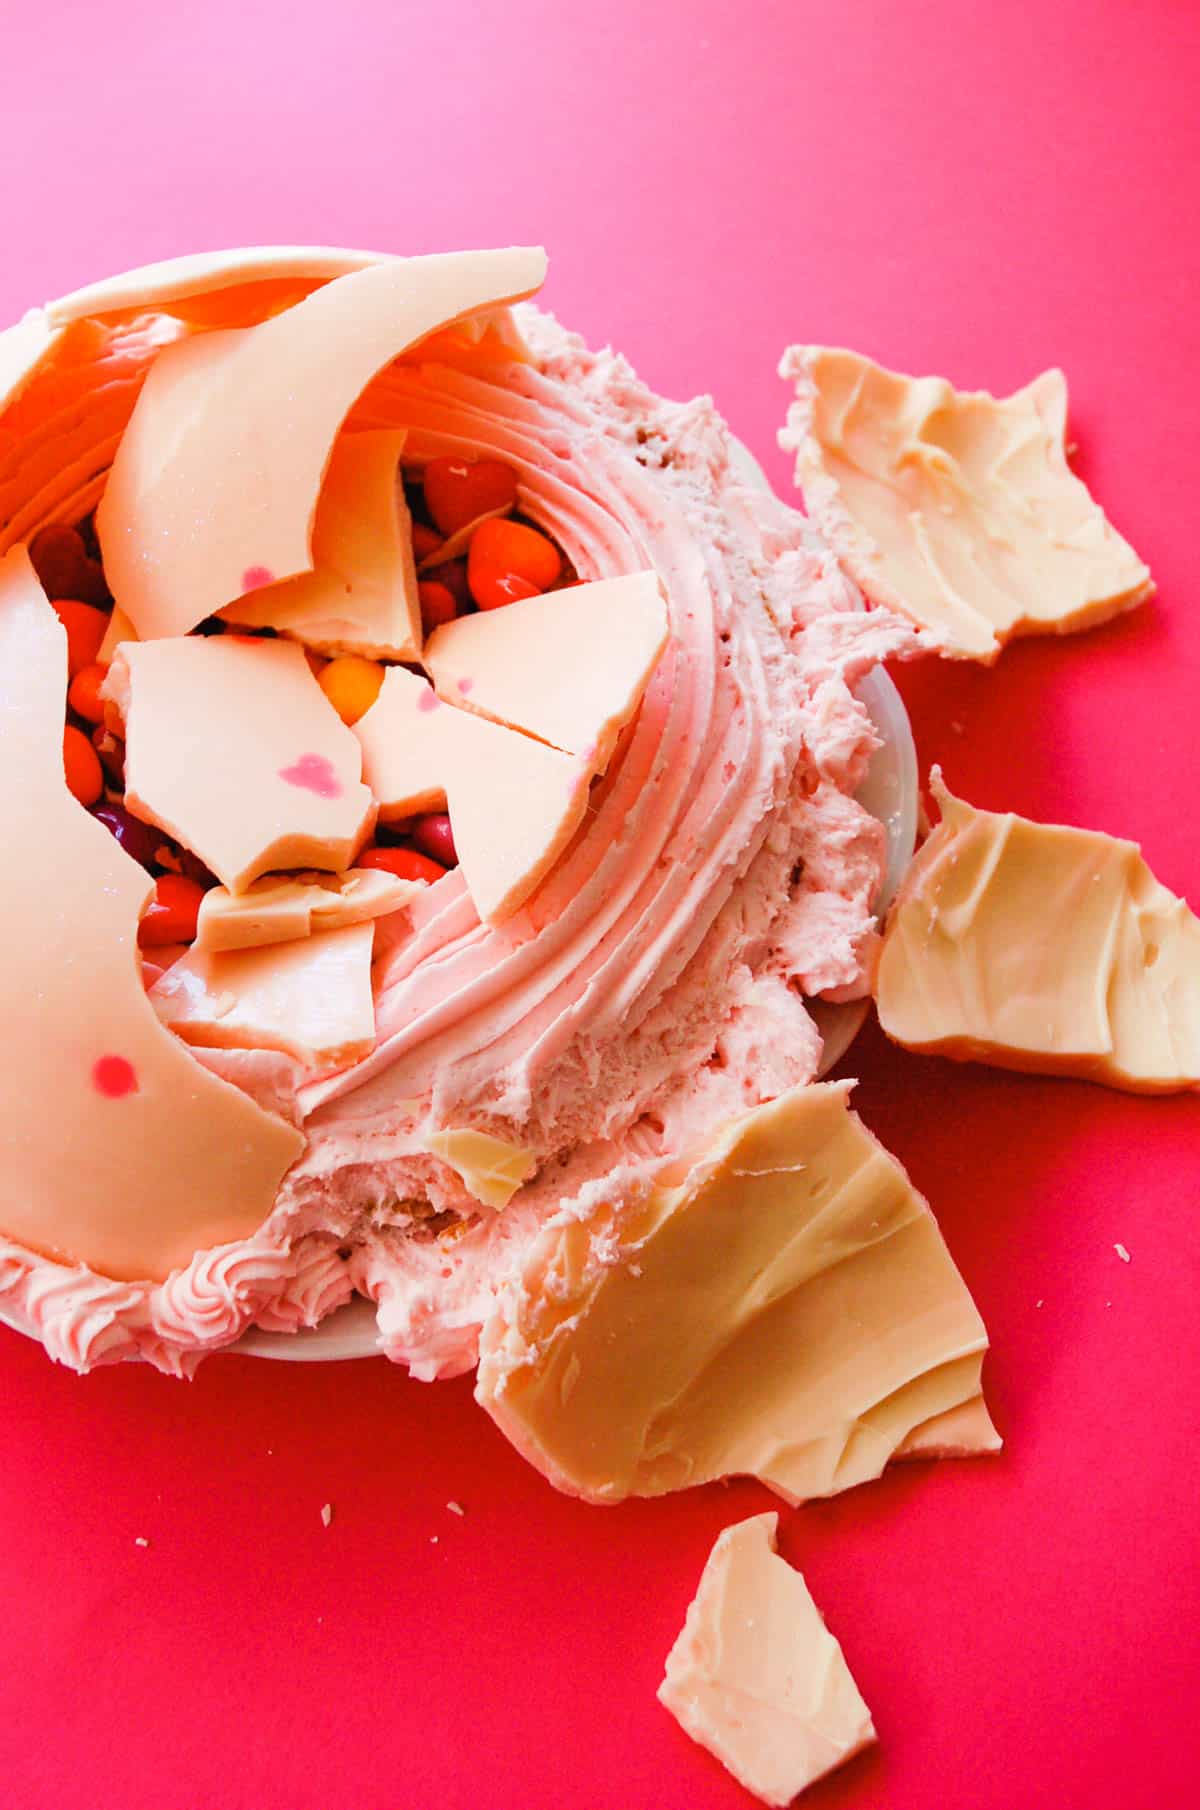
We used the back of a butter knife to break this pinata cake open but we’ve also used toy hammers in the past which was really fun!
So much fun, right?!
You can see in this photo how thick the chocolate dome is. It will be much sturdier if you do it on the thicker side like this.
There is something so satisfying about smashing a cake open with a reveal of candies!
If you’re having a kid’s party soon, you have to try this! A bash cake, smash cake, chocolate dome cake is the best idea!
It’s literally a tabletop pinata that is edible too! If you’ve ever wondered how to make a pinata cake, now you know how easy it is!
More Fun Party Dessert Ideas
- Faux Croquembouche with Donut Holes – This fun dessert makes a great centerpiece and is extra fun for brunch!
- 3 Tiered Brownie Cake – For the kid who doesn’t love cake, try a brownie cake! A simple dusting of powdered sugar is the only decoration you need.
- A Pie Cake! It’s Pie Baked Inside a Cake! – Again, this sounds crazy hard but is so easy! You’ve got to give this a try!

Now you know how to make a pinata cake. Make one for your next kid’s party!
Love the tutorial. When I saw this on your birthday post, I thought it was amazing, but was disappointed that it was from a bakery (thinking we could never find one in Minneapolis). But then you all did this! Perfect for my little soon to be 2-year-old’s birthday in late April.
You should give it a try!!! The kids absolutely love it! The parents are appalled which is even more awesome. It is quite messy but if you can do it outside, clean up is pretty easy.