Easy DIY Wire Word Art for Halloween
Give your DIY Halloween decor a twist! This wire wall sign couldn’t be easier! If you are not a holiday superfan, this easy Halloween DIY wire word art is for you. You can make this “boo”-tiful in minutes and it just takes 2 products. This easy homemade decoration looks cute and can be made while watching your favorite TV program.
Cute DIY Wire Word Art for Halloween
This DIY wire word art sign is as spooky as I get for Halloween. And it’s one of my favorite Easy Halloween Party Ideas that you can try out this year!
I’m a scaredy-cat who would prefer to stay home on Halloween, not answer the door and be safe in my bed. But I have kids, I’m an adult and I’m not boring. (Ok, the last one might be debatable).
Twisting the wire means you can create whatever word of phrase you want as long as you can do it in cursive. “Boo” is nice and short so it works really well, but you can even try out names if you want to personalize your decor even more.
This is the perfect easy Halloween party decoration especially if you don’t love guts and gore.
Supplies
To make your own DIY Halloween decoration, you will need just a few supplies.
That’s it!
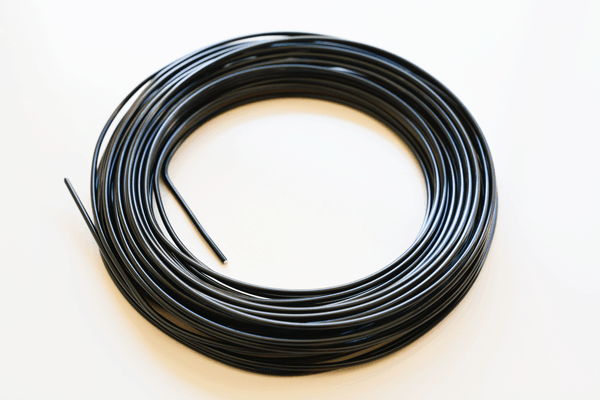
Of course you can use any color wire, but I love that black and white graphic look for Halloween decorating. So I had to use black wire.
My wire was 12 gauge. Why does that make me think of rap songs and shotguns?
You can use thicker wire if you want, but you still need to be able to twist it easily, so keep that in mind.
This 12 gauge wire was easy to bend, holds it’s shape really well, and doesn’t get all kinked up in the process.
A thinner gauge wire would also probably work, but the thinner the wire, the less it will stand out against the wall.
Scroll down to find a printable how-to card with all the detailed instructions for this craft idea.
How to Make a “Boo” Wall Sign
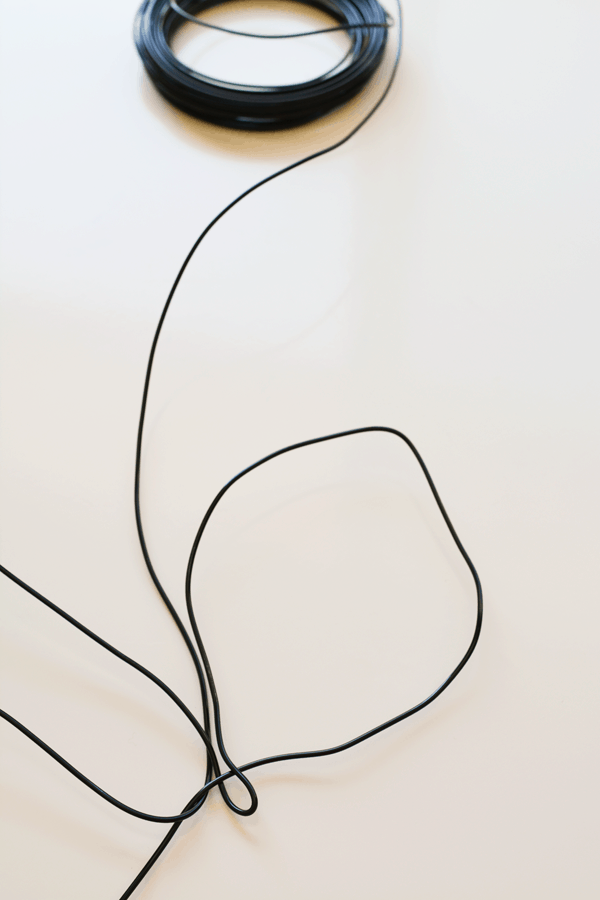
As you twist it together to make the word “boo”, think of how you draw cursive letters. Take it slow and look at how it reads as you twist it.
If you need to, print out the word you are twisting on paper so you can follow along as you bend and have it visually in front of you.
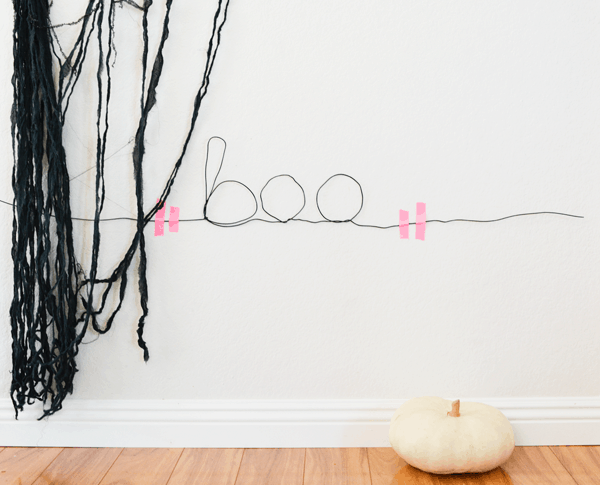
Also, I left a lot of extra wire at the front and at the end which is how I taped the DIY Halloween sign to the wall.
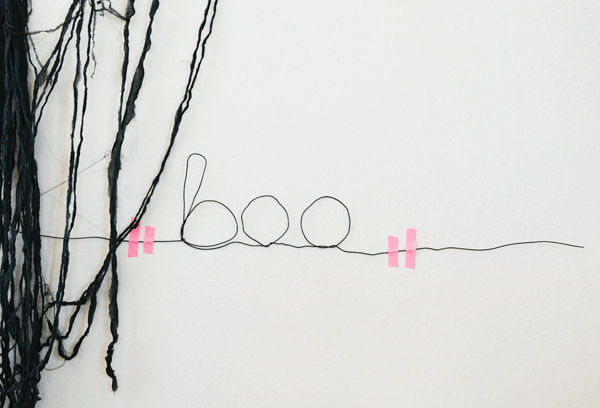
I kind of love it. It’s graphic, it’s kind of cute, it’s easy and it took me only a minute. Can’t stop, won’t stop with bright pink, FYI.
I wouldn’t say I am a skilled crafter so my letters aren’t super smooth. In this case, thanks to Halloween having spooky vibes, the jagged circles give it a bit of a creepy quality.
You can hang it up on your wall with pink tape as I did. Or you can hammer in nails to hang the “o’s” off of. Up to you.
Since it’s just going to be up for a very short while I definitely didn’t want to hammer nails into the wall.
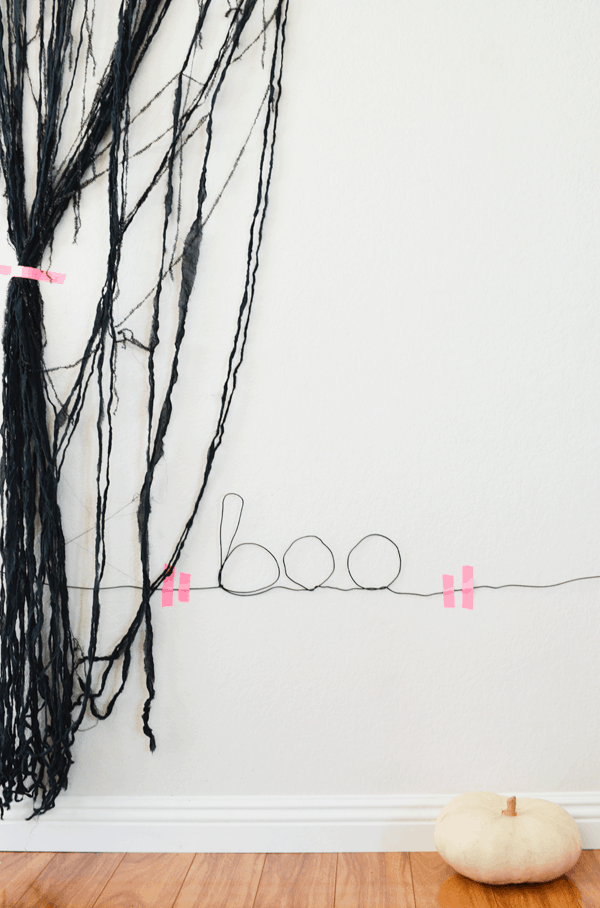
I just styled this easy wall sign with a faux white pumpkin and a creepy Halloween fabric. Such a cute simple look.
And now that you know how easy these wire word art signs for Halloween are, you can make them for anything.
Kind of adorbs for a kid’s name to hang in their room, right? Maybe twisted into “welcome” for by your front door.
And I would also love to spell out “happy birthday” for a celebratory garland.
If you made one of these DIY wire signs, what would it say?
More Halloween Decorating Ideas
- Vampire Teeth Mobile
- Vampire Teeth Garland
- Pumpkin Faced Oranges
- Homemade Halloween Candles
- Fabric Bugs
And don’t forget to go check out this Cute and Creepy Zombie Party.
Plus Buzzfeed has 31 Last-Minute Halloween Hacks for you to check out.

DIY Wire Word Art Sign for Halloween
Equipment
- Heavy Duty Scissors
Ingredients
- Black Craft Wire
- Painter’s Tape
Instructions
- Leave a long length of wire then begin your first letter.
- To make letters, you can either print out a guide using a Word document or you can freeform cursive letters.
- Leave a long length of wire at the end of the word as well.
- To hang, you can either use painter’s tape like I did or you can use a few nails to hang the "o’s" on.
so fun . . sharing today on my biz page! ;)
So simple. So cute.
Oh, dear. These are too cute!
(I lovelovelove Halloween decor and am proud to say that I’ve passed the obsession onto my kids! That’s a win, right?! :))
this is awesome! have any extra wire? :) i want one!
What a cute idea..so clever and easy! and affordable!
Jacqueline
http://www.purelypeanut.com
Love love love this. I’m scared of creepy Halloween decor and totally act like a baby.. no scary movies in this house!
Simple, but cool……my kind of crafting!
booy-yah!! easy and simple but cute and effective is right up my alley, sister. and yay to hot pink tape 4-eva. yeah, i guess i’d spell Boo-ya! or my boo… haha xo
Very cute!
Cute! I’m not so crafty but I think I could swing this!
Betsy that is what most of my crafts are like. I like to be crafty but I like to keep things easy and simple. :)
You come up with the best and easiest DIY projects ever. Love this and love how doable it is.
Thanks Jessica! I like to come up with things that everyone can do!