DIY Bracelets with Knotted Yarn
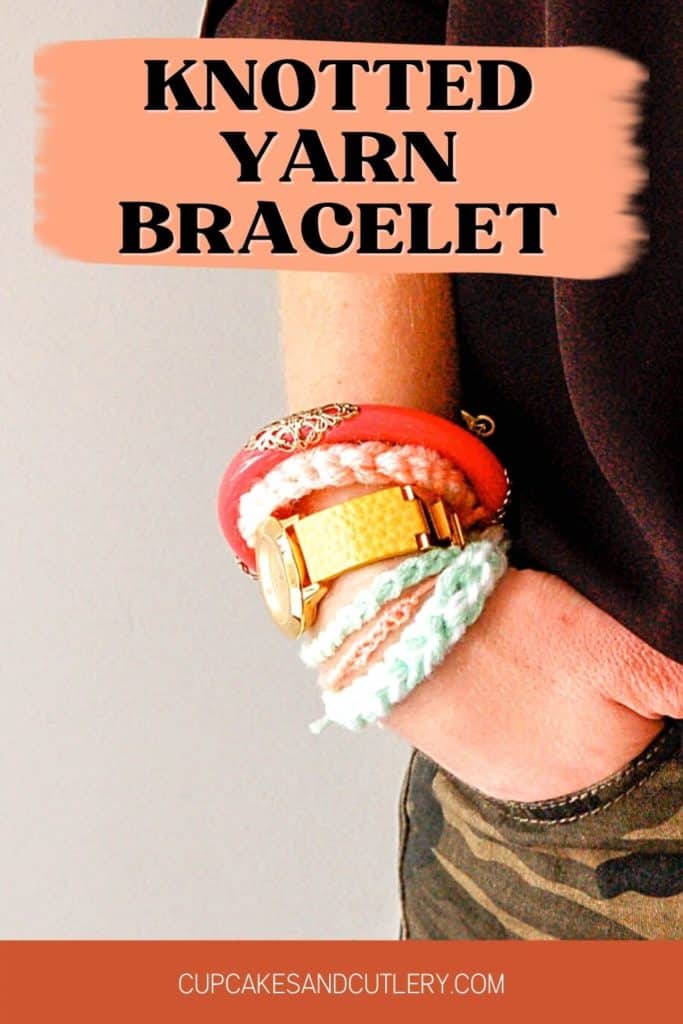
Want to know how to make a bracelet with one piece of string or yarn? It’s so easy! With a few simple knots, you can make an adjustable bracelet in just minutes! This Knotted Yarn Bracelet is a great craft for teens!
I really like to knot things. And I can’t stop. I’ve used these particular yarn garlands to decorate my house, to decorate parties and now I’m using the same easy technique to make bracelets.
Why Make Easy Yarn Bracelets
Easy handmade bracelets are a good idea! You only need a few supplies (which you might already have on hand) and they take just a few minutes.
You can customize them and make them whatever color you want. I originally made these for St. Patrick’s Day because I didn’t have any green!
It’s a great activity or craft to do with kids or teens and they are inexpensive to make! I also love that they are a little bit different from traditional friendship bracelets.
These DIY bracelets look cool and are totally beginner-level.
Supplies
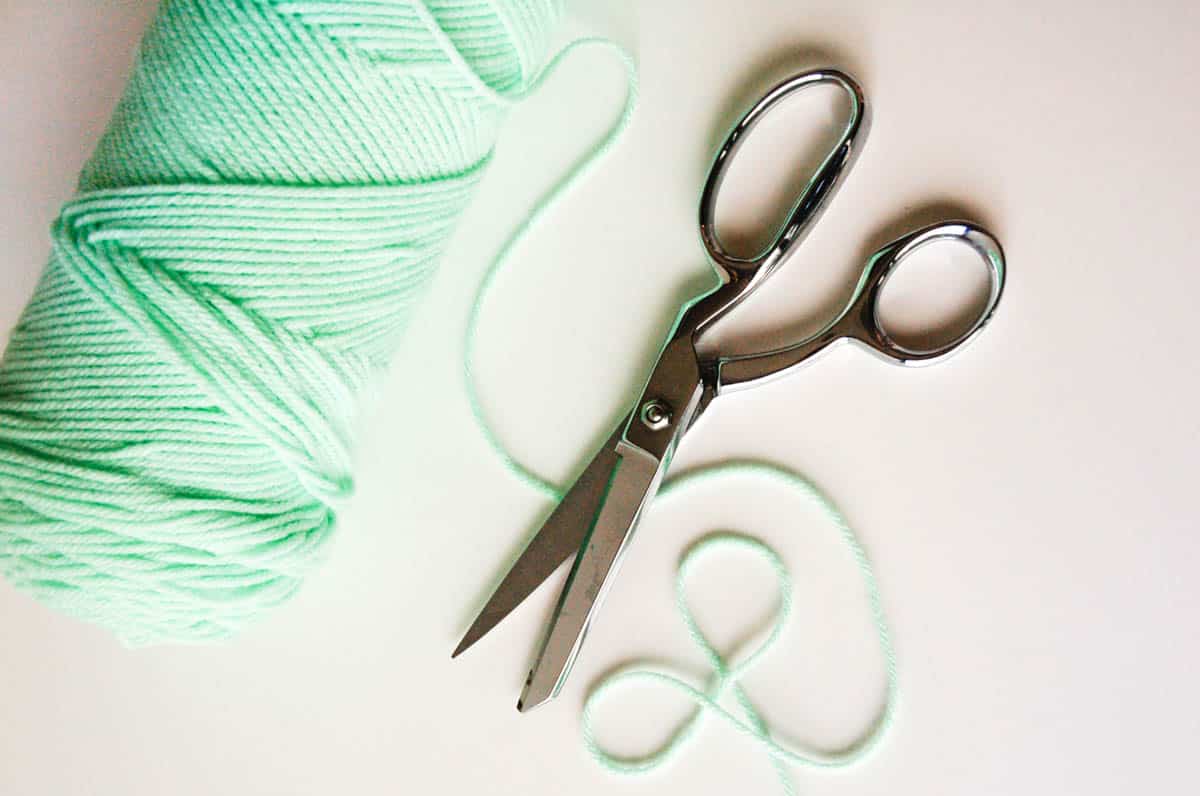
- Yarn
- Scissors
That’s it!
I know that yarn varies in thickness so choose something that will look nice as a bracelet. I used much thicker yarn when I used this same technique to make wall garlands but that would have been too bulky for bracelets.
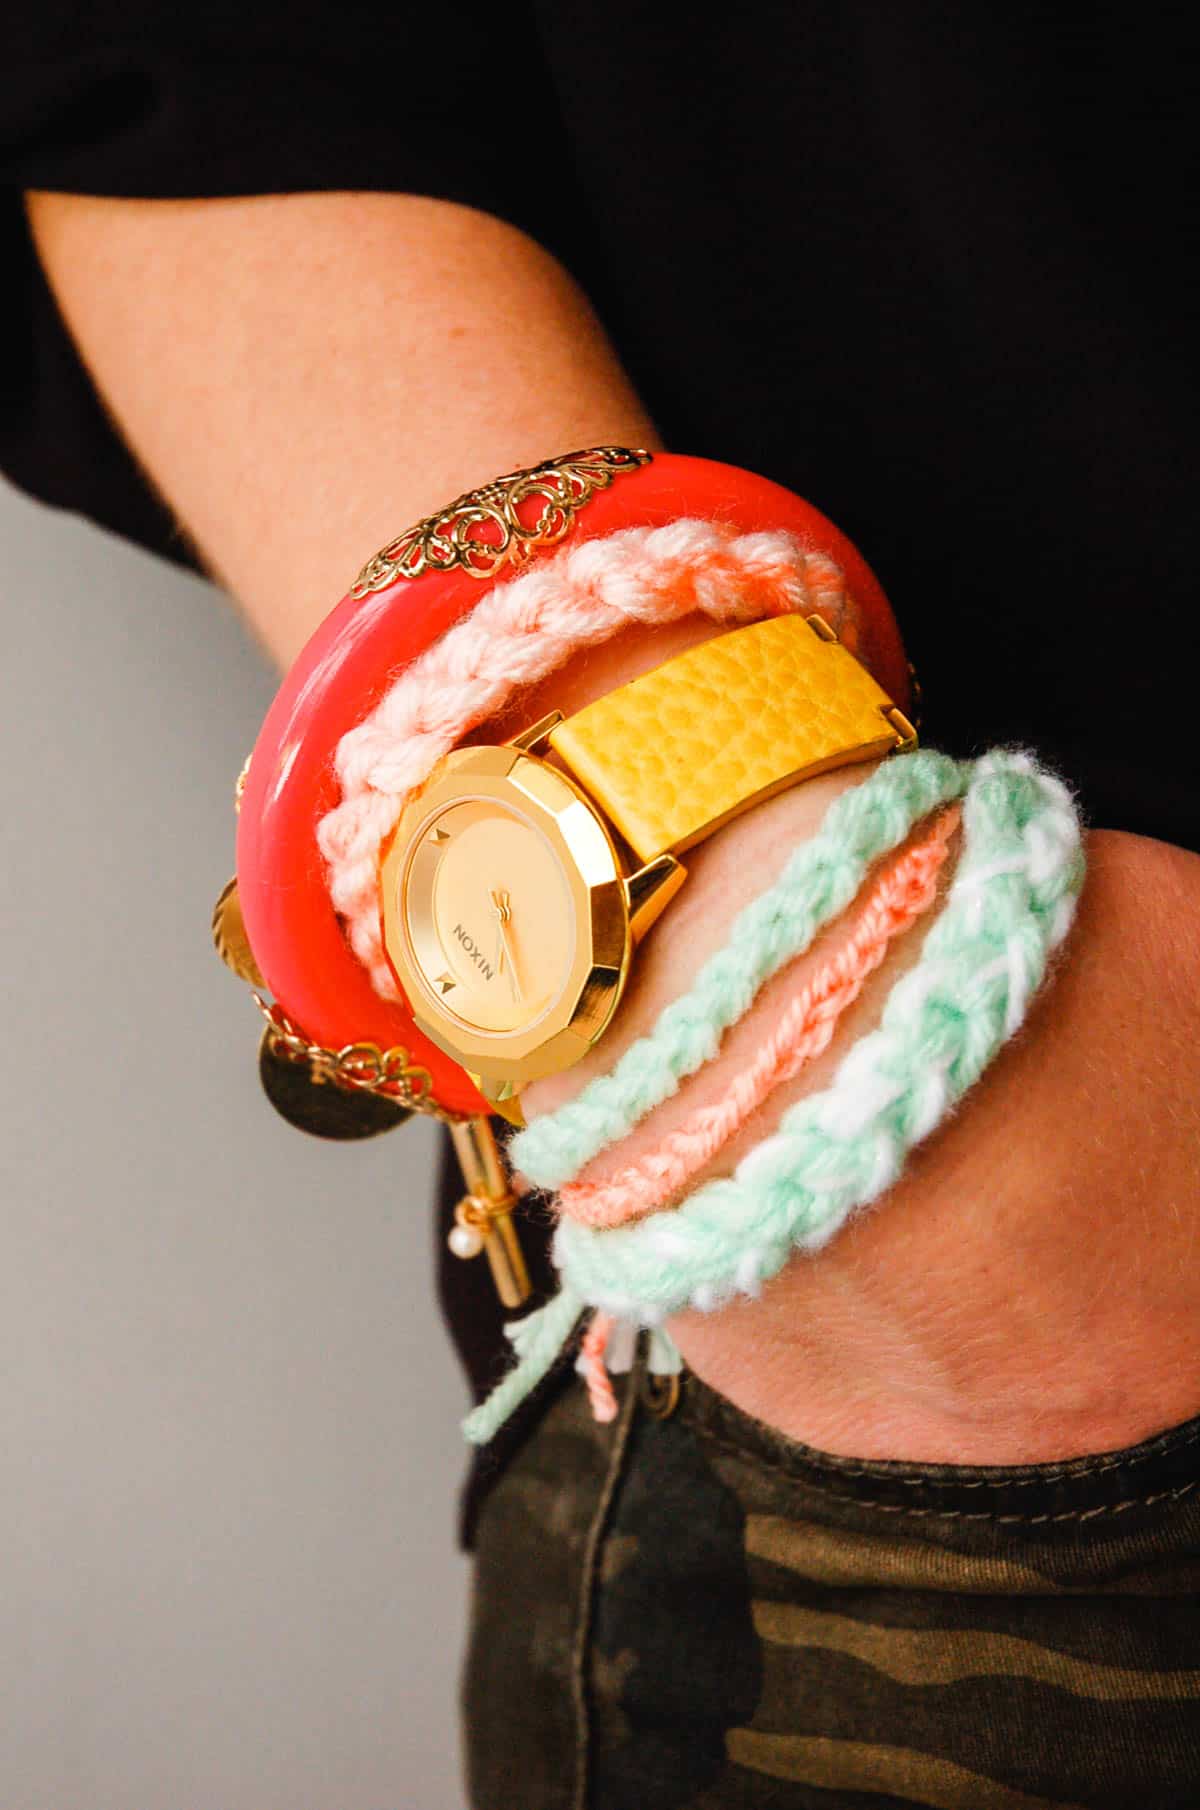
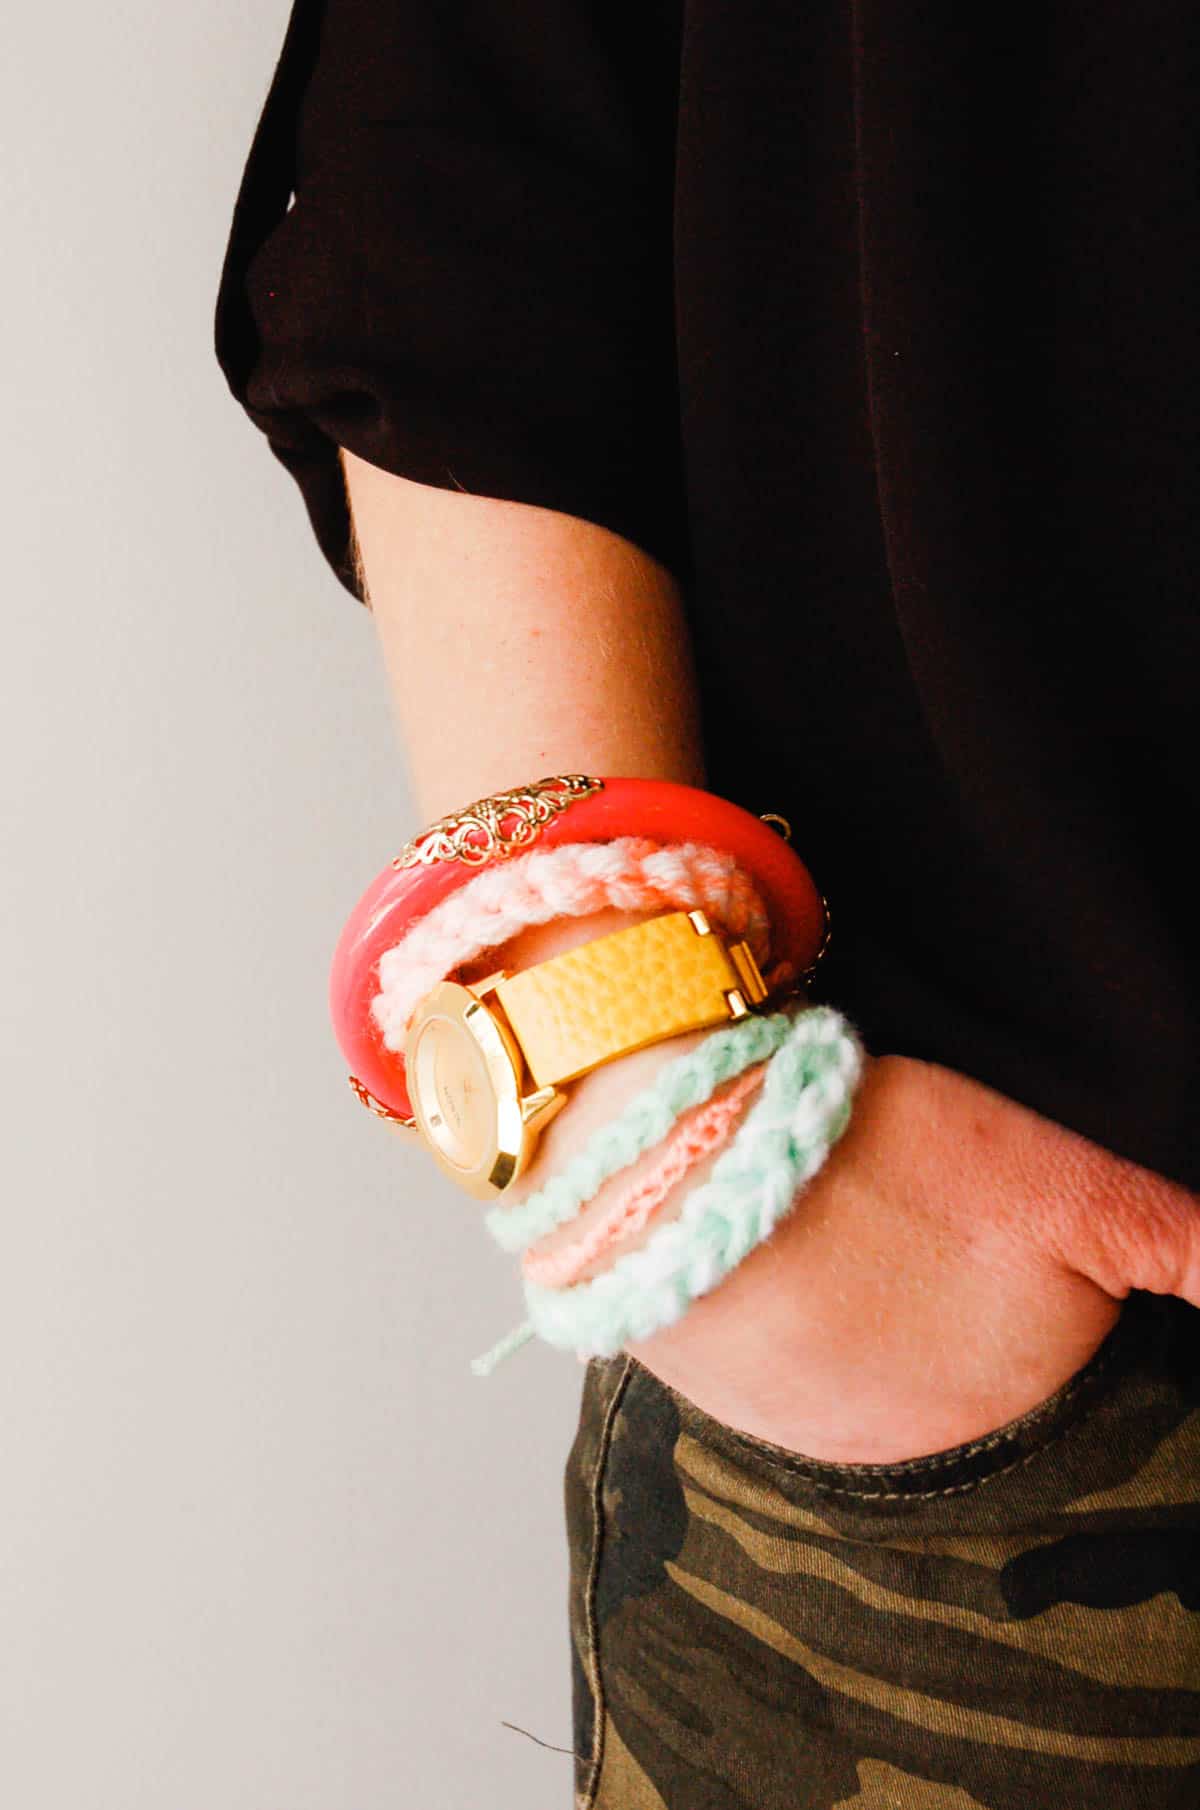
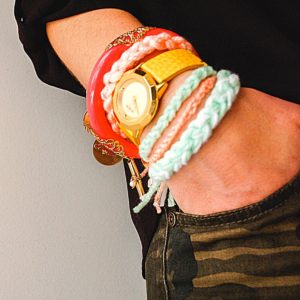
You can see in the photo at the top of the post that my bracelets are of different sizes. I used the same size yarn, and just added more strands to some of the bulkier bracelets.
How to Make Yarn Bracelets
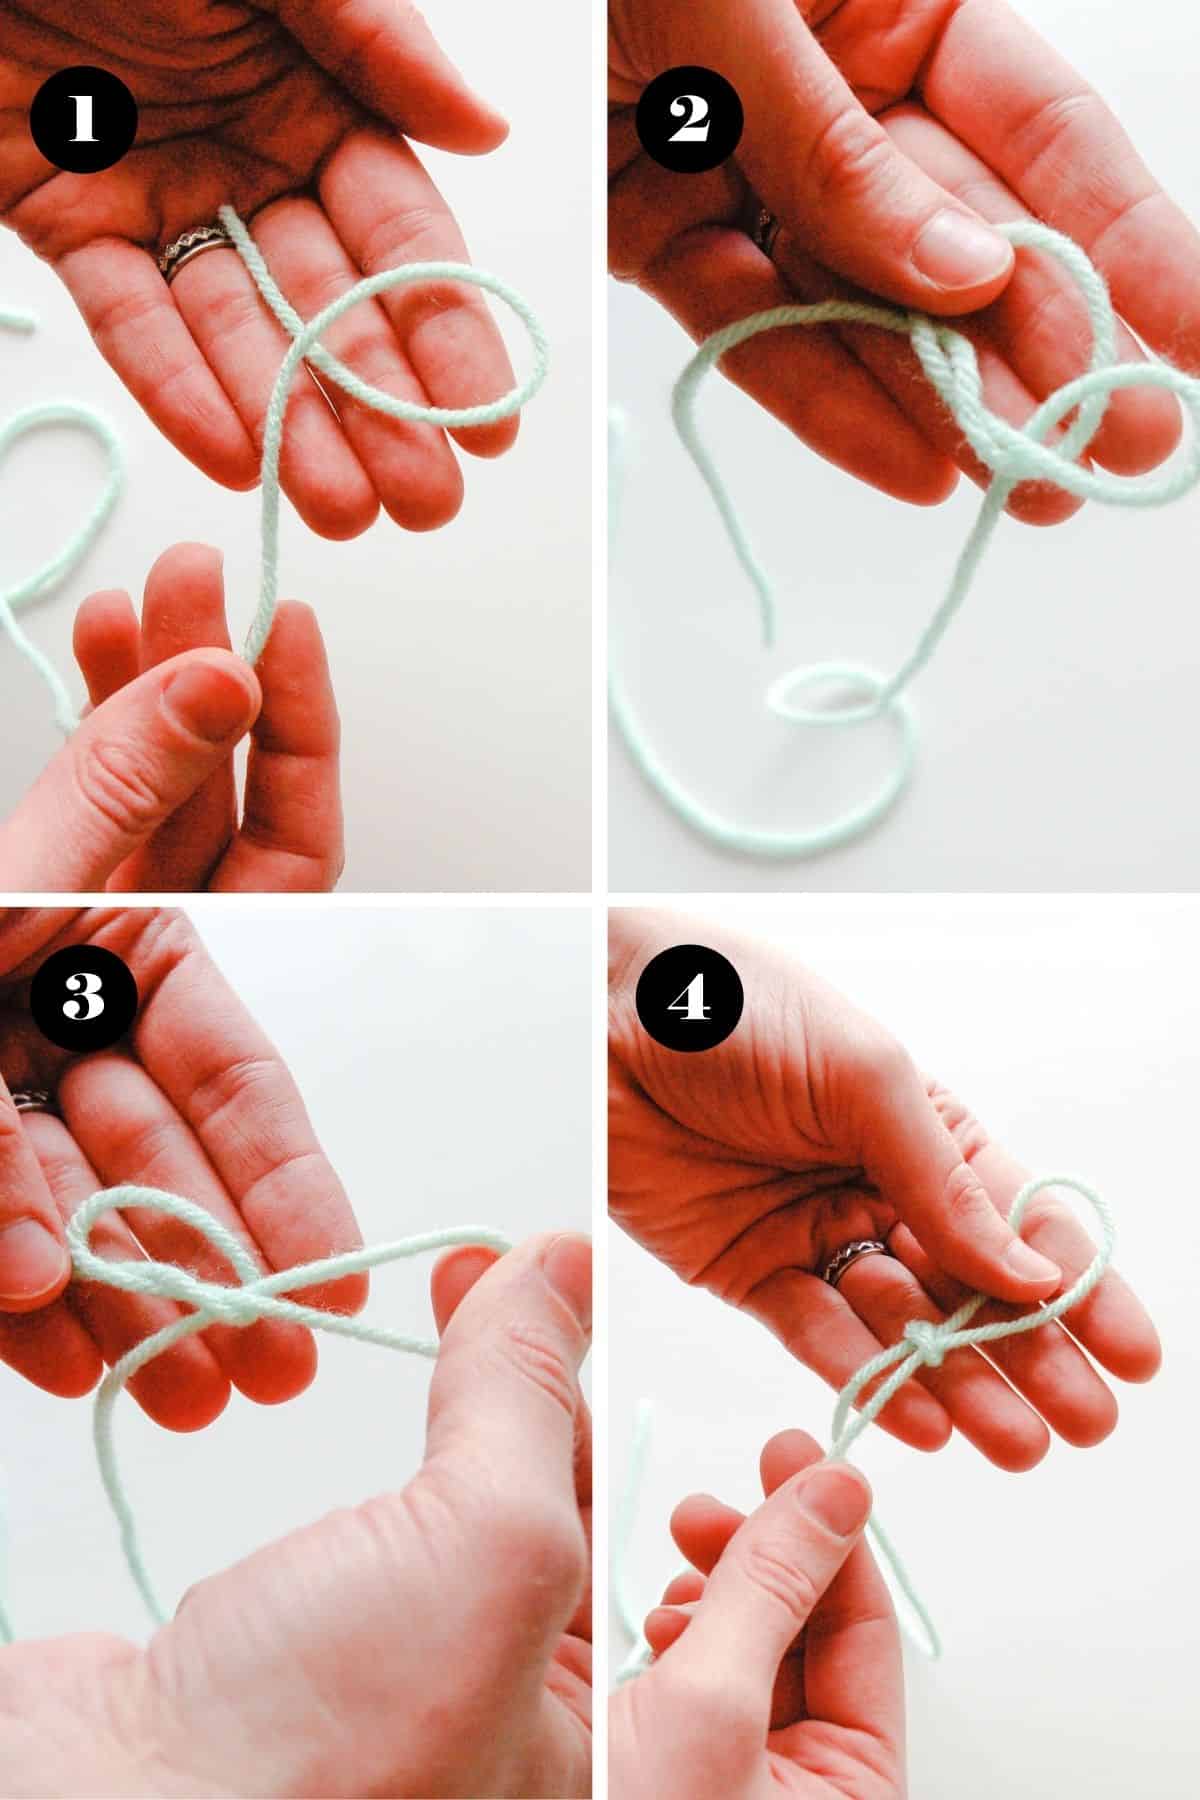
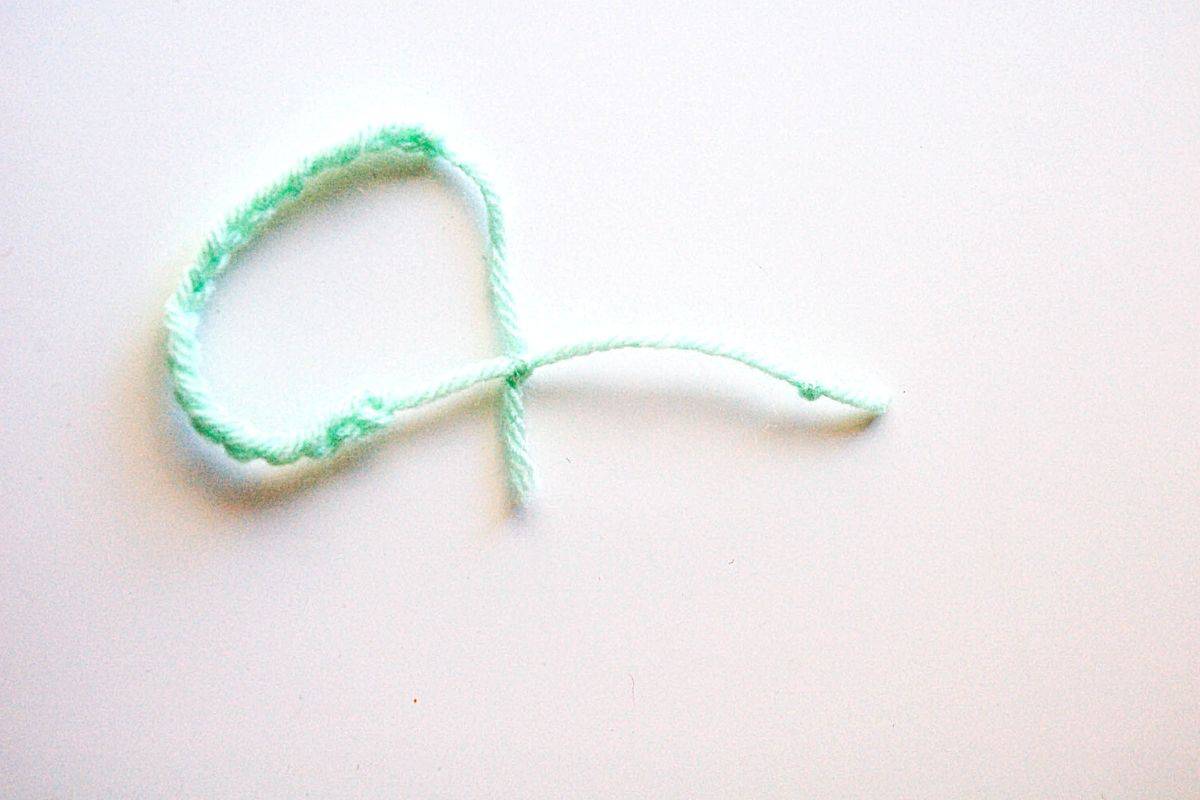
1: Make a loop with the yarn. Make sure to leave enough at the end so that you can hold it in your left hand (you’ll be knotting with your right hand).
2: With your right hand, tuck the yarn through your first loop from underneath. Do not pull it all the way through, you will be creating your second loop.
3: Grab your new loop and pull to create a tight-ish knot at your first loop (from step 1) Have I lost you? It is really simple just super hard to explain!
4: Here is a better look at the knot. Remember do not pull the yarn all the way through. Your knot may get really long in order to get your first knot to tighten which is fine and will be fixed in the next step.
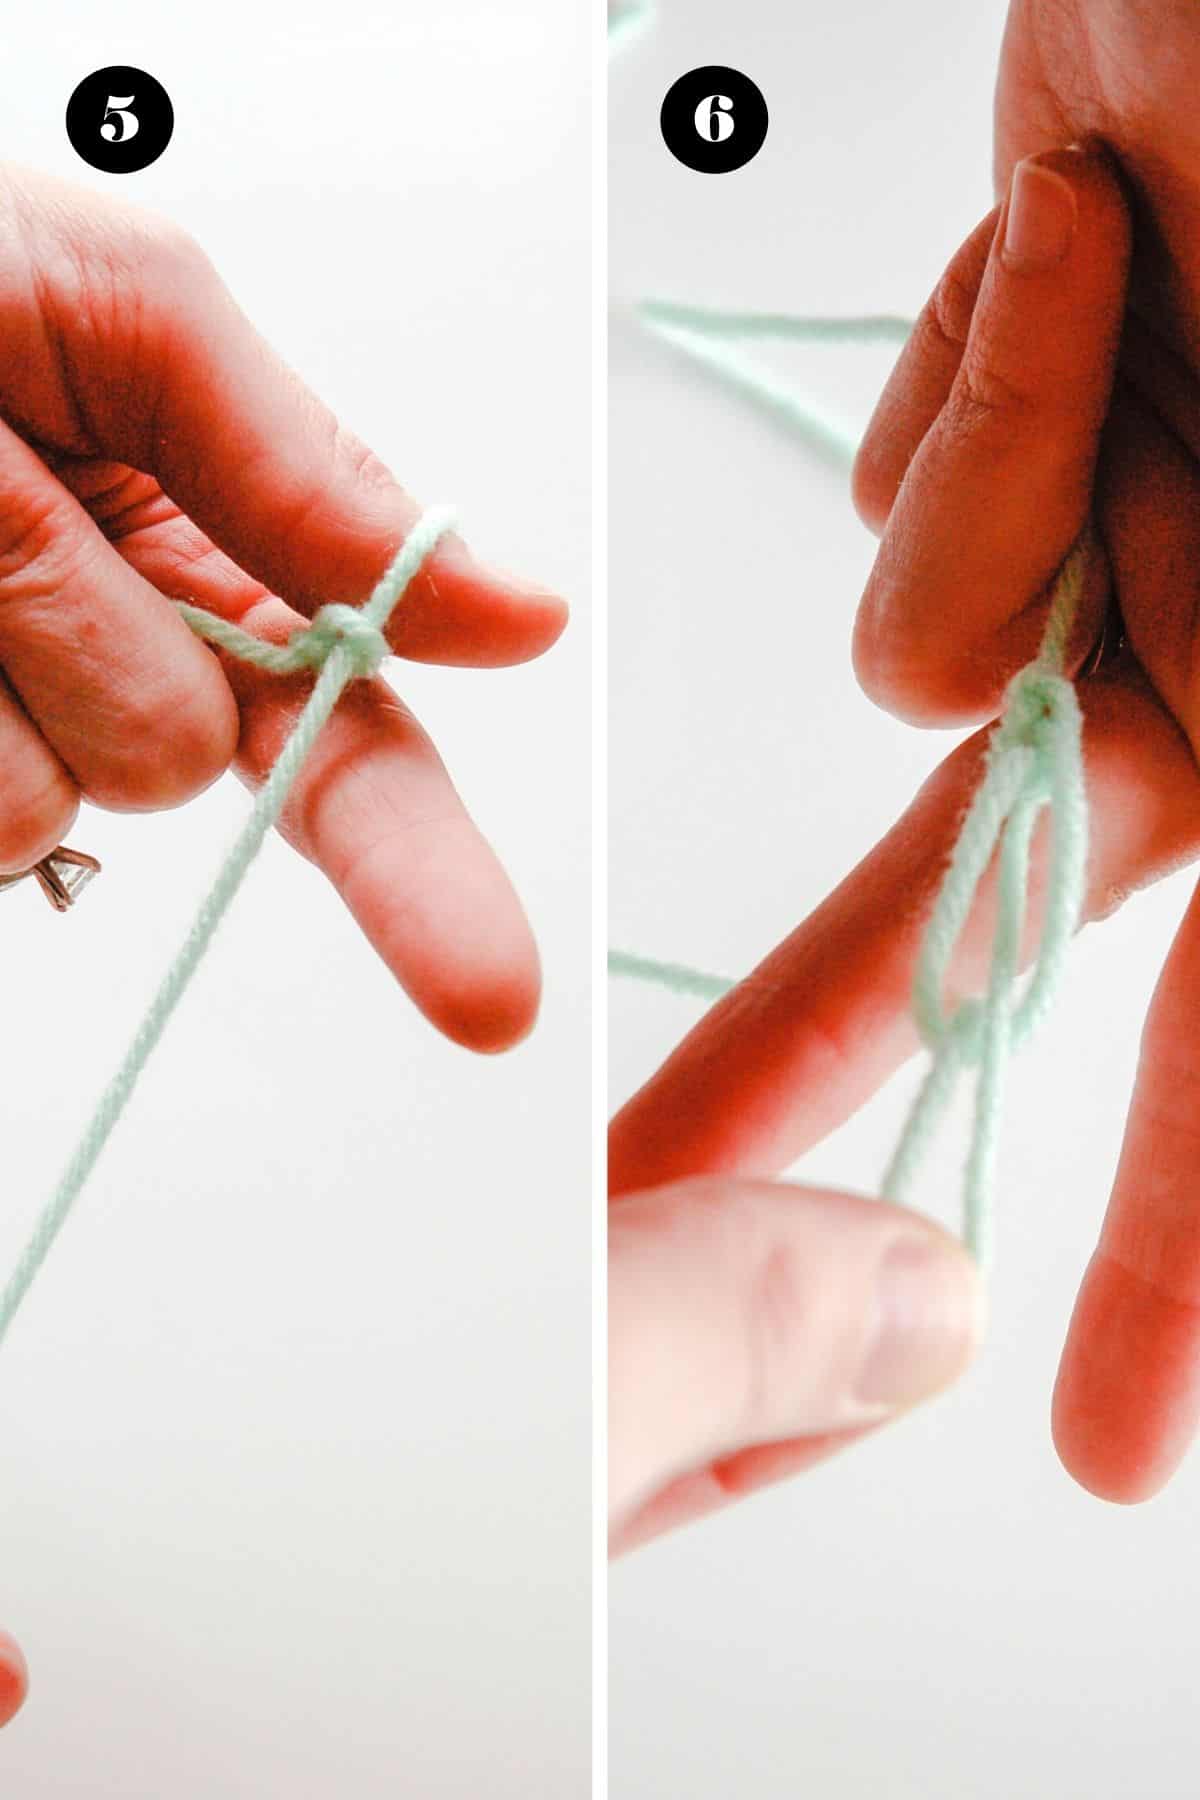
5: You want to work with a small loop to keep it efficient and taut. Place that floppy loop around the thumb on your left hand and pull the loose string back through the first knot with your right hand.
This part is critical when making the bracelets with more than one piece of yarn. This is where you get them to be smooth and not have one that is looser than the rest which can make it look really messy.
6: Begin the next loop by repeating step 2. And continue until you have the length of knots you want.
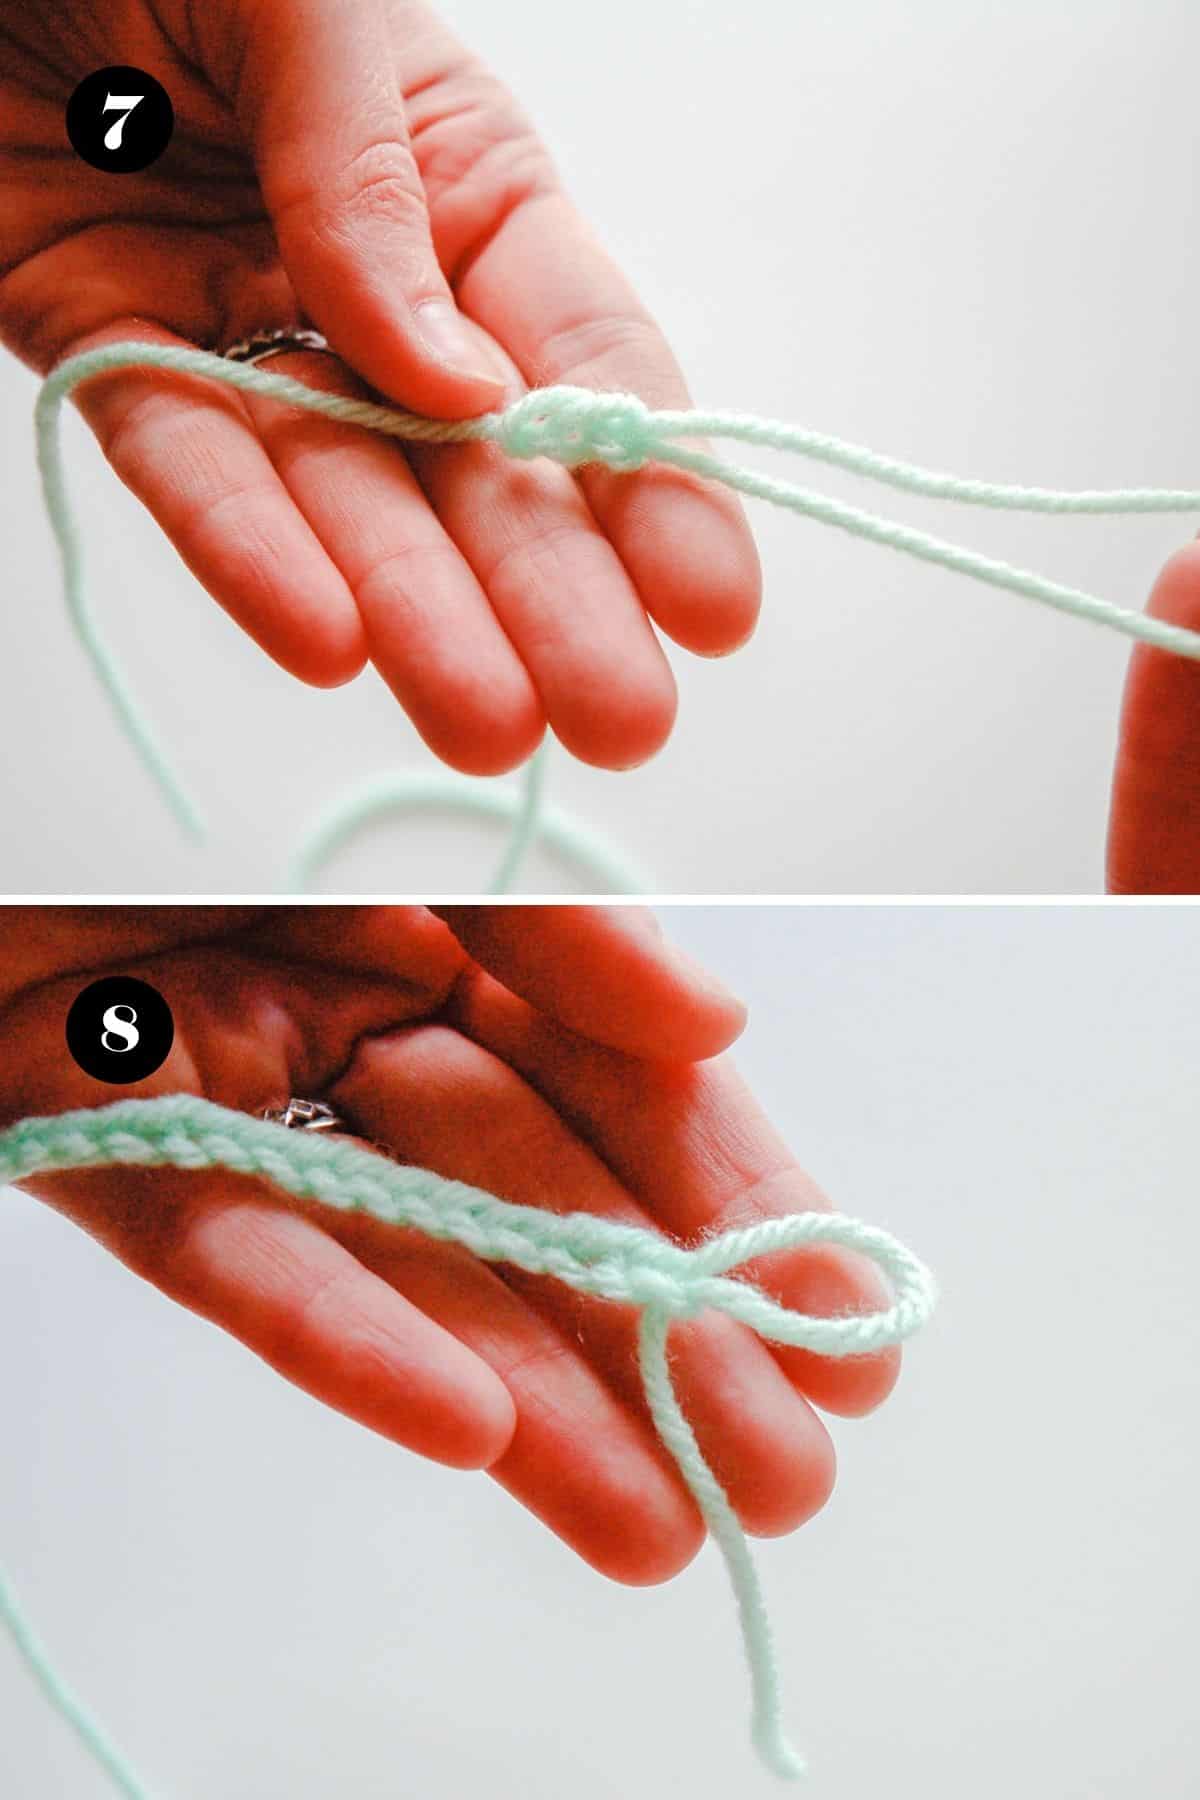
Here is what it will look like. Remember to keep the yarn tucked in your left hand and do the knotting with your right.
After the first few knots, this will go really fast. It will get addicting and you’ll have to fight yourself to stop when it’s bracelet-sized or else you’ll just keep going and going and going. It’s kind of therapeutic.
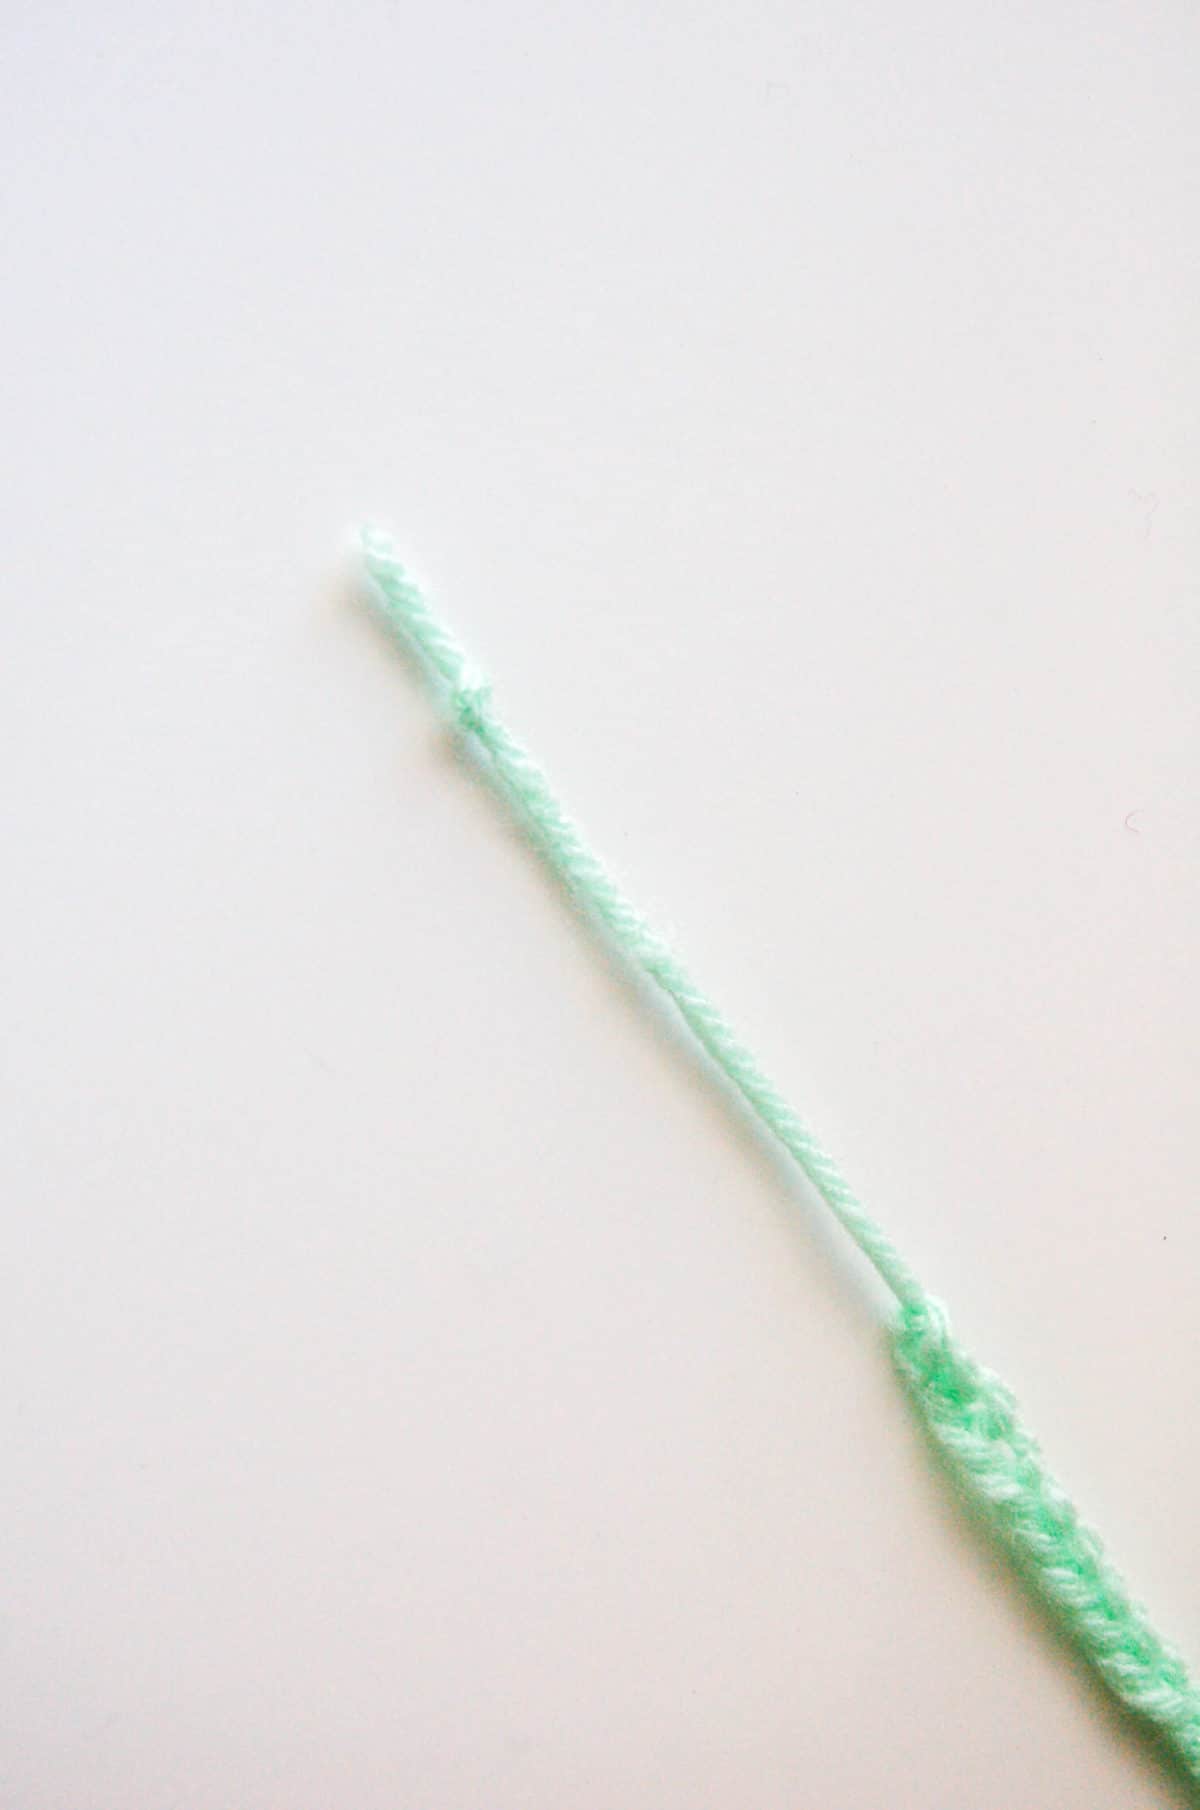
To finish the knotted portion of the bracelet, create one last loop, but this time you will pull the piece of yarn all the way through and secure the knots.
If you haven’t already done so, you can now cut the yarn from the yarn spool. Which I’m sure has another name but I don’t know it.
You’ll want to leave a bit of a tail still since you still need to make this yarn bracelet adjustable.
How to Make an Adjustable Yarn Bracelet
As if that last part wasn’t hard enough to explain, here is how you make it adjustable and wearable…
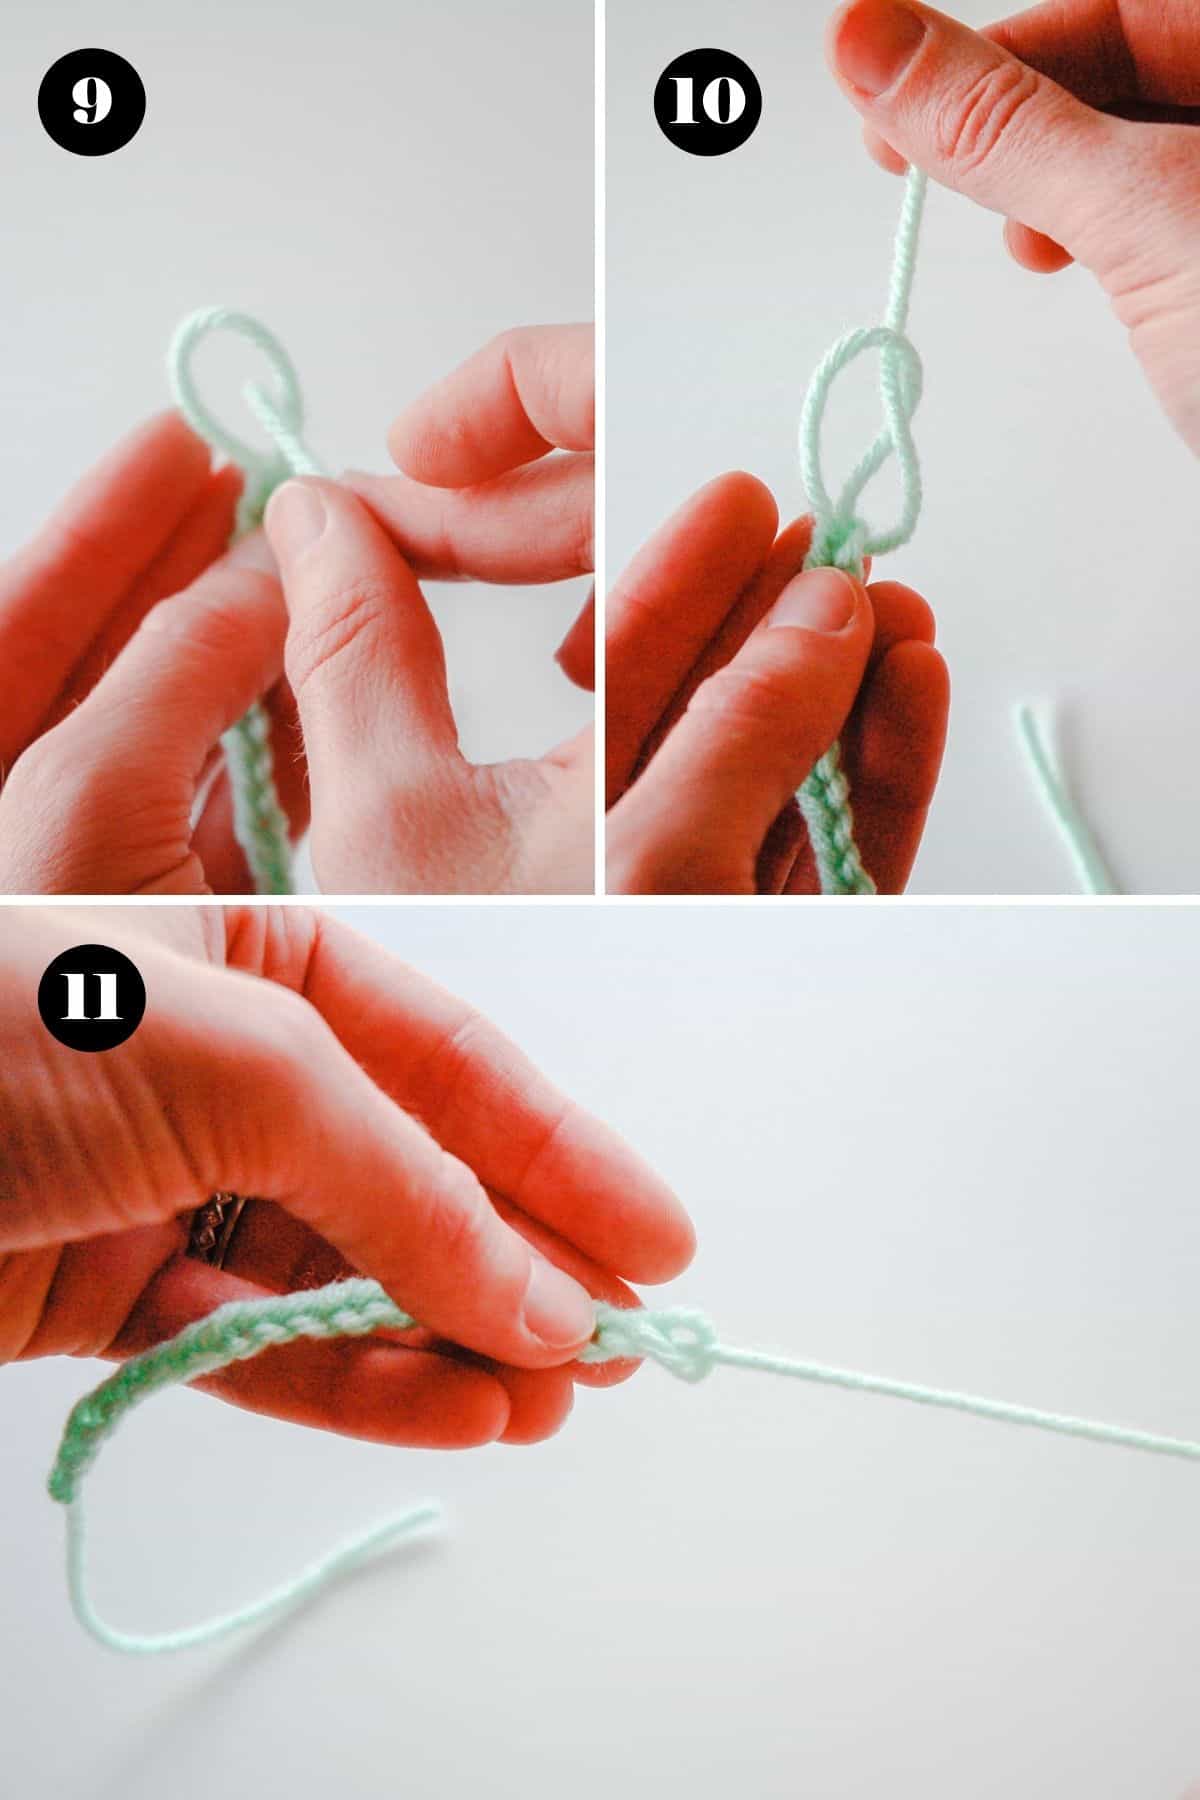
On one end, make a knot (just to be safe, knot it again at the same spot so that the knot is not tiny). This is the knot that makes the bracelet slide to tighten on your wrist, but not slide all the way out of the other knot that secures it.
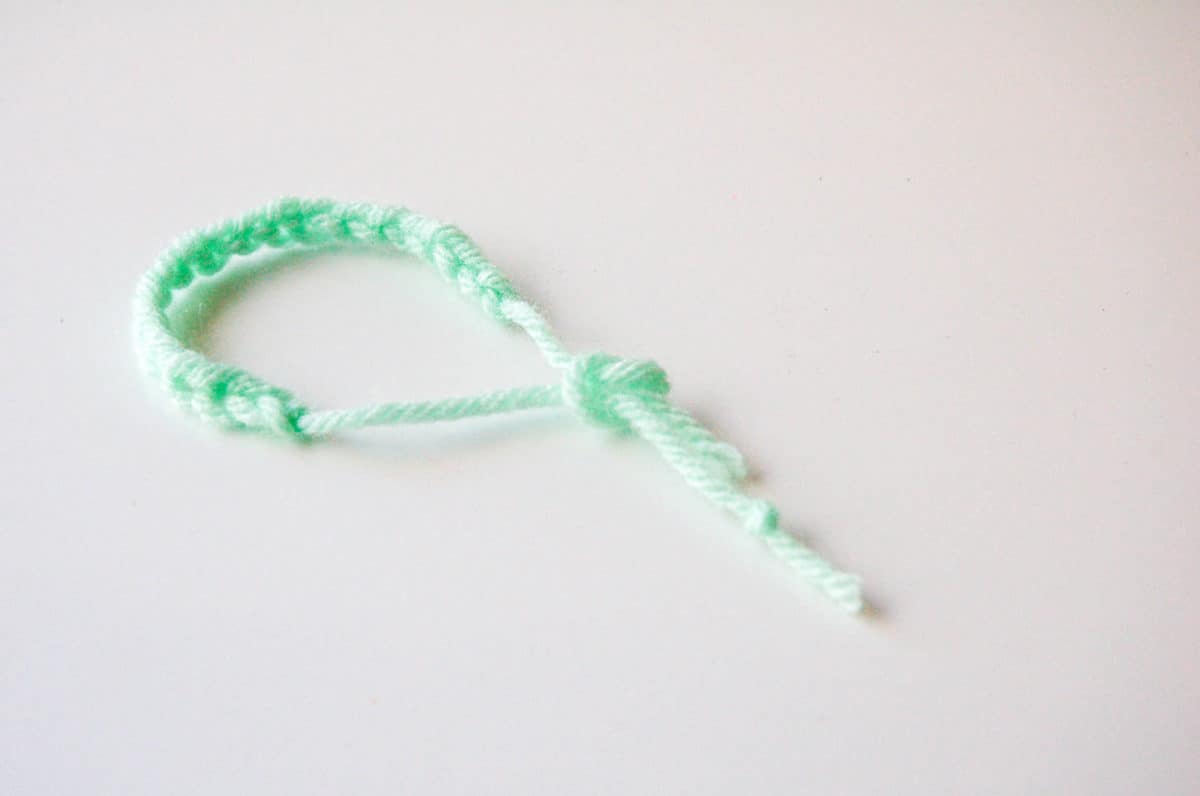
Next, put both ends of yarn together and tie a knot. You can see from the image above you’ll do this closer to the bracelet than the end with the knot already in it.
Pull the knot tight. Trim the end of the bracelet without the knot. Don’t cut it too short as this is yarn and it is somewhat slippery and a nice tug can pull it out of the knot.
Once you have this on your wrist, you will pull the end with the knot at the end to tighten it.
To loosen, just pull on that same piece of yarn from the other side of the knot you tied in the other direction.
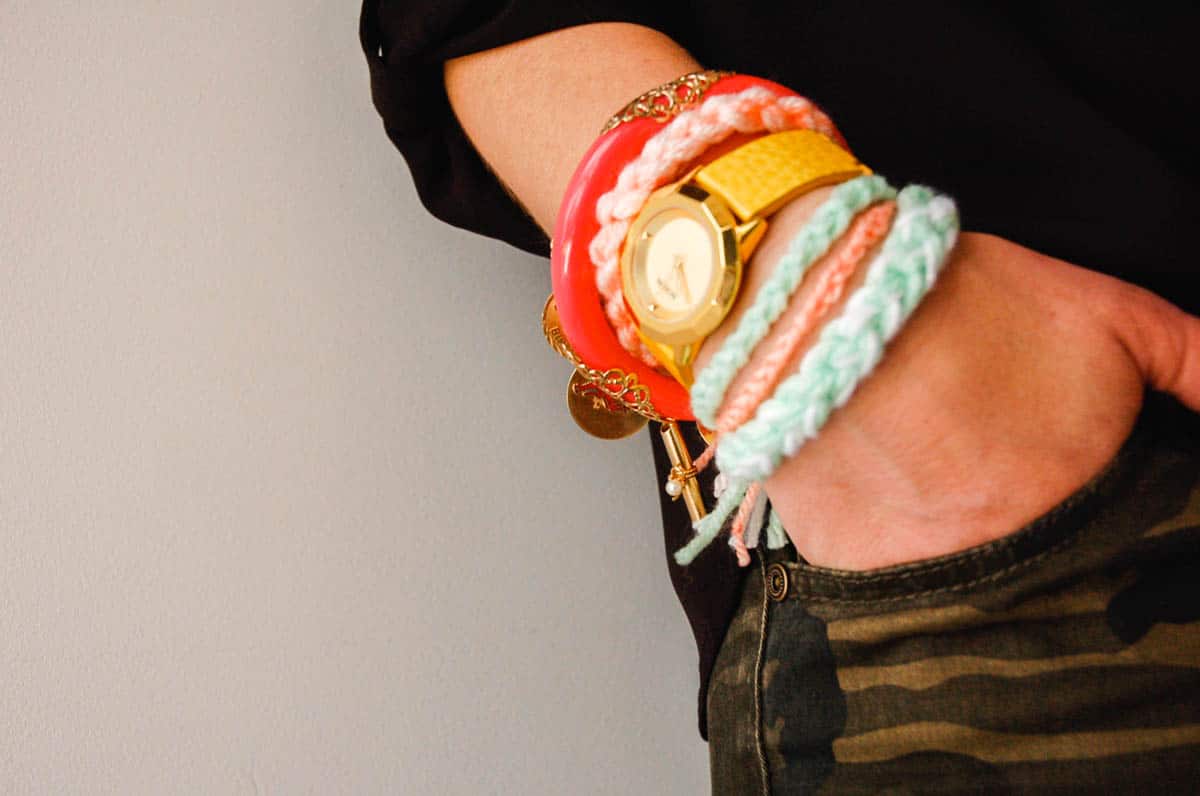
Then stack your brand new DIY bracelets up and wear them with other accessories.
Tips
For tutorial purposes, I’m showing you how to make them with just one piece of string. To make a thicker bracelet, just use more pieces in one color, or get wild and use a bunch of colors.
Embroidery thread would be a little too thin for my taste although they would make a delicate-looking bracelet.
More DIY Bracelet Ideas
- Feeling nostalgic? Here are 16 Friendship Bracelet Patterns to make.
- 14 Ways to Make a Sliding Knot Bracelet.
- Be hands-free with this DIY Keychain Bracelet.
- This Homemade Bracelet with Snap Swivels is super cute. No one will even know it’s made from fishing tackle!
Knotted Yarn Bracelet With One Piece of String
Equipment
Ingredients
- 1 piece yarn, about 18 inches long
Instructions
- Make a loop with the yarn. Make sure to leave enough at the end so that you can hold it in your left hand (you’ll be knotting with your right hand).
- With your right hand, tuck the yarn through your first loop from underneath. Do not pull it all the way through, you will be creating your second loop.
- Grab your new loop and pull to create a tight-ish knot at your first loop from step 1.
- Do not pull the yarn all the way through. Your knot may get really long in order to get your first knot to tighten which is fine and will be fixed in the next step.
- You want to work with a small loop to keep it efficient and taut. Place that floppy loop around the thumb on your left hand and pull the loose string back through the first knot with your right hand. This part is critical when making the bracelets with more than one piece of yarn. This is where you get them to be smooth and not have one that is looser than the rest which can make it look really messy.
- Begin the next loop by repeating step 2. And continue until you have the length of knots you want.
- Keep the yarn tucked in your left hand and do the knotting with your right. After the first few knots this will go really fast. You are done when the knots cover the length of a wrist.
- To finish the knotted portion of the bracelet, create one last loop, but this time you will pull the piece of yarn all the way through and secure the knots.
To Make It Adjustable
- On one end, make a knot (just to be safe, knot it again at the same spot so that the knot is larger).
- Gather both ends of the bracelet and tie them in a knot together below the other knot you tied to one end of the yarn. Tighten the knot.
- Pull the knot tight. Trim the end of the bracelet without the knot (don’t cut it too short as this is yarn and it is somewhat slippery and a nice tug can pull it out of the knot).
- Once you have the bracelet on your wrist, you will pull the piece with the knotted end to tighten it. To loosen, just pull on that piece of yarn (the one with the knot at the end) from the other side of the knot made from both strings, from the other direction.
You’re doing a chain stitch, just with your fingers and not a crochet hook. The chain stitch is essentially the backbone for all crocheted pieces! =]
Thank you! I heart the chain stitch!
Slip knot?? I like have used twine and this technique to make my cat toys before, never thought to make into a bracelet! Great idea!
See there is inspiration everywhere. Cat toys might just be the newest trend in jewelry. ;)
These are so cute Sharon! And I love your Nixon watch. :)
Thanks Brittni! My husband picked out that watch. He’s got pretty good taste. :)
Pretty!! Seems simple enough and I really like the colors you used.
Um, duh. All my crafts are super simple. :) The colors are really dreamy, aren’t they?