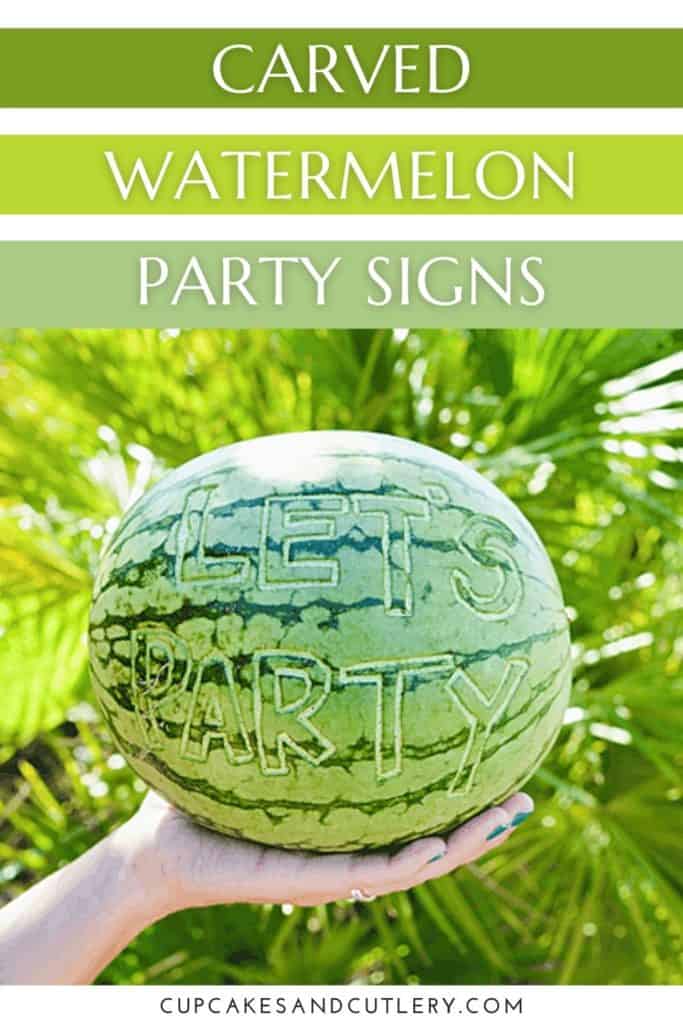
Fun Party Decor Idea : Carved Watermelons
Jazz up your summer parties with a carved watermelon! With a few simple tools, you can create a fun party decoration in just minutes! It’s a unique and creative way to bring a natural and quirky element to the look of your party.
I love to entertain and geek out over including unique details to delight my guests. On a girl’s trip to Palm Springs, my friend Carole made this awesome carved watermelon and I had to share the idea with you!
It’s easy to recreate and is a cute decor element that I can’t wait to include in all my summer parties!
Carved Watermelons Are Awesome
Pumpkins aren’t the only thing you can carve! Carved watermelons are quite easy to make and will be the star of whatever party you showcase them at.
While the idea of carving a pumpkin might make you think of a jack-o-lantern, these decorative watermelons are not that.
Using more of a scraping technique to remove the top layer of skin, these fruit signs are a really cool way to use a whole watermelon in a totally new way.
They can be made ahead of time and will add a pop of whimsy to any type of party.
Supplies
- Whole Watermelon
- Carving Tools
- Design to trace, if needed
A large watermelon will give you the most space to create your design but you can also create carved watermelon signs in a variety of ways.
Putting one letter on a small watermelon to write out a whole word would also be a cute display.
You don’t need expensive carving tools and can probably even use whatever pumpkin carving tools you already have. The ones that my friend used were actually for carving clay and these are easy to find in most craft stores.
If you can free-hand a design, you can draw it right onto the watermelon. Or you can use a computer printout or a hand-drawn template (shown below) to get the design onto the watermelon.
How to Make a Carved Watermelon

- Prepare the design
The most important part of planning the design is that it fits well in the area of the watermelon you want to carve.
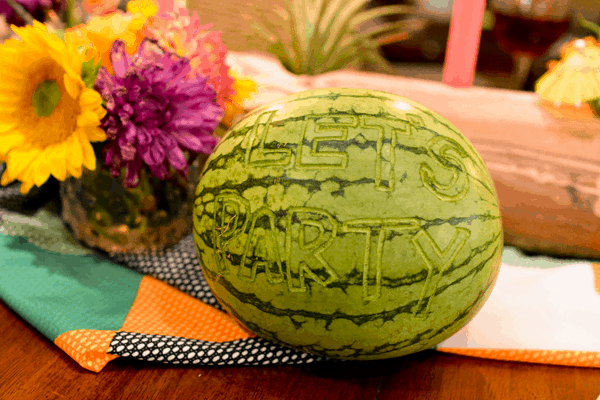
Carole wrote out “Let’s Party” on a napkin in marker and taped it to the front of the watermelon to work from.
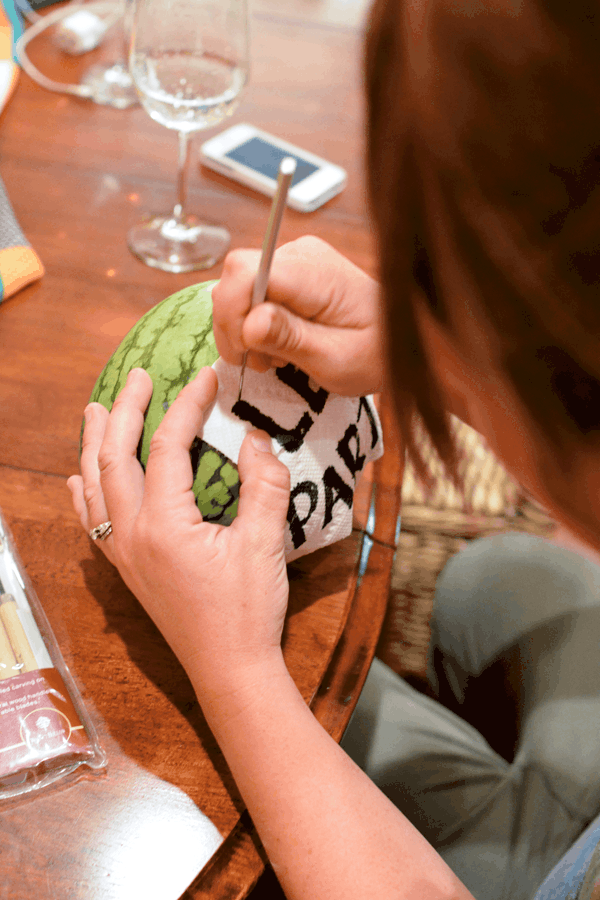
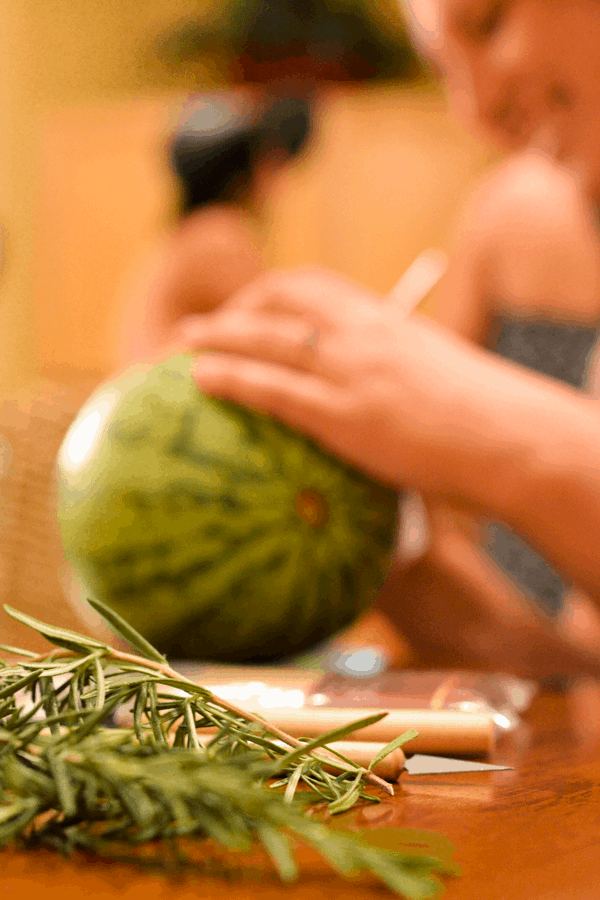
2. Trace the design
Using a pointed tool, you will use small dots to trace the outline of the design. This is a technique you see in many pumpkin carving books.
You can see here that the dots are close enough that connecting them will be super simple and not require you to have a super steady hand.

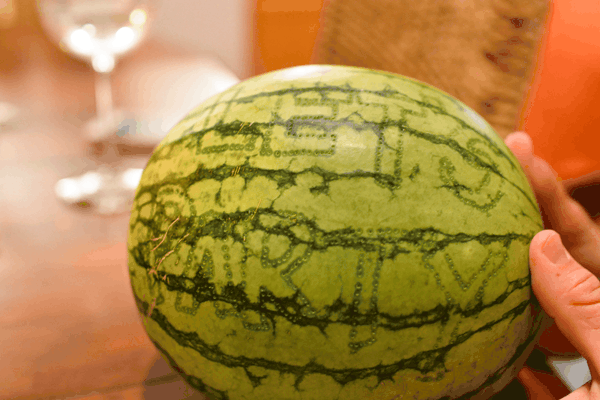
3. Scrape off the watermelon skin
Next, you’ll remove the top layer of the watermelon skin. Carole used a tool that looks like a small ‘u’.
With this, you will follow along the dotted line and remove the skin, but not go through anything more than the dark skin. You aren’t cutting out whole chunks as you may when carving pumpkins.
You can see from the picture above that she is aiming the tool more sideways rather than into the watermelon.
4. Let it dry
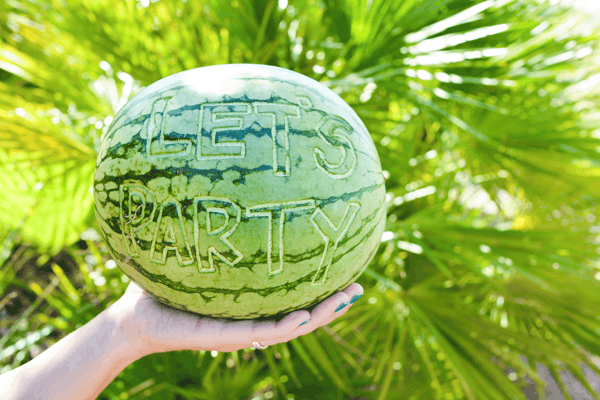
While it might take a few minutes to do, it is really easy. Once you are done, you want it to have a chance to dry out a bit. We left this one out overnight and by the next morning, it looked like the first image in this post.
The carved portion turns a little bit lighter and it makes the words pop. Aren’t they fantastic!
Just think of all the creative designs you could do! I’m so grateful to have creative friends who are willing to share their talents with me! Thank you, Carole!
Carved watermelons are a great idea for signs at your parties. You can use them on buffet tables, as centerpieces and just about anywhere else!
You can make these, not only with words but images too (as long as you have the skill to follow a printed design).
Related Posts
- Reusable Fabric Fringe Garland
- Large Format Birthday Banner
- How to Put a Picture on a Balloon
- DIY Cake Topper with Macarons
- How to Make Ruffled Streamers out of Plastic Tablecloths

How to Carve a Watermelon as a Party Sign
Equipment
- Carving Tools
Ingredients
- 1 watermelon, whole
Instructions
- Tape design to the front of the watermelon.
- Using a sharp, straight carving tool, trace the design by making small dots very close together along the outlines.
- Use another tool (like one with a small "u" channel) to scrape off the top layer of the watermelon skin without punching through to the hollow center.
- Allow the watermelon to sit for several hours to dry out a bit. This will dry out the carved area and it will turn a lighter shade making the design stand out a bit more.
CUTE!